

DIY Deadlift Blocks
The granddaddy of them all, the Dead. As one of the Big Four lifts, the Deadlift is probably one of the greatest exercises for building total body strength. If you can bend down and pick up three or four hundred pounds from the ground you are indeed strong! This is probably the least technical of the Big Four but the one that injures most clients. We’ve also told you we have variations to help those with past injuries, can't set up to the bar properly or aren't comfortable with the lift. A slightly modified version that you do consistently will provide far better results than the "ideal" lift that you can't, don't want or simply refuse to do. We've got you covered!
Sign up to receive more tips, recipes and tricks for building a lifestyle that produces lasting results.
No spam, no junk and you can unsubscribe at any time.


Our Deadlift Blocks Project
Hover over the photos for a detailed description. Click on them to open a larger view complete with the description.
The Block Pull Deadlift is the simplest variation of the Deadlift. Elevating the bar is easier on the back and also allows those with limited mobility or structural issues in the hip to set up in a safe position in order to get the benefits of the Deadlift. Used during rehab and for those working to lift from the floor after injury or a lower back issue. This lift is often used to help lifters focus on the top portion of the lift, overload more due to the shorter ROM or increase the intensity of the exercise.
However, in our demographic, we usually program it because clients have past injuries and can't set up to the bar properly; or simply aren't comfortable with the lift. The higher you raise the bar, the easier the lift becomes, where easy is relative to the fact that you're still picking up heavy weight from the ground. It's also a great alternative for those who don't like doing a Rack Pull.
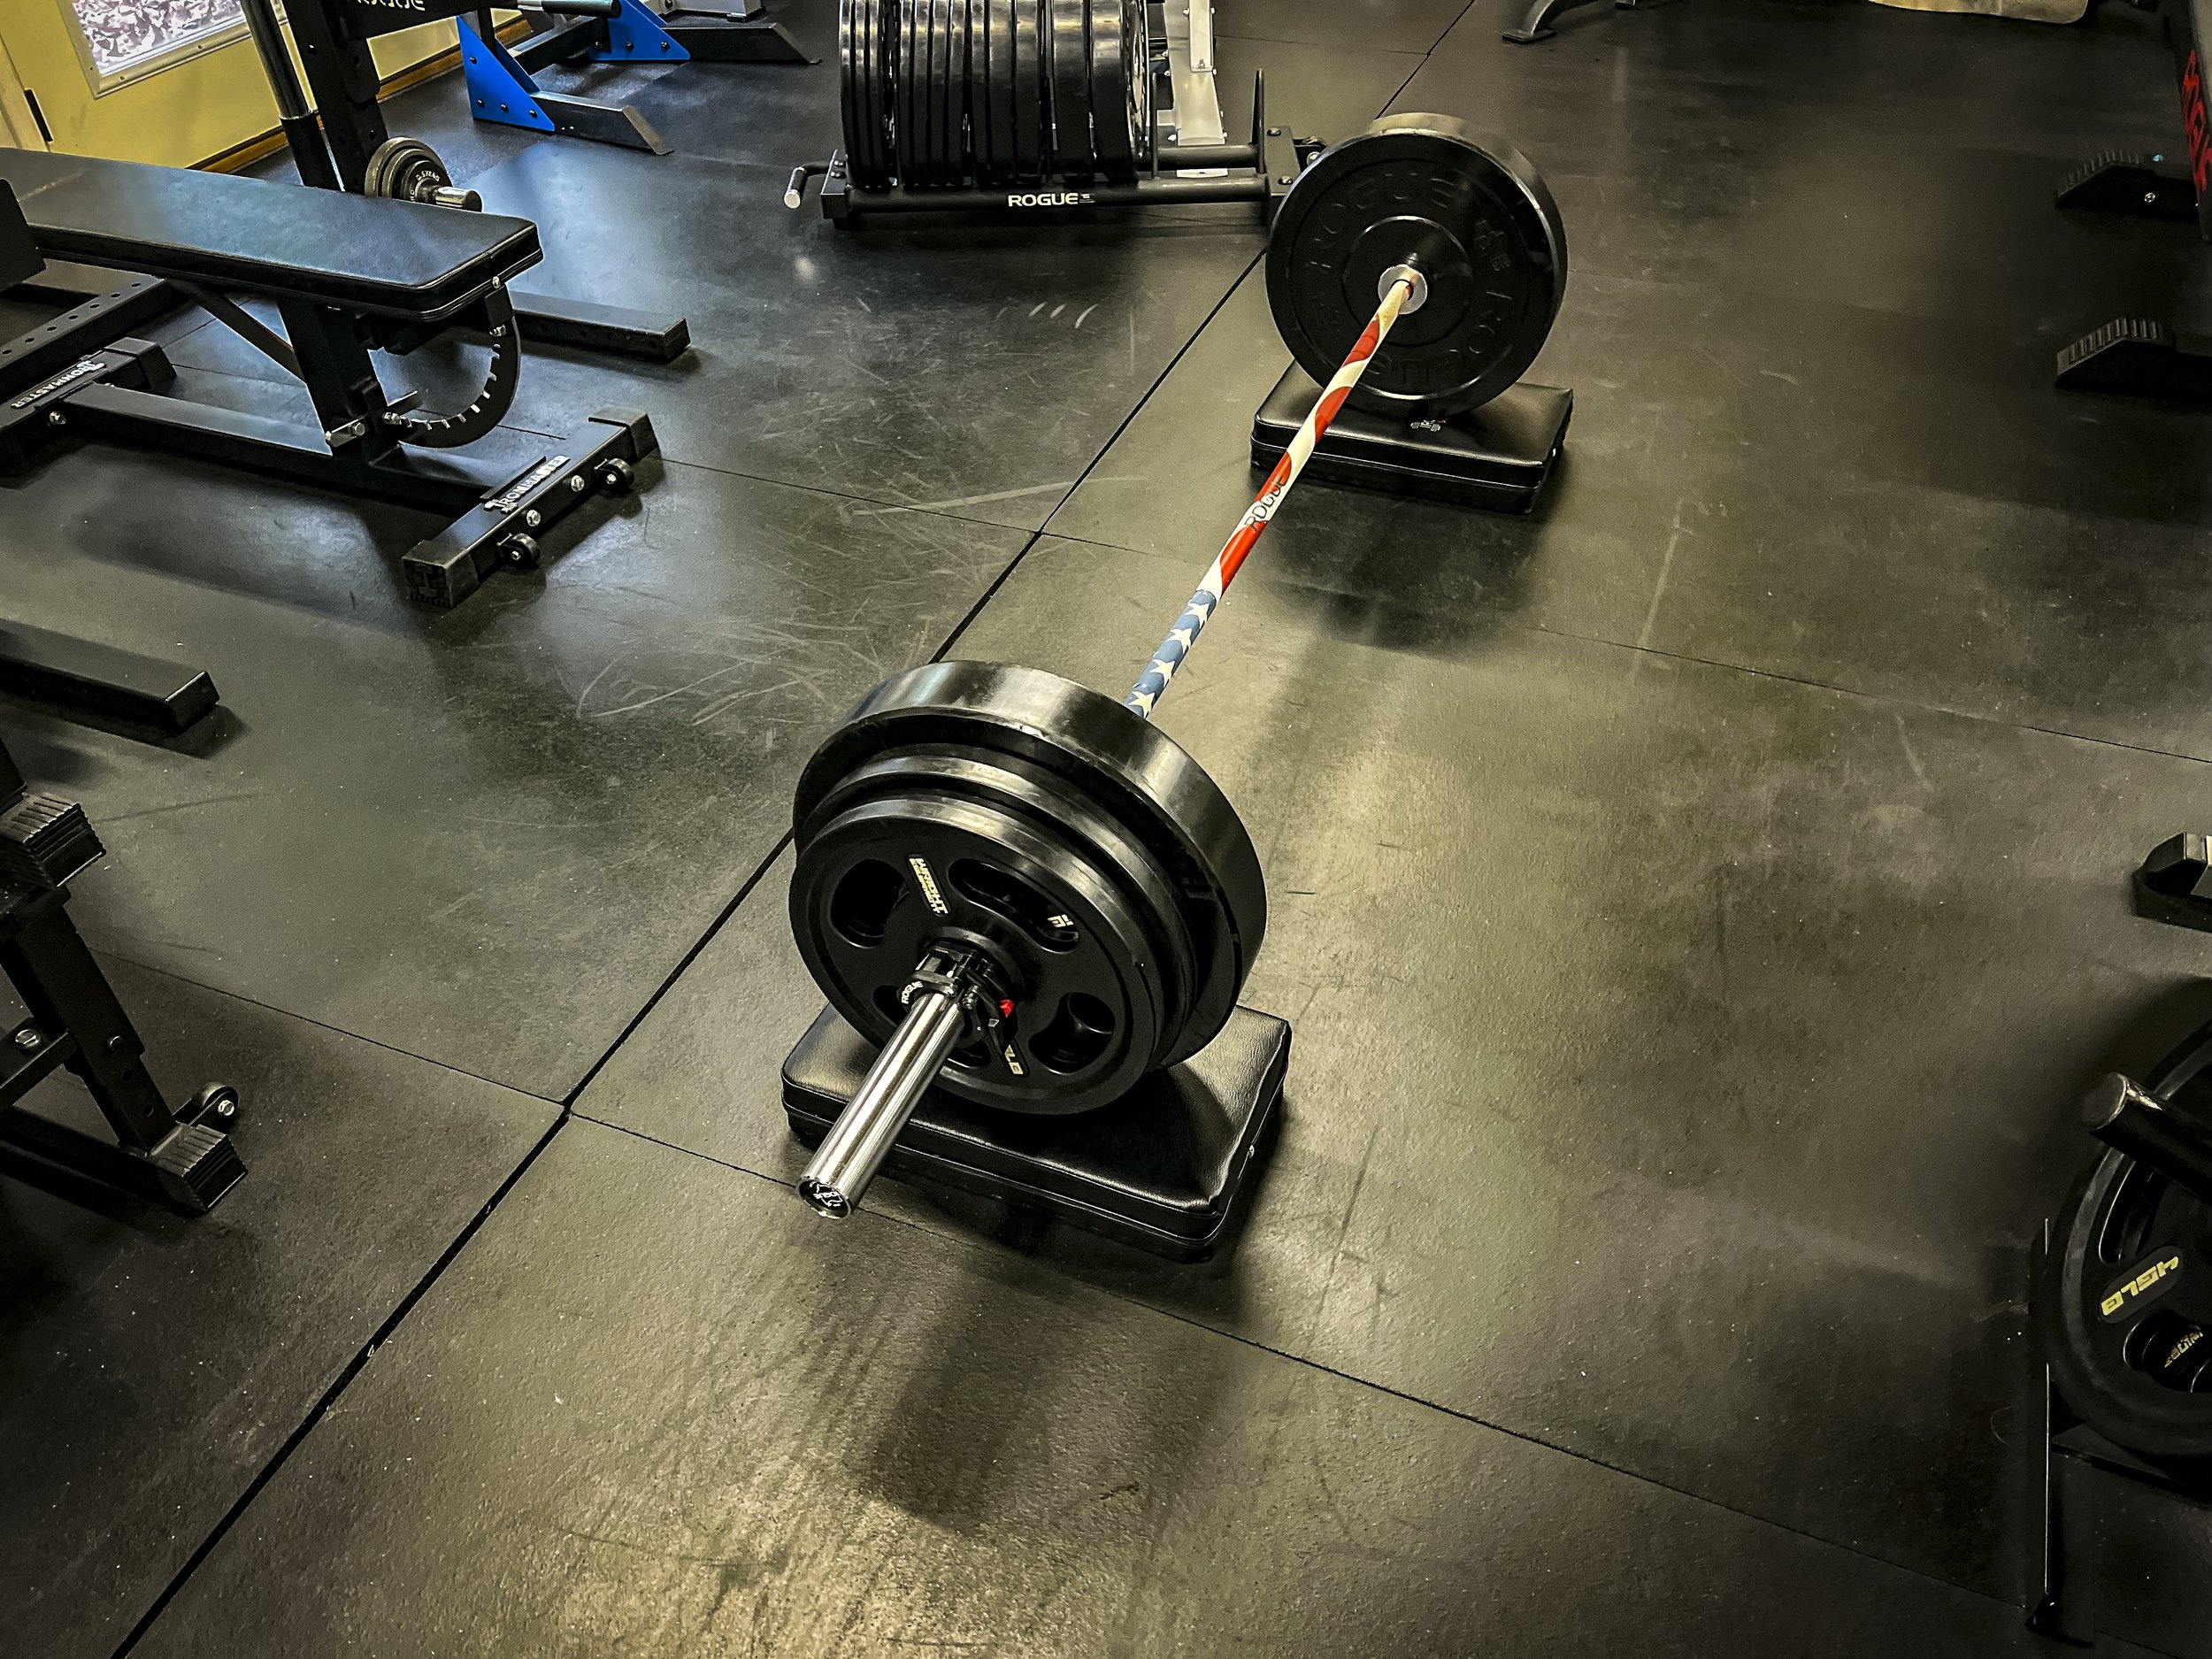
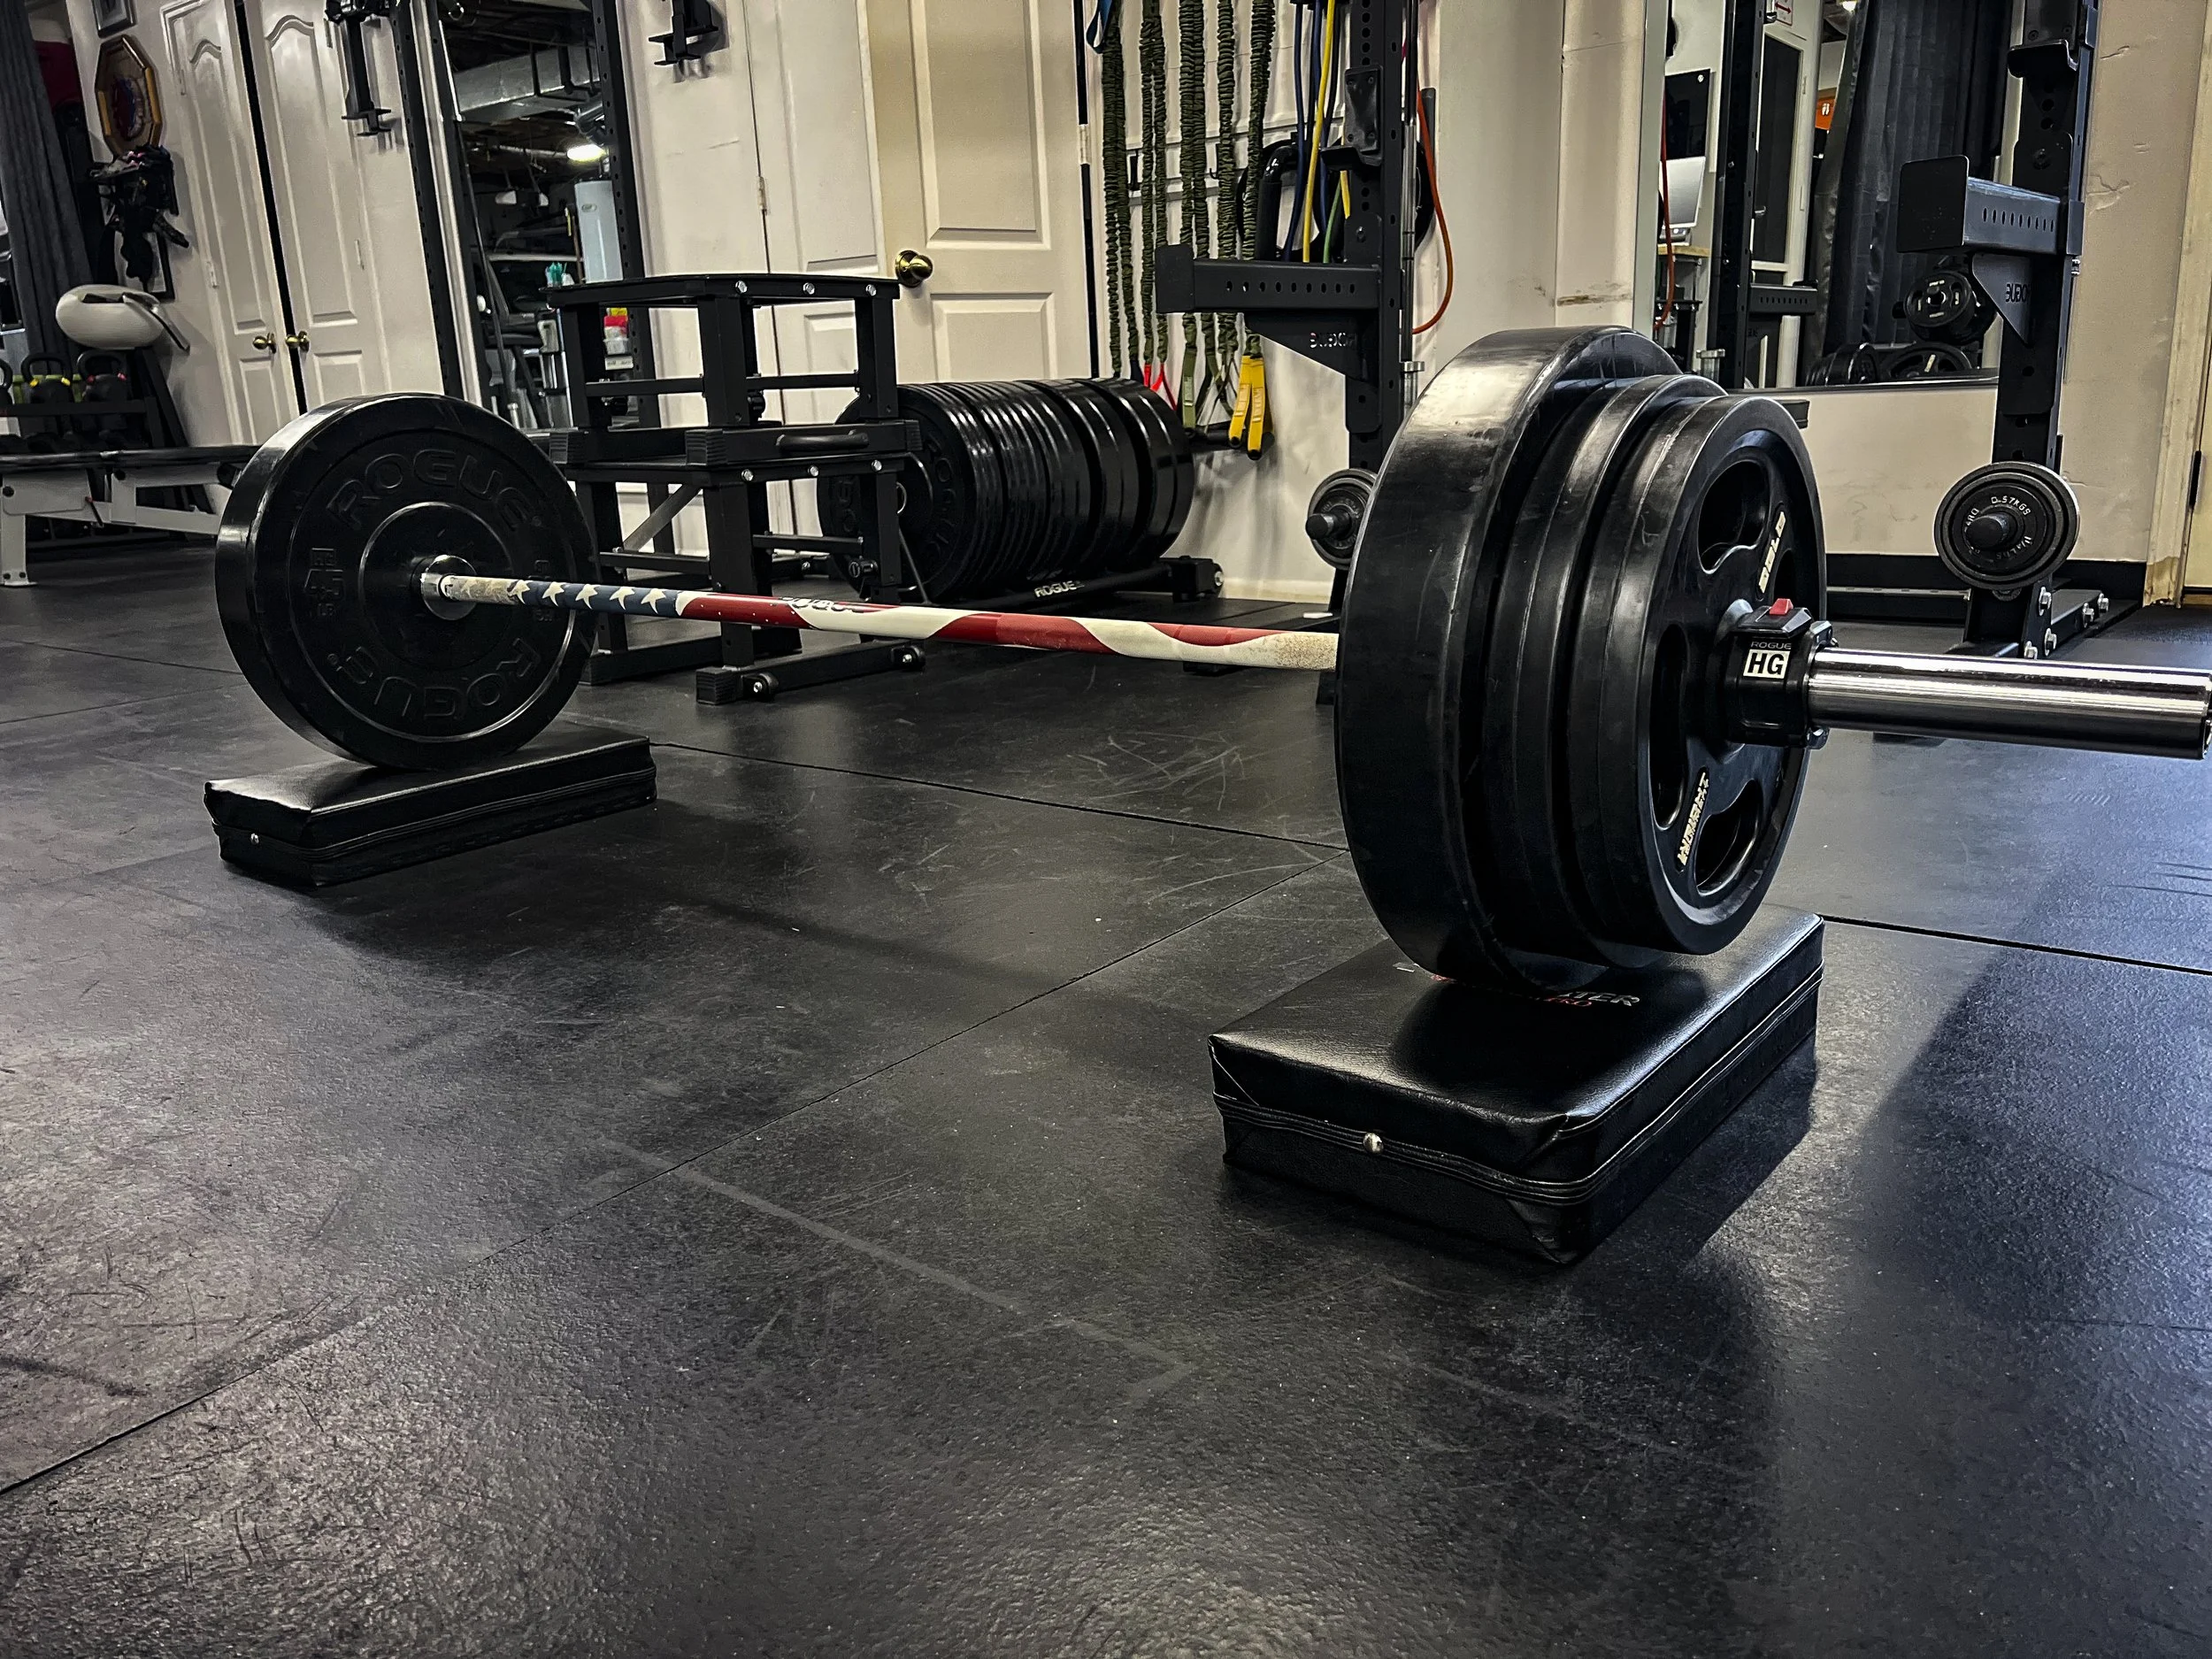
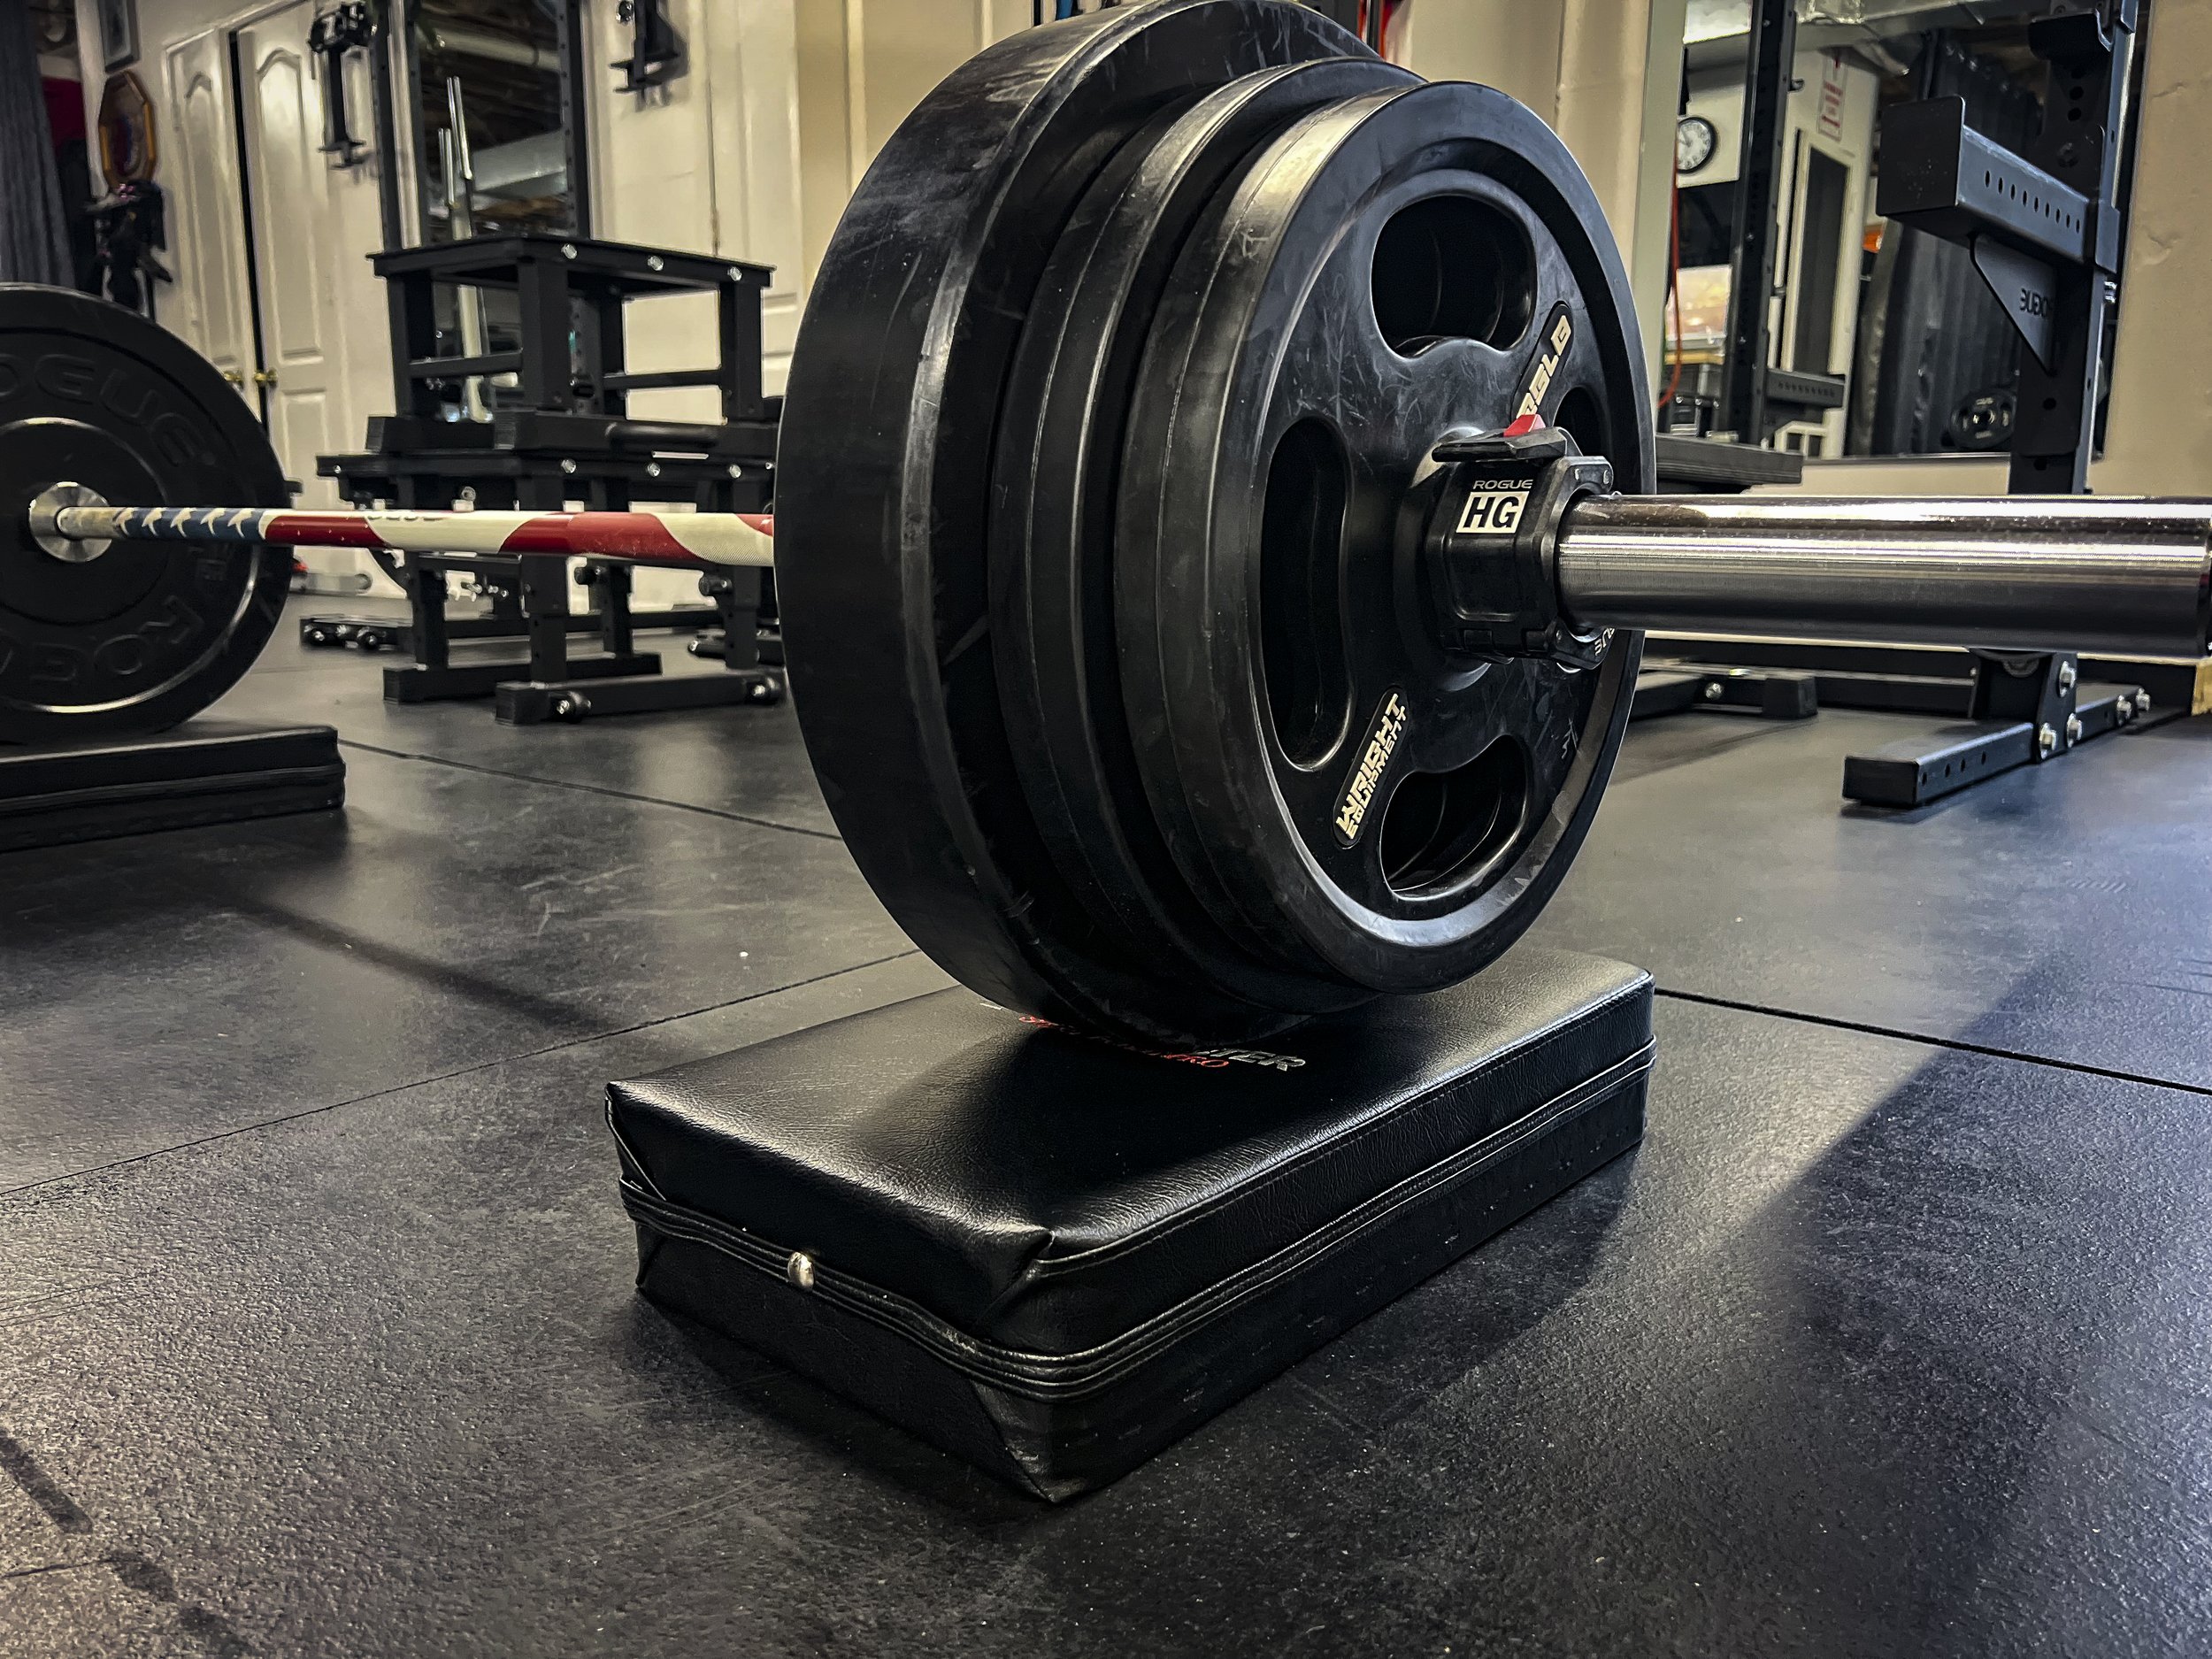
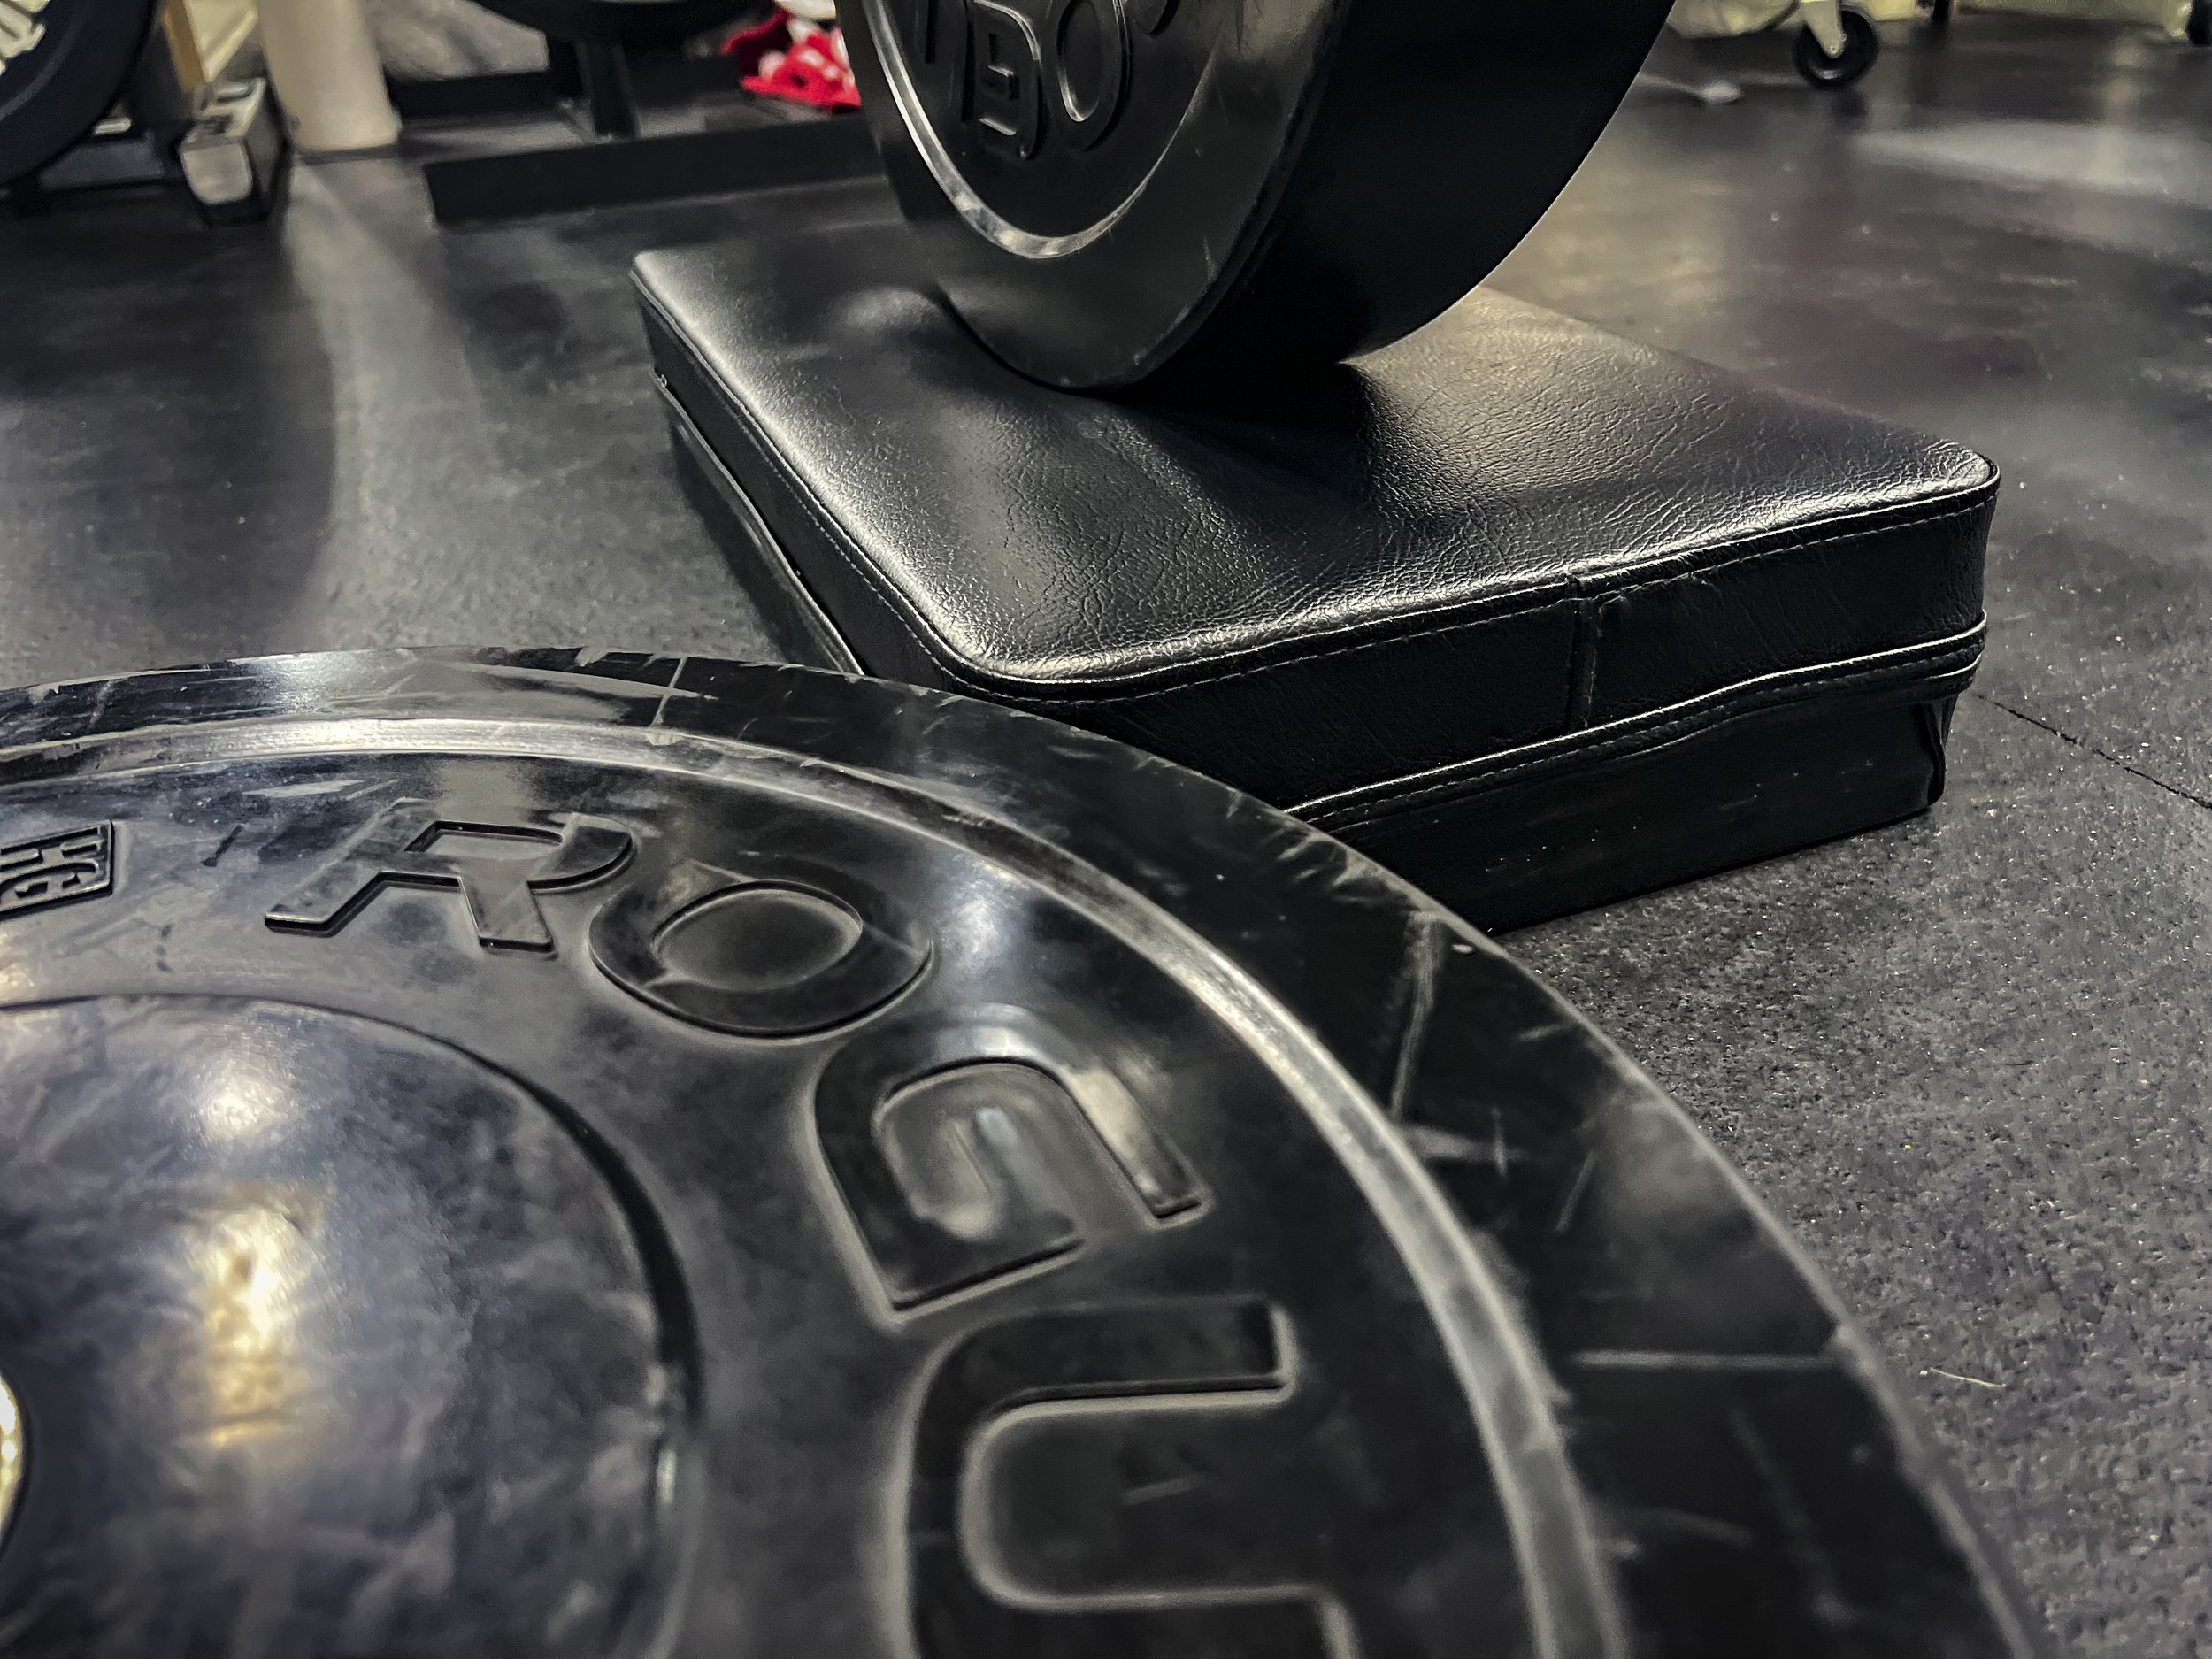
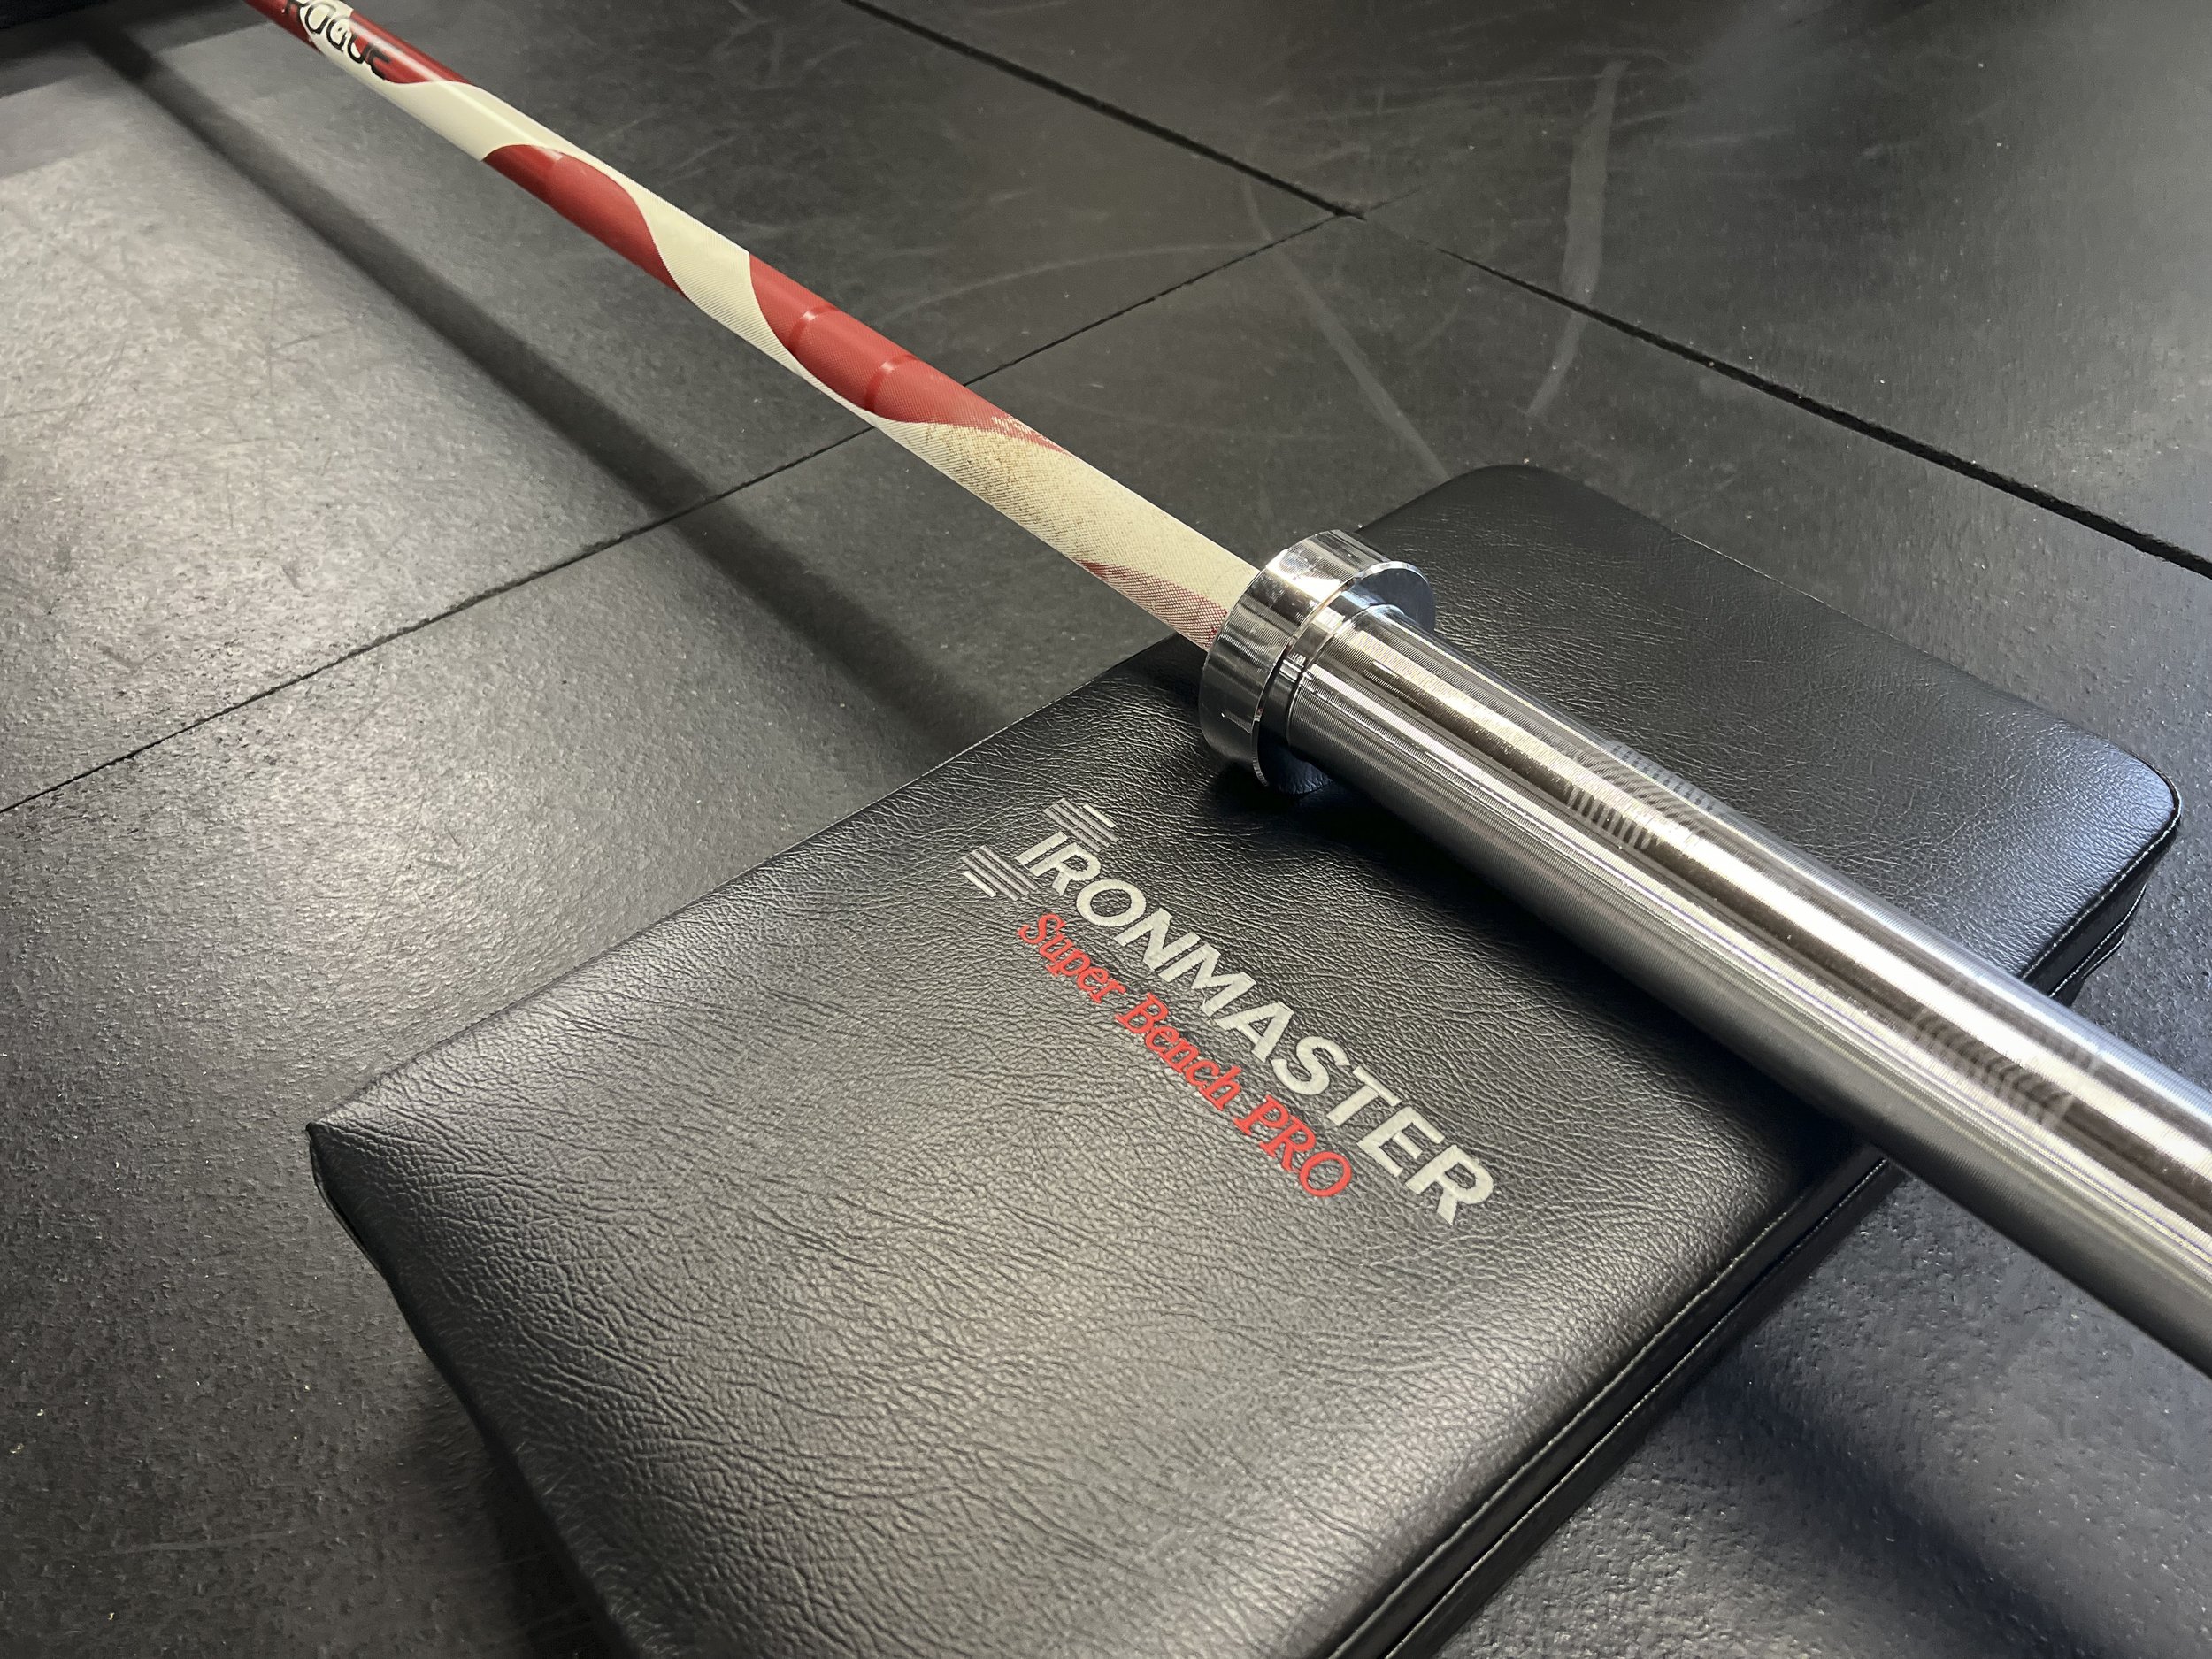
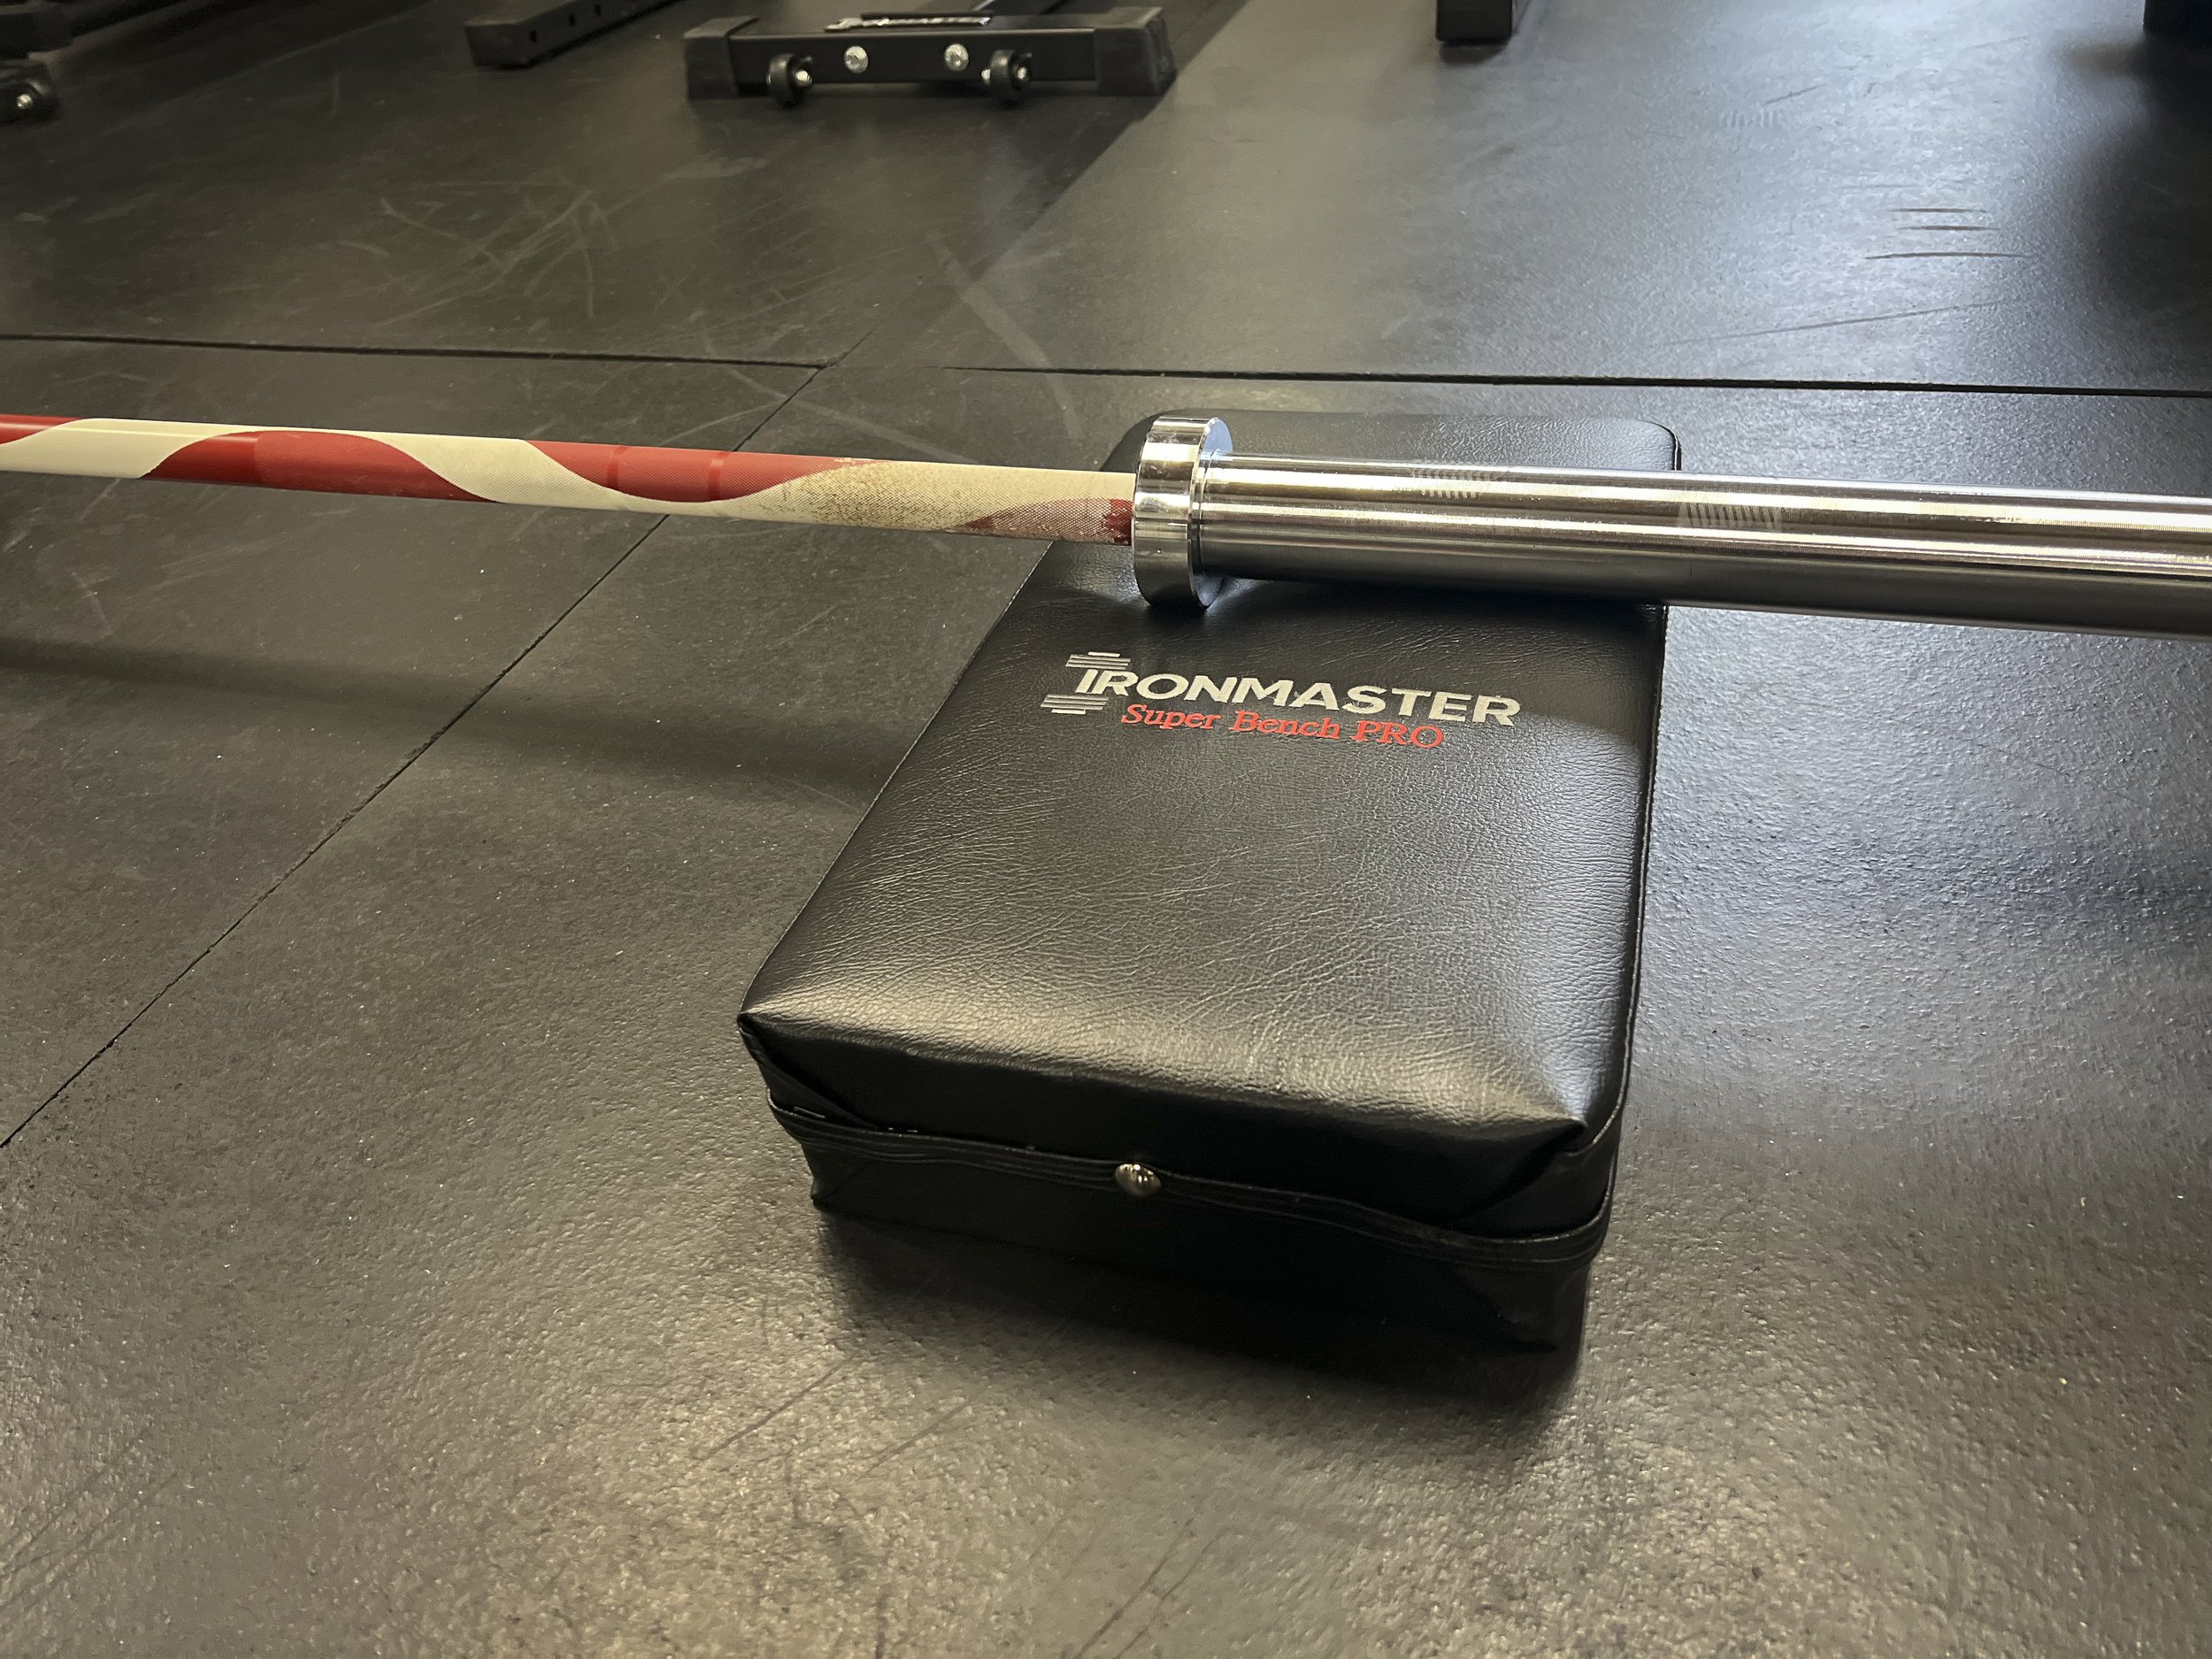
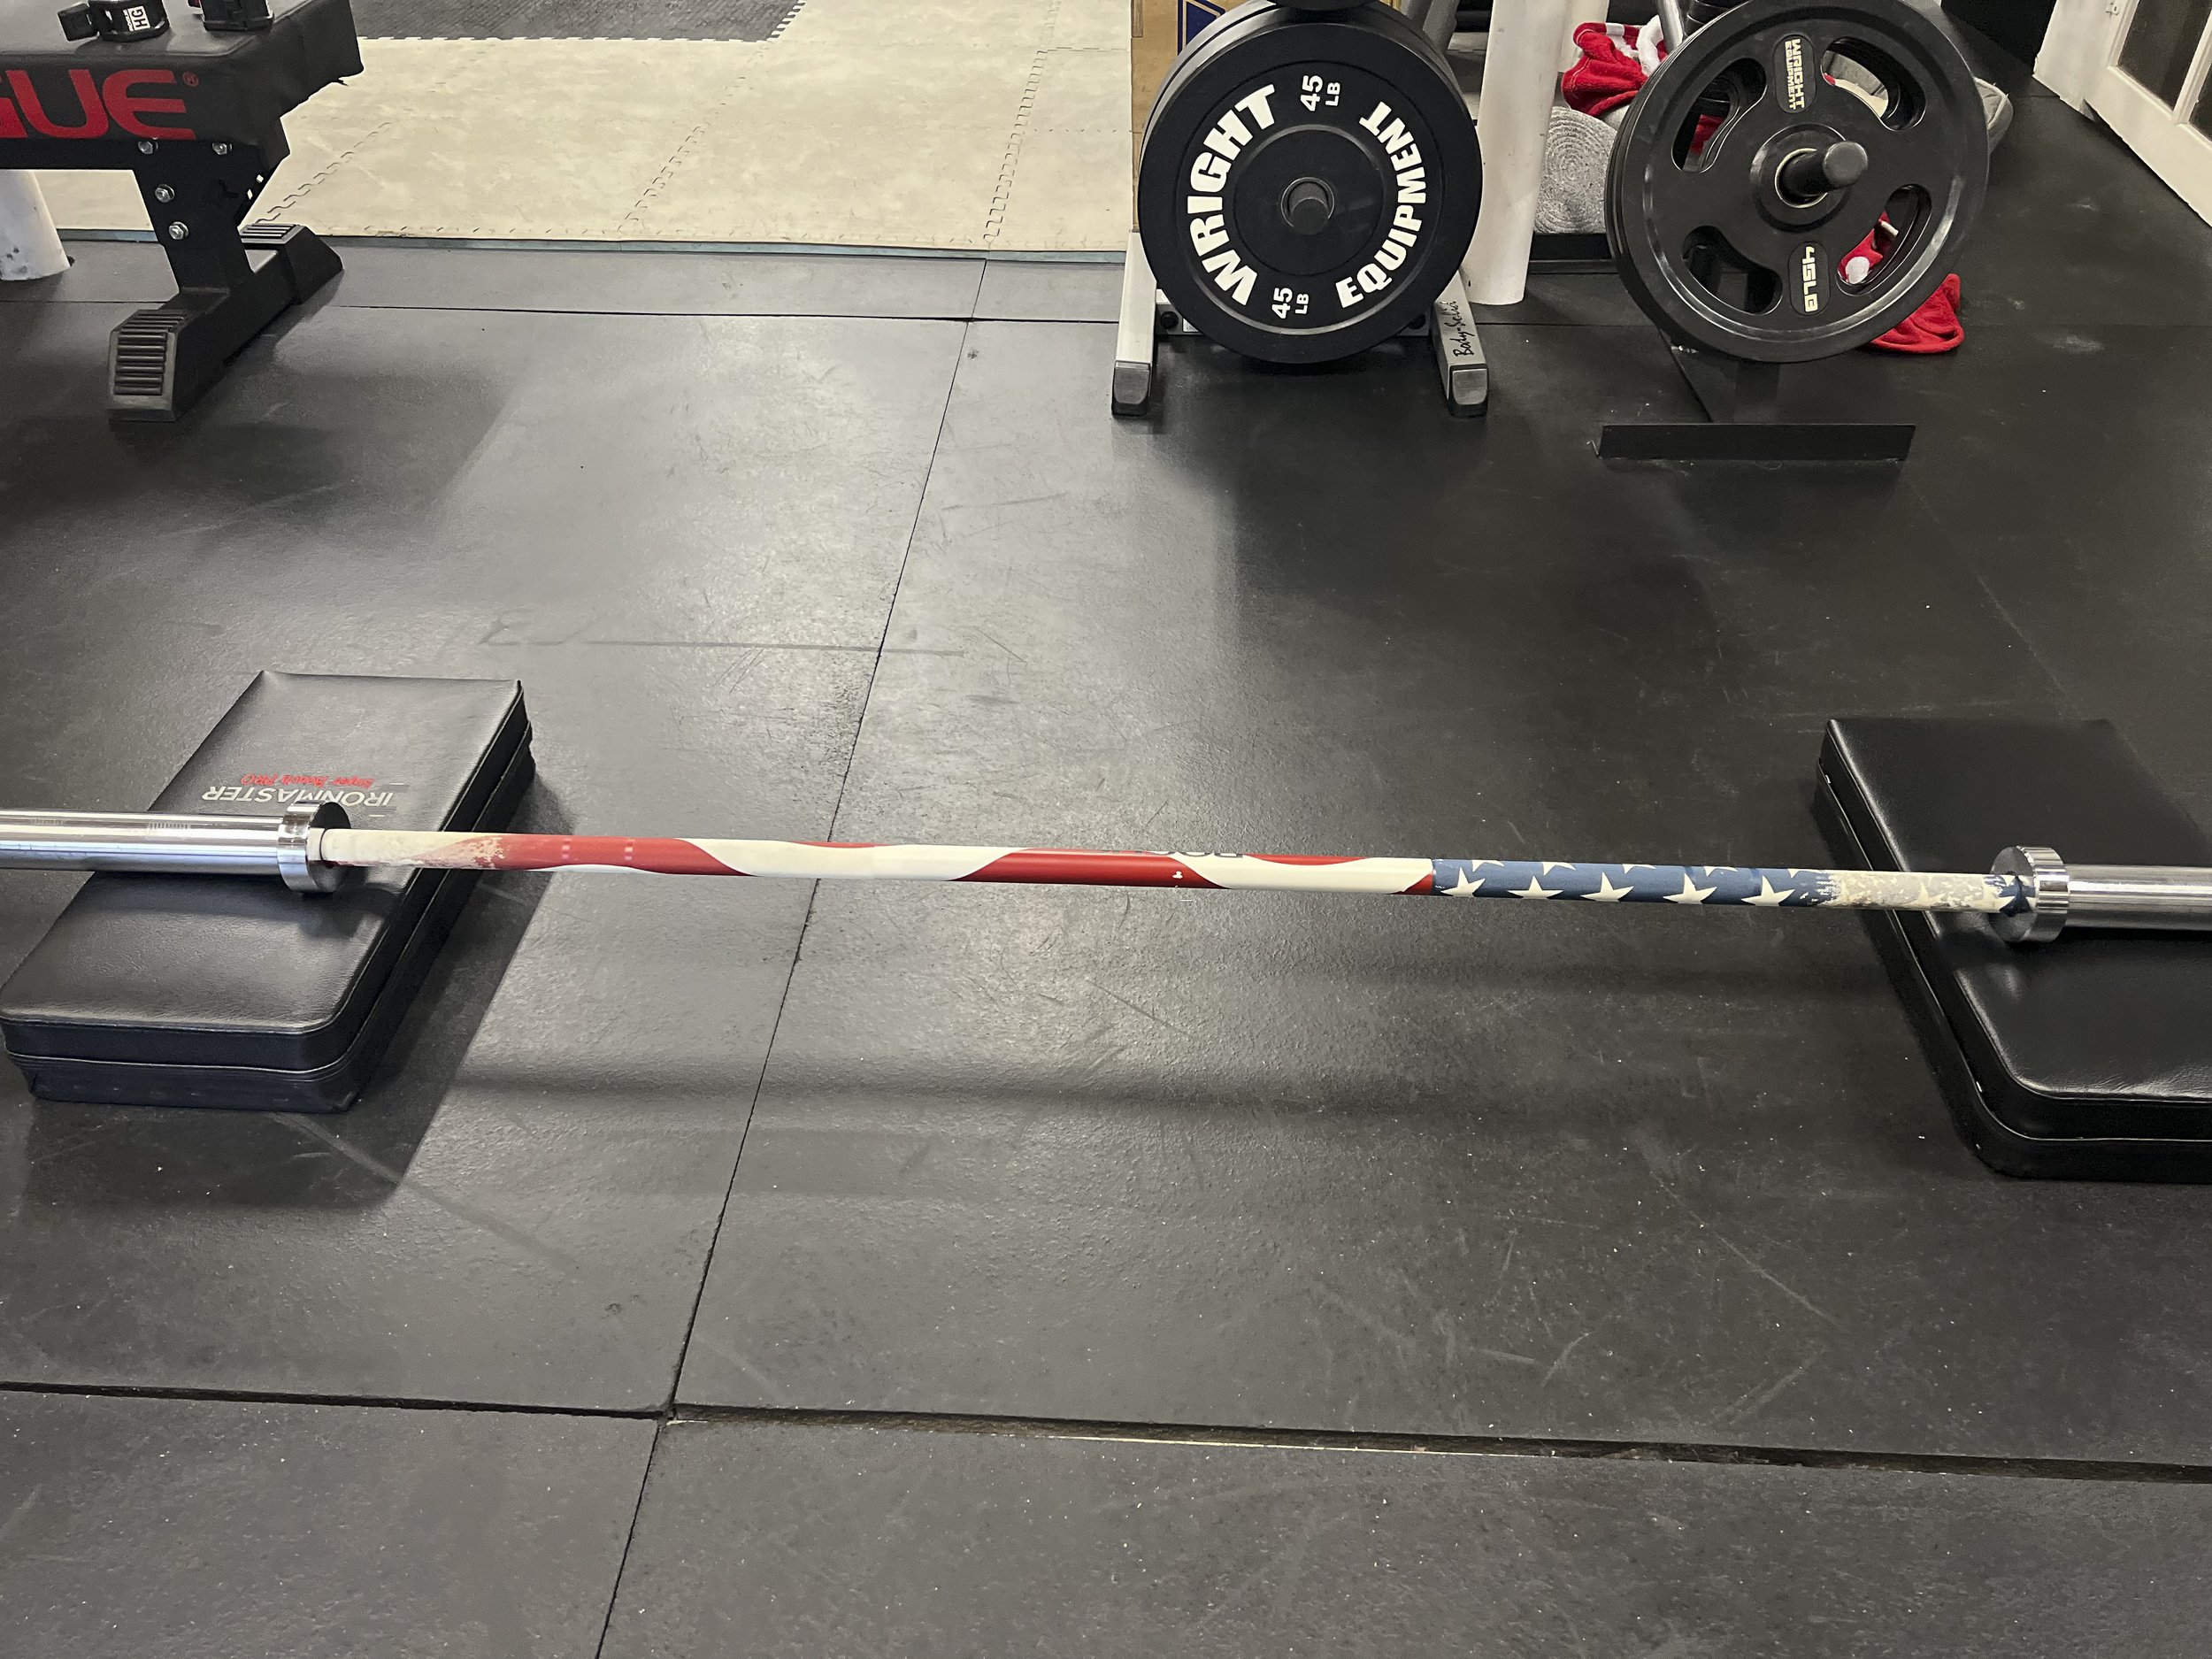
You can raise the bar with bumper plates flipped on their sides, use deadlift blocks and plyo boxes or place the bar in the rack where it becomes a Rack Pull instead of a Block Pull Deadlift. Normally, we use bumper plates on their sides because it’s quick and we can change the height based on which ones we use.
I decided to make a set of my own that would elevate the bar to the correct height and also provide some deadening when the bar comes down. The goal was to find a way to do it with materials I had around the house and gym. These cost me nothing; it’s all stuff I had lying around. Let’s get started!
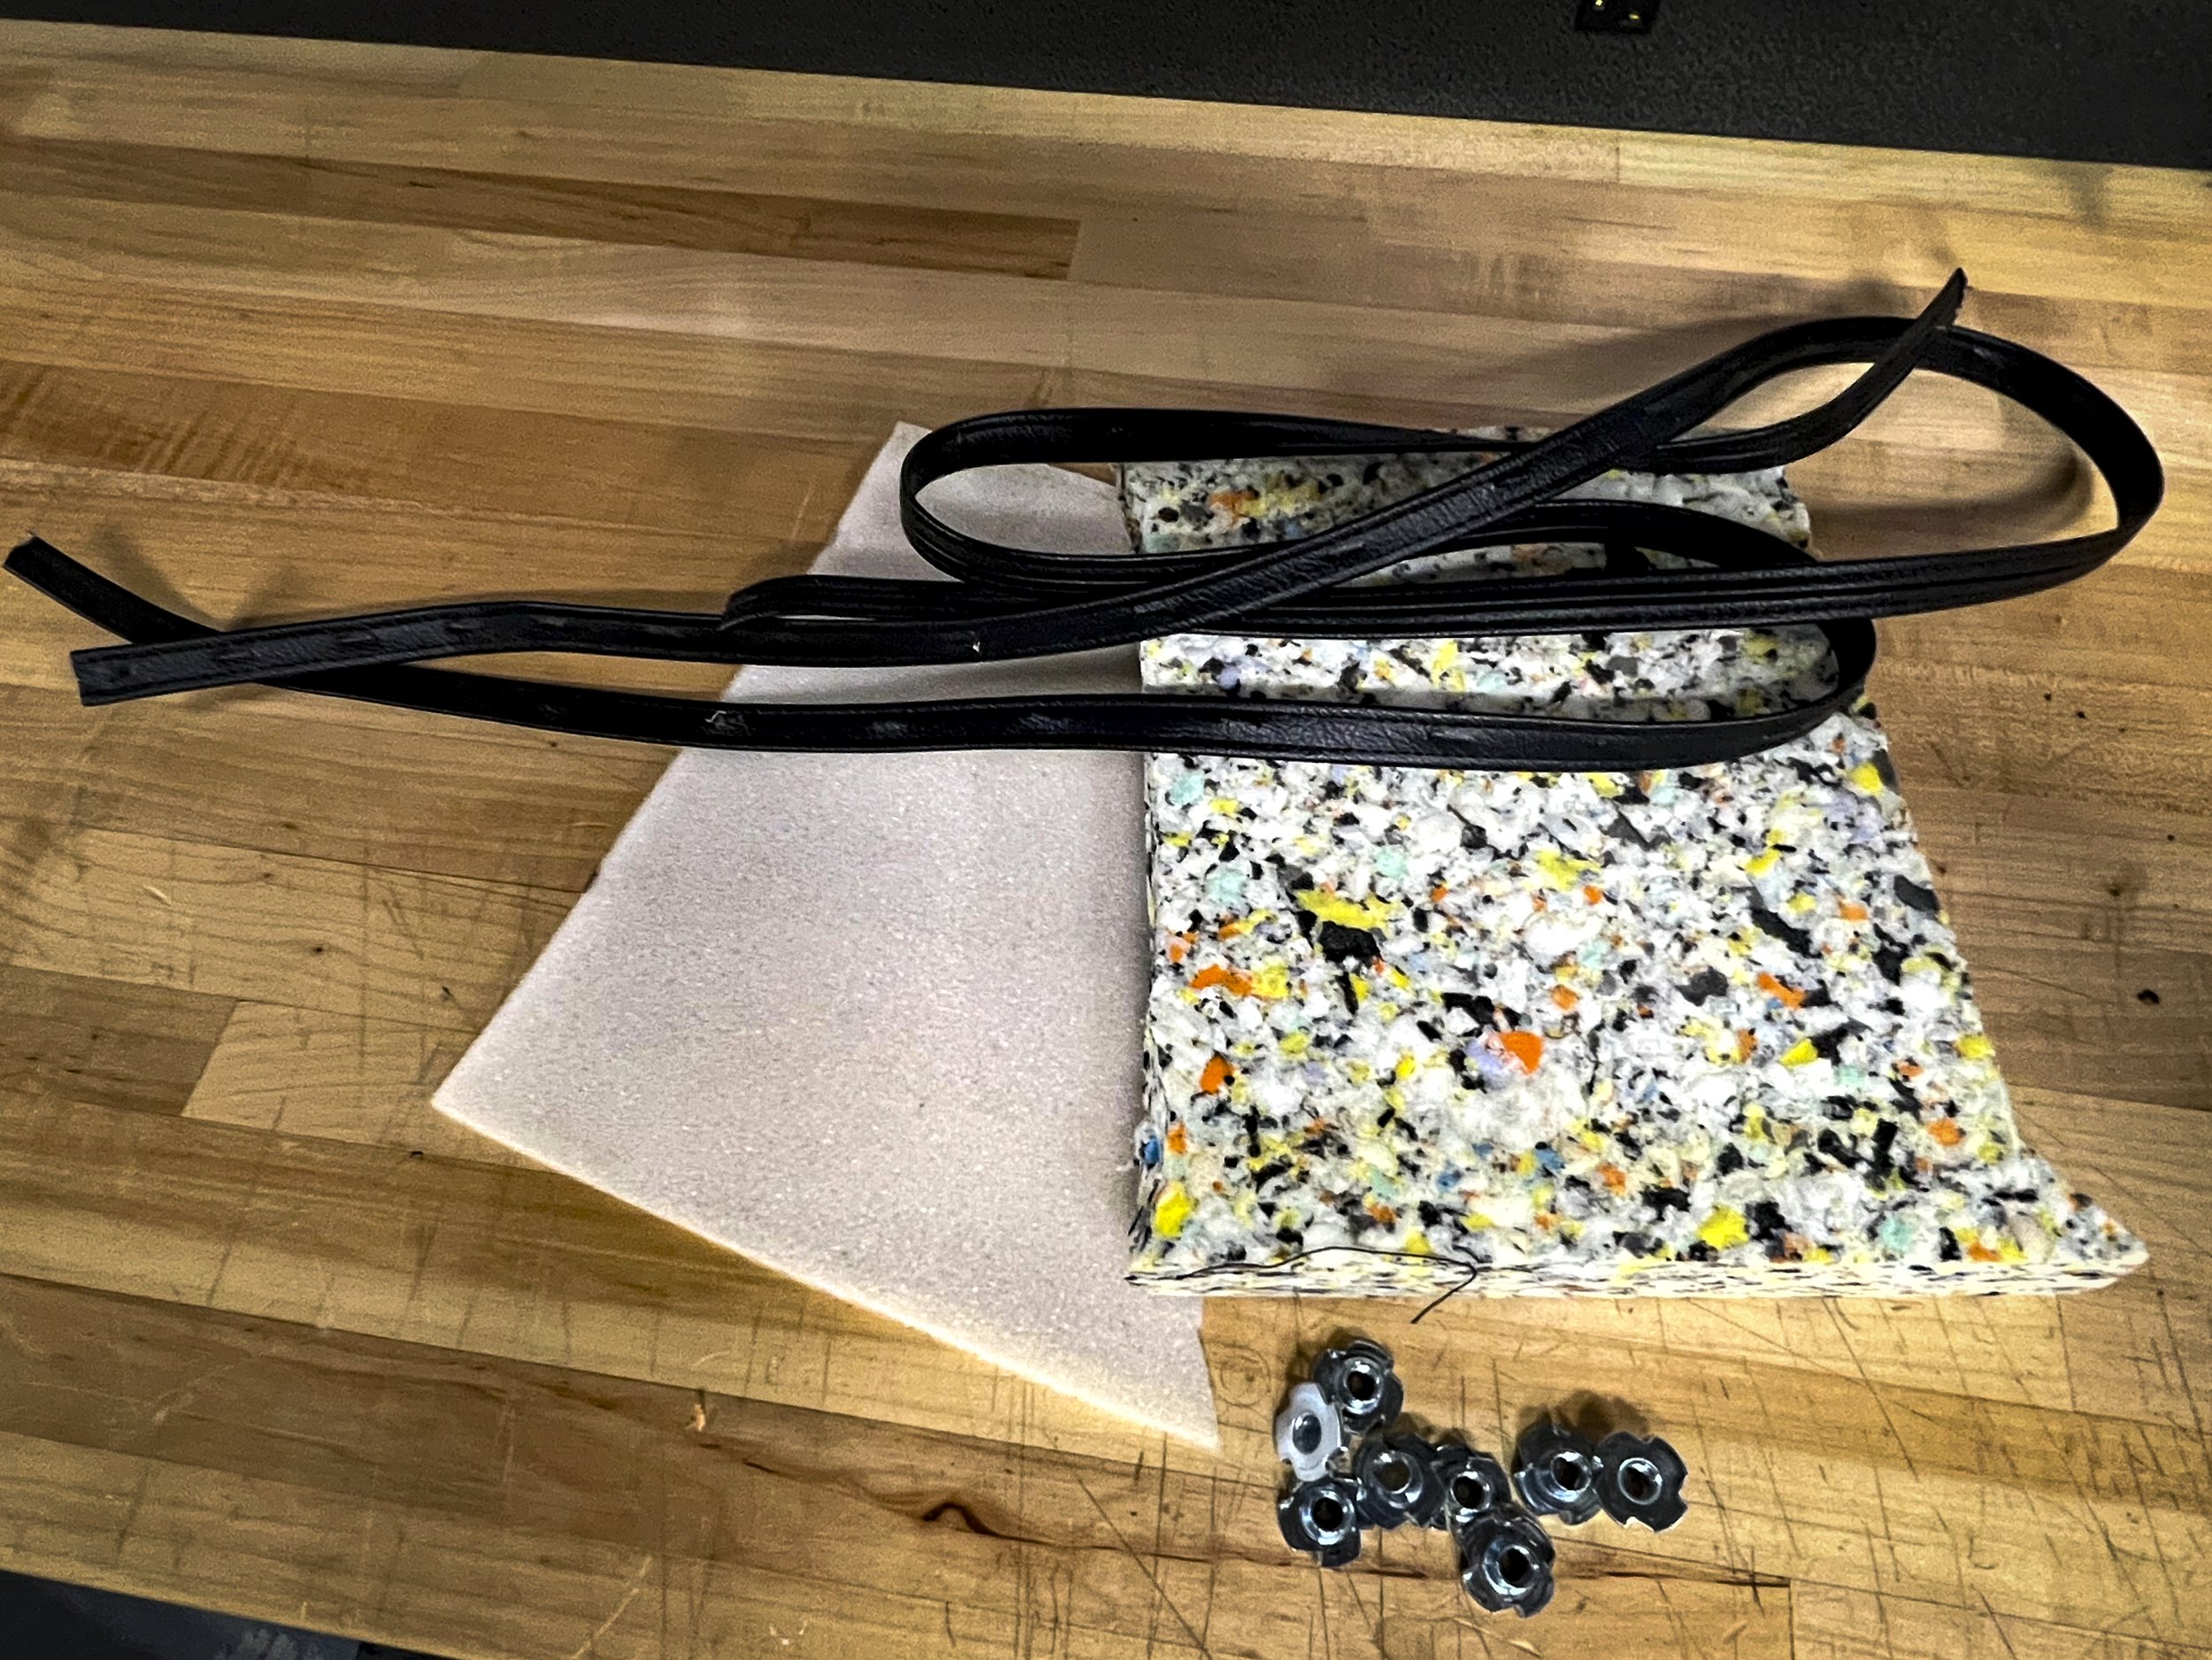
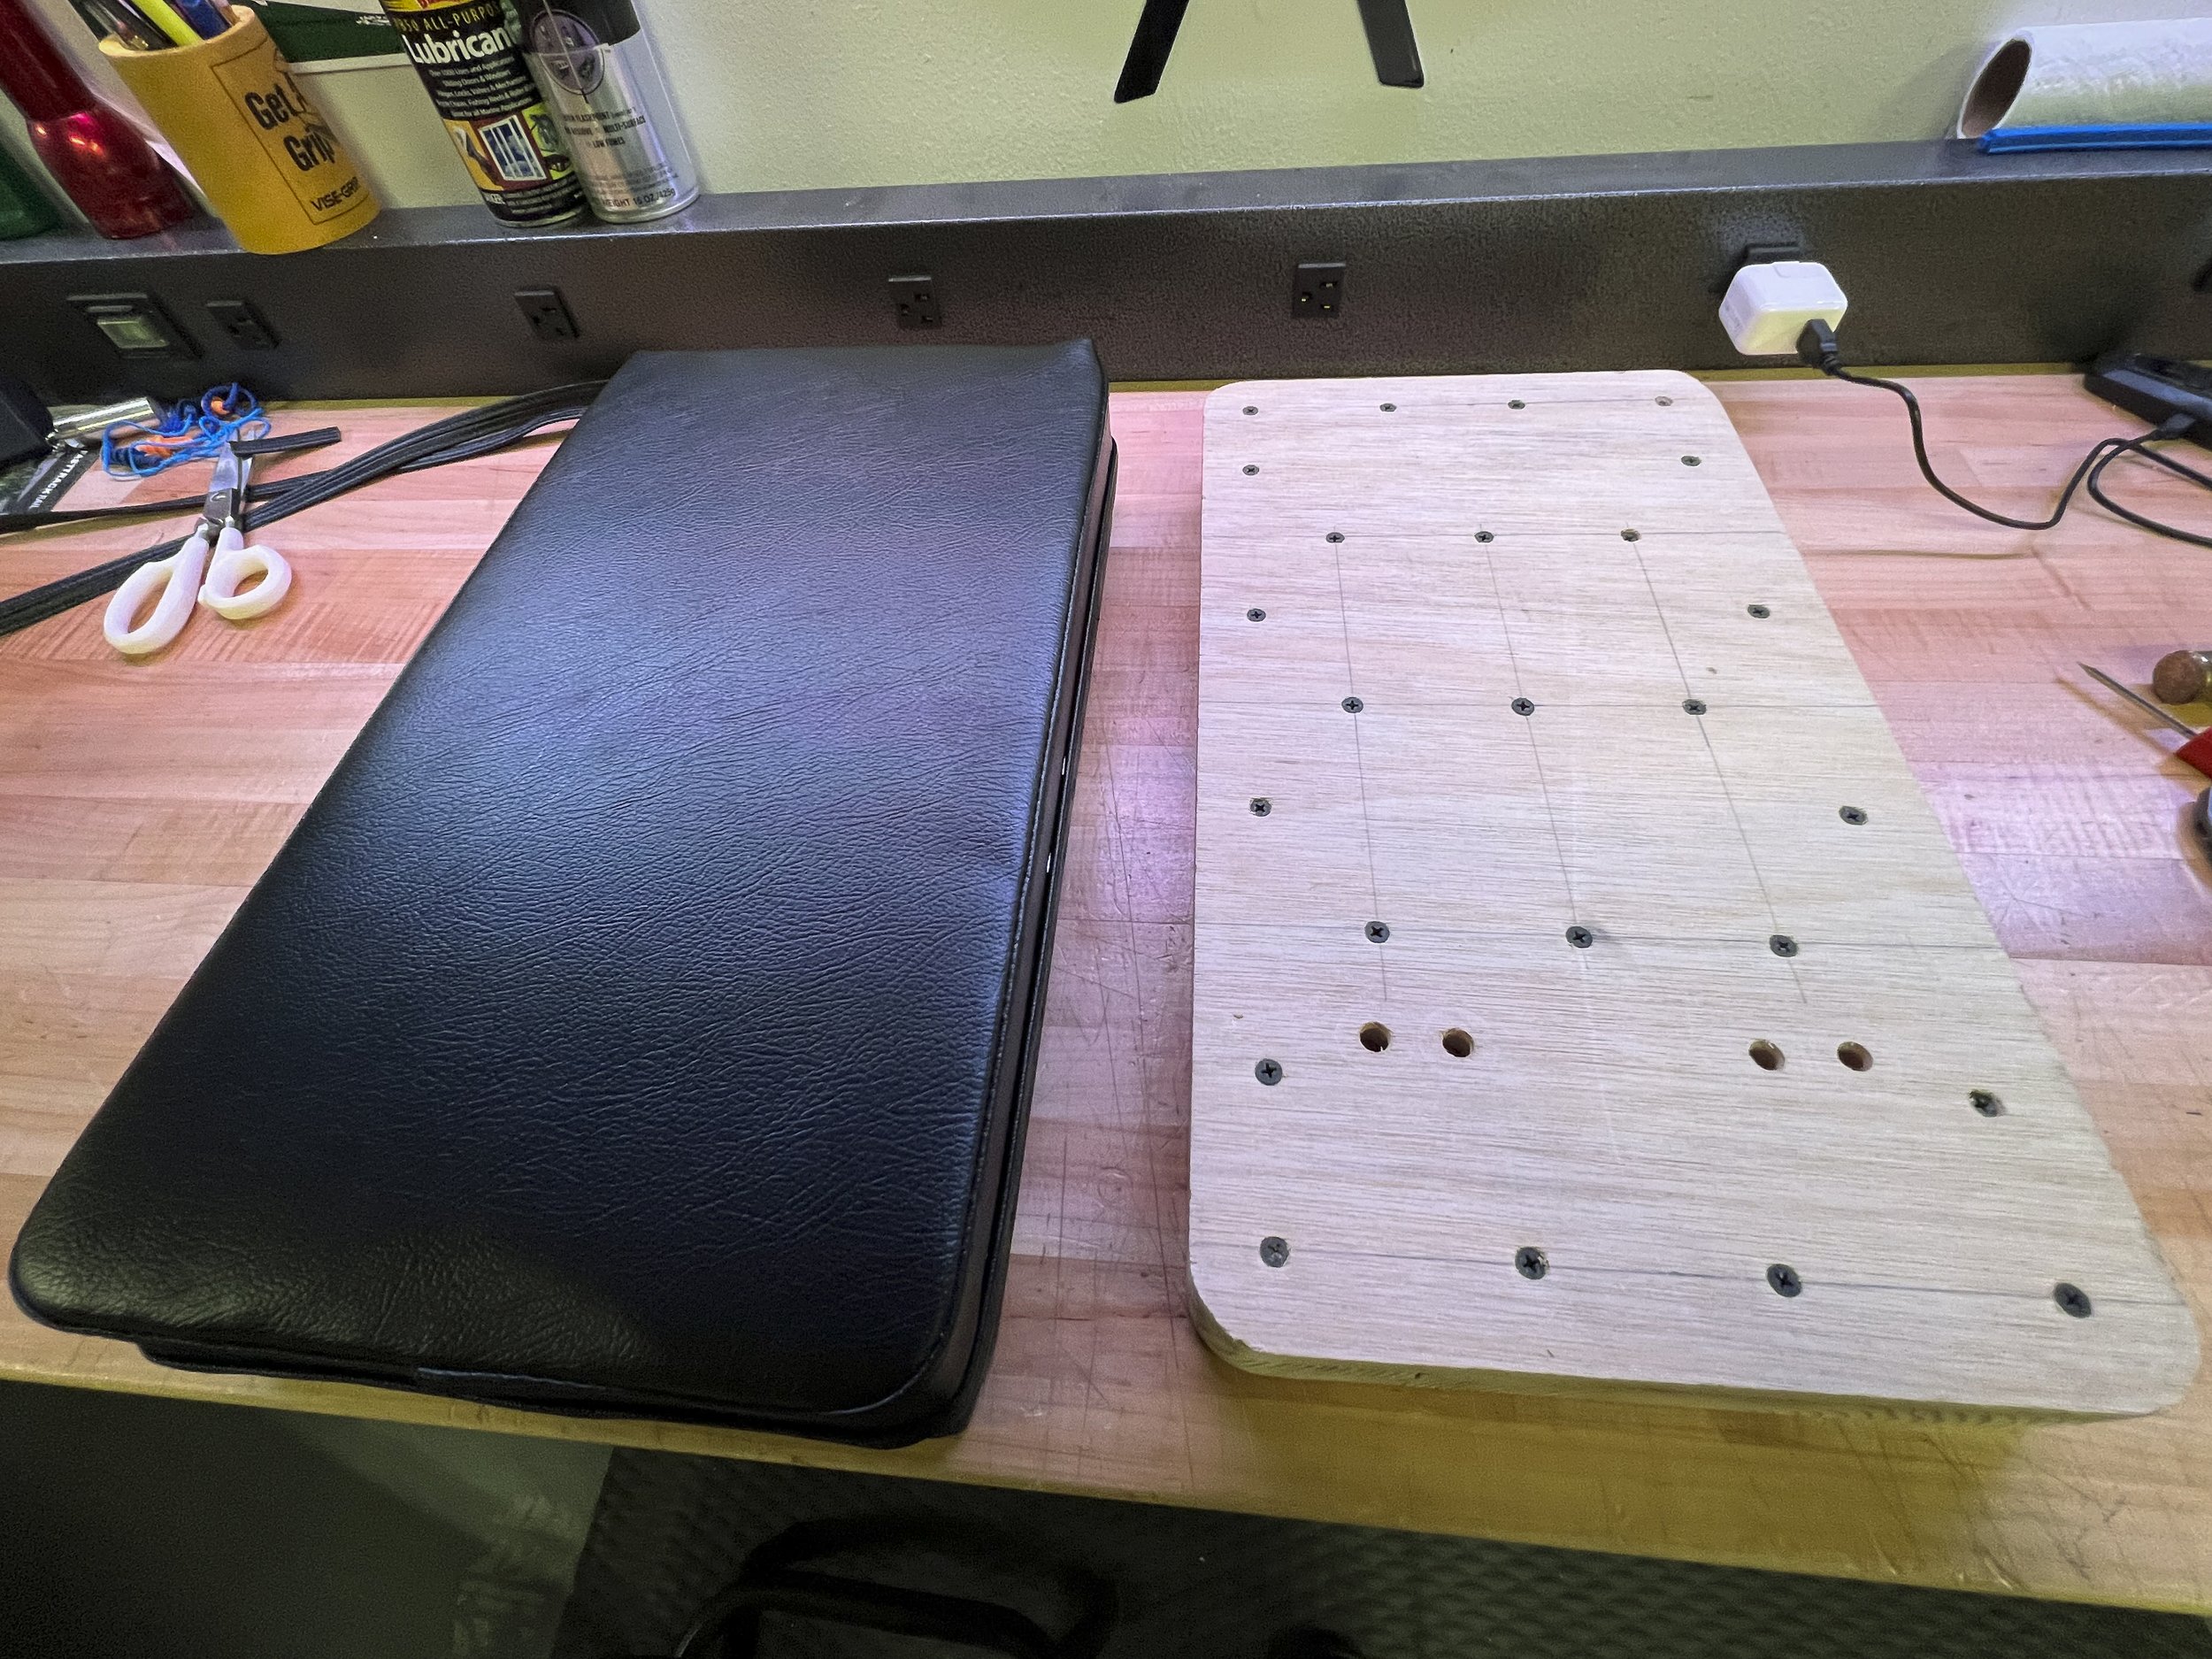
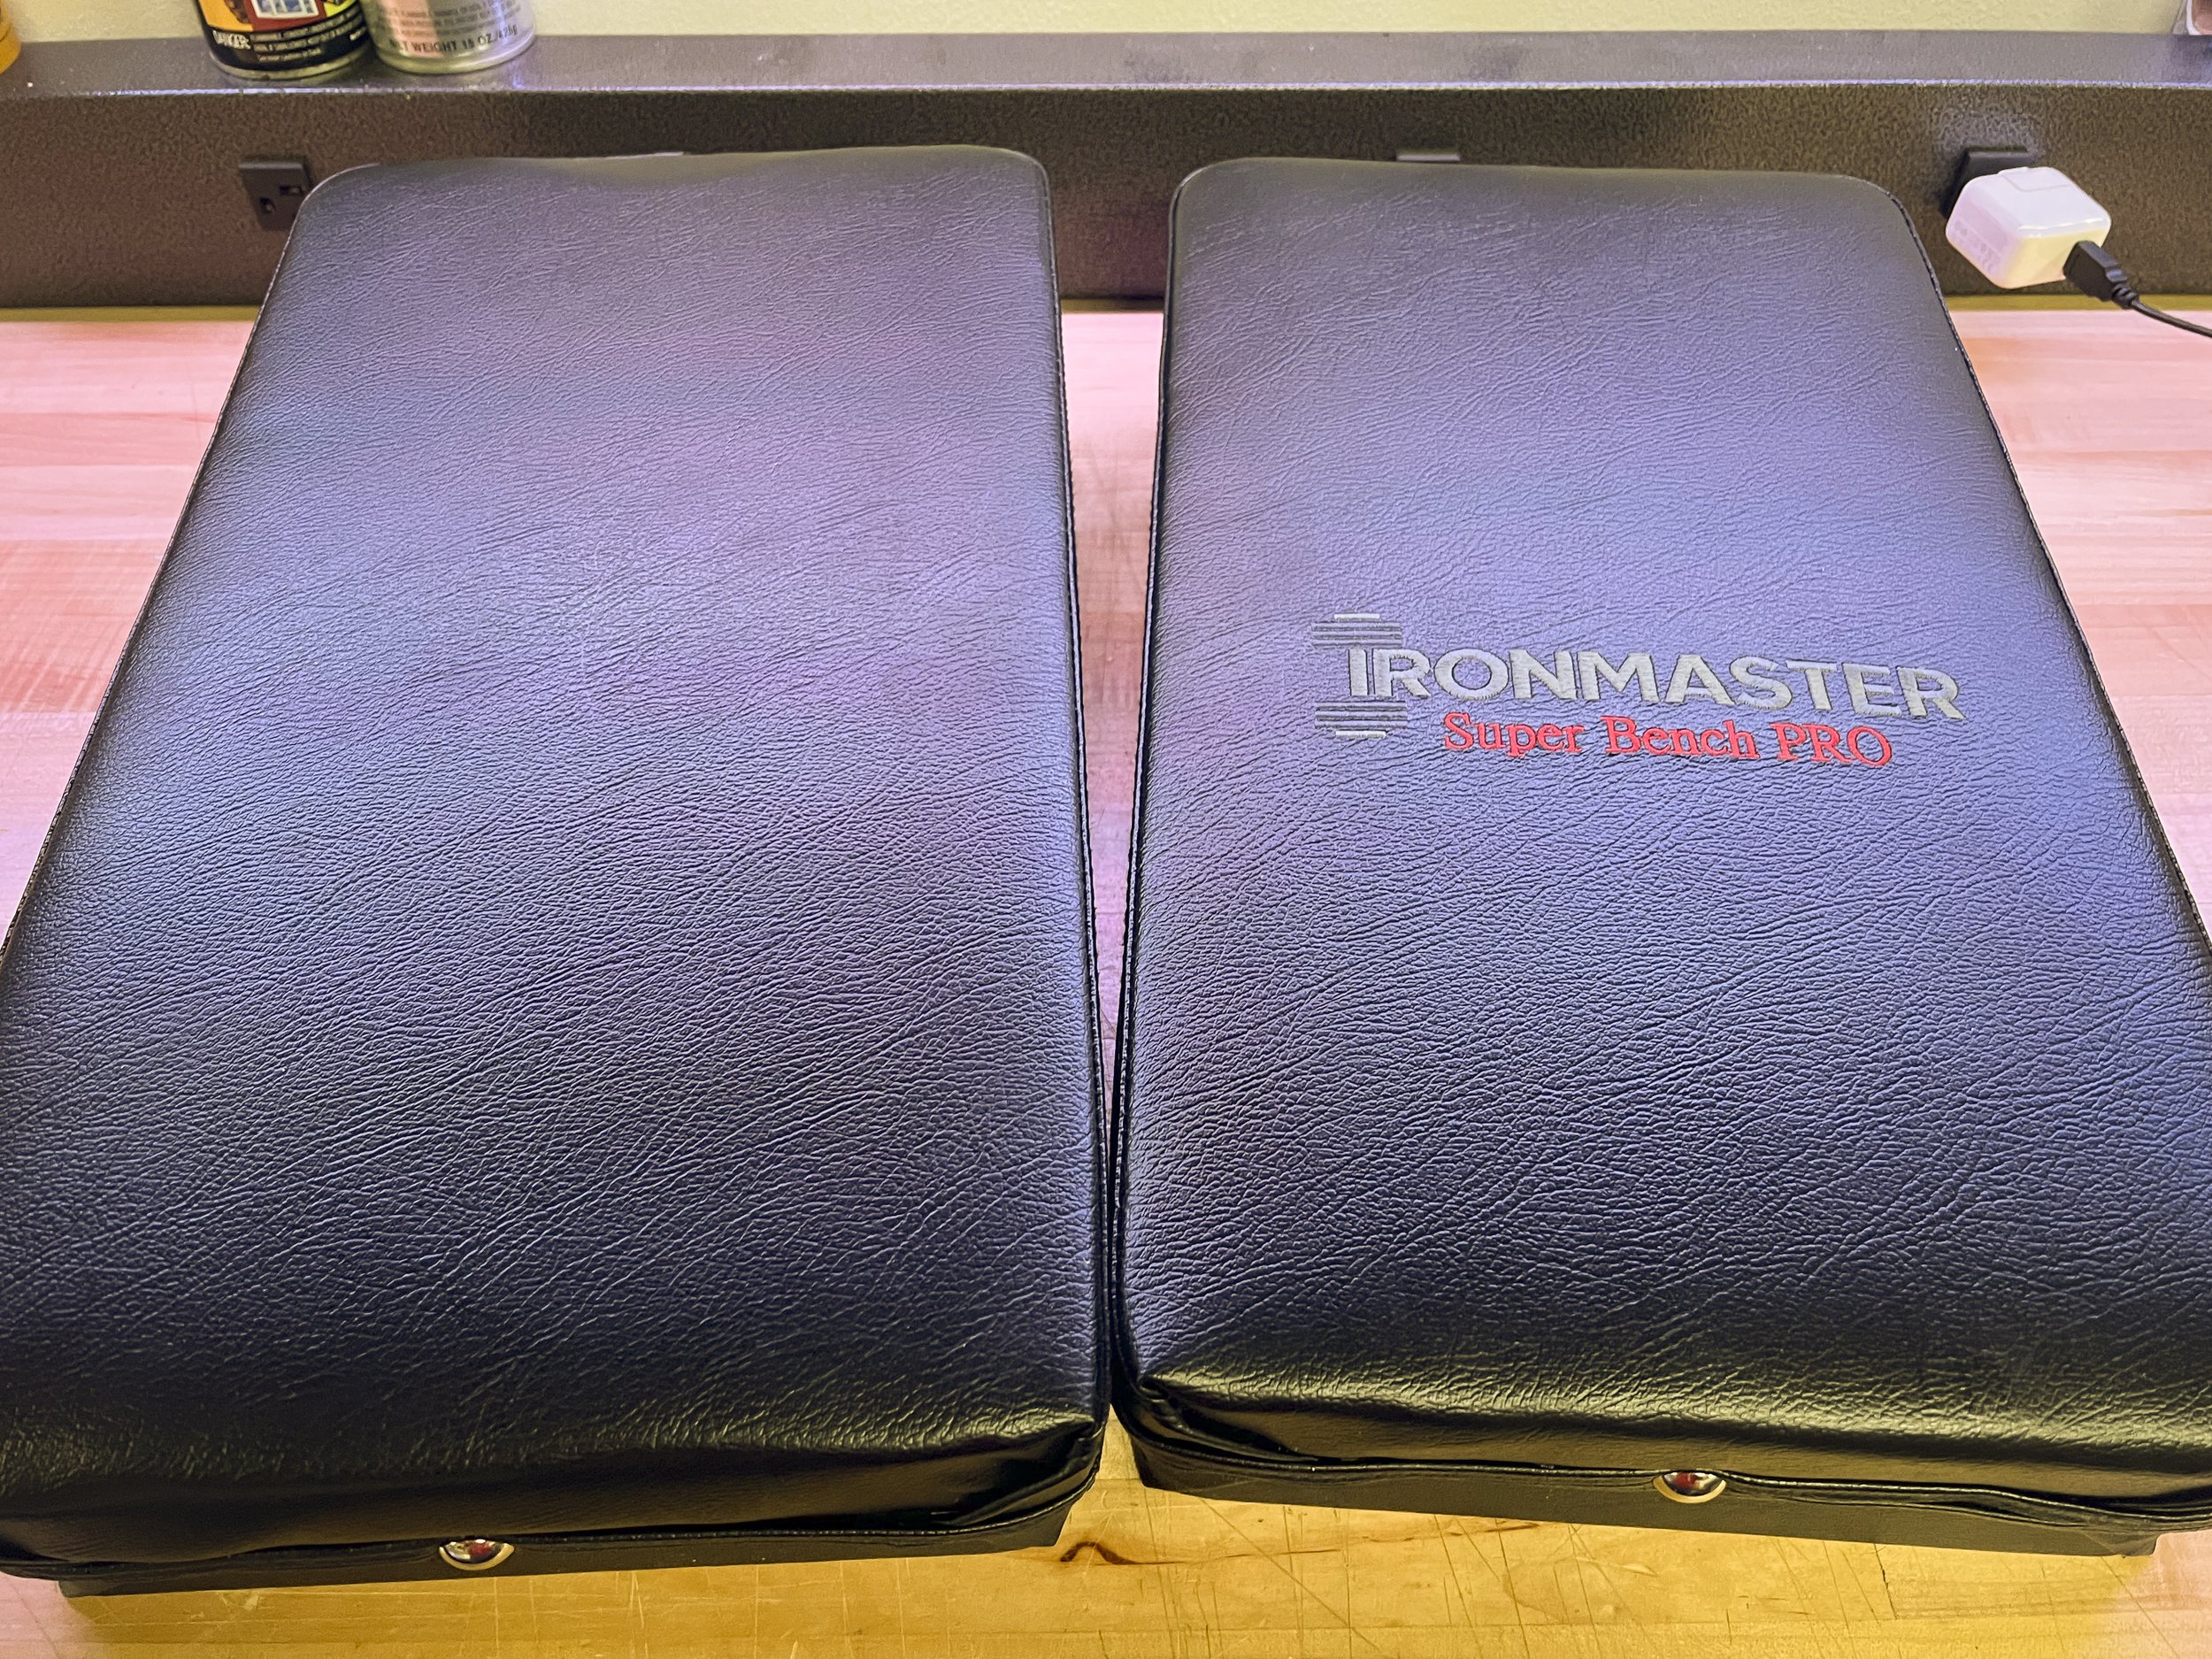
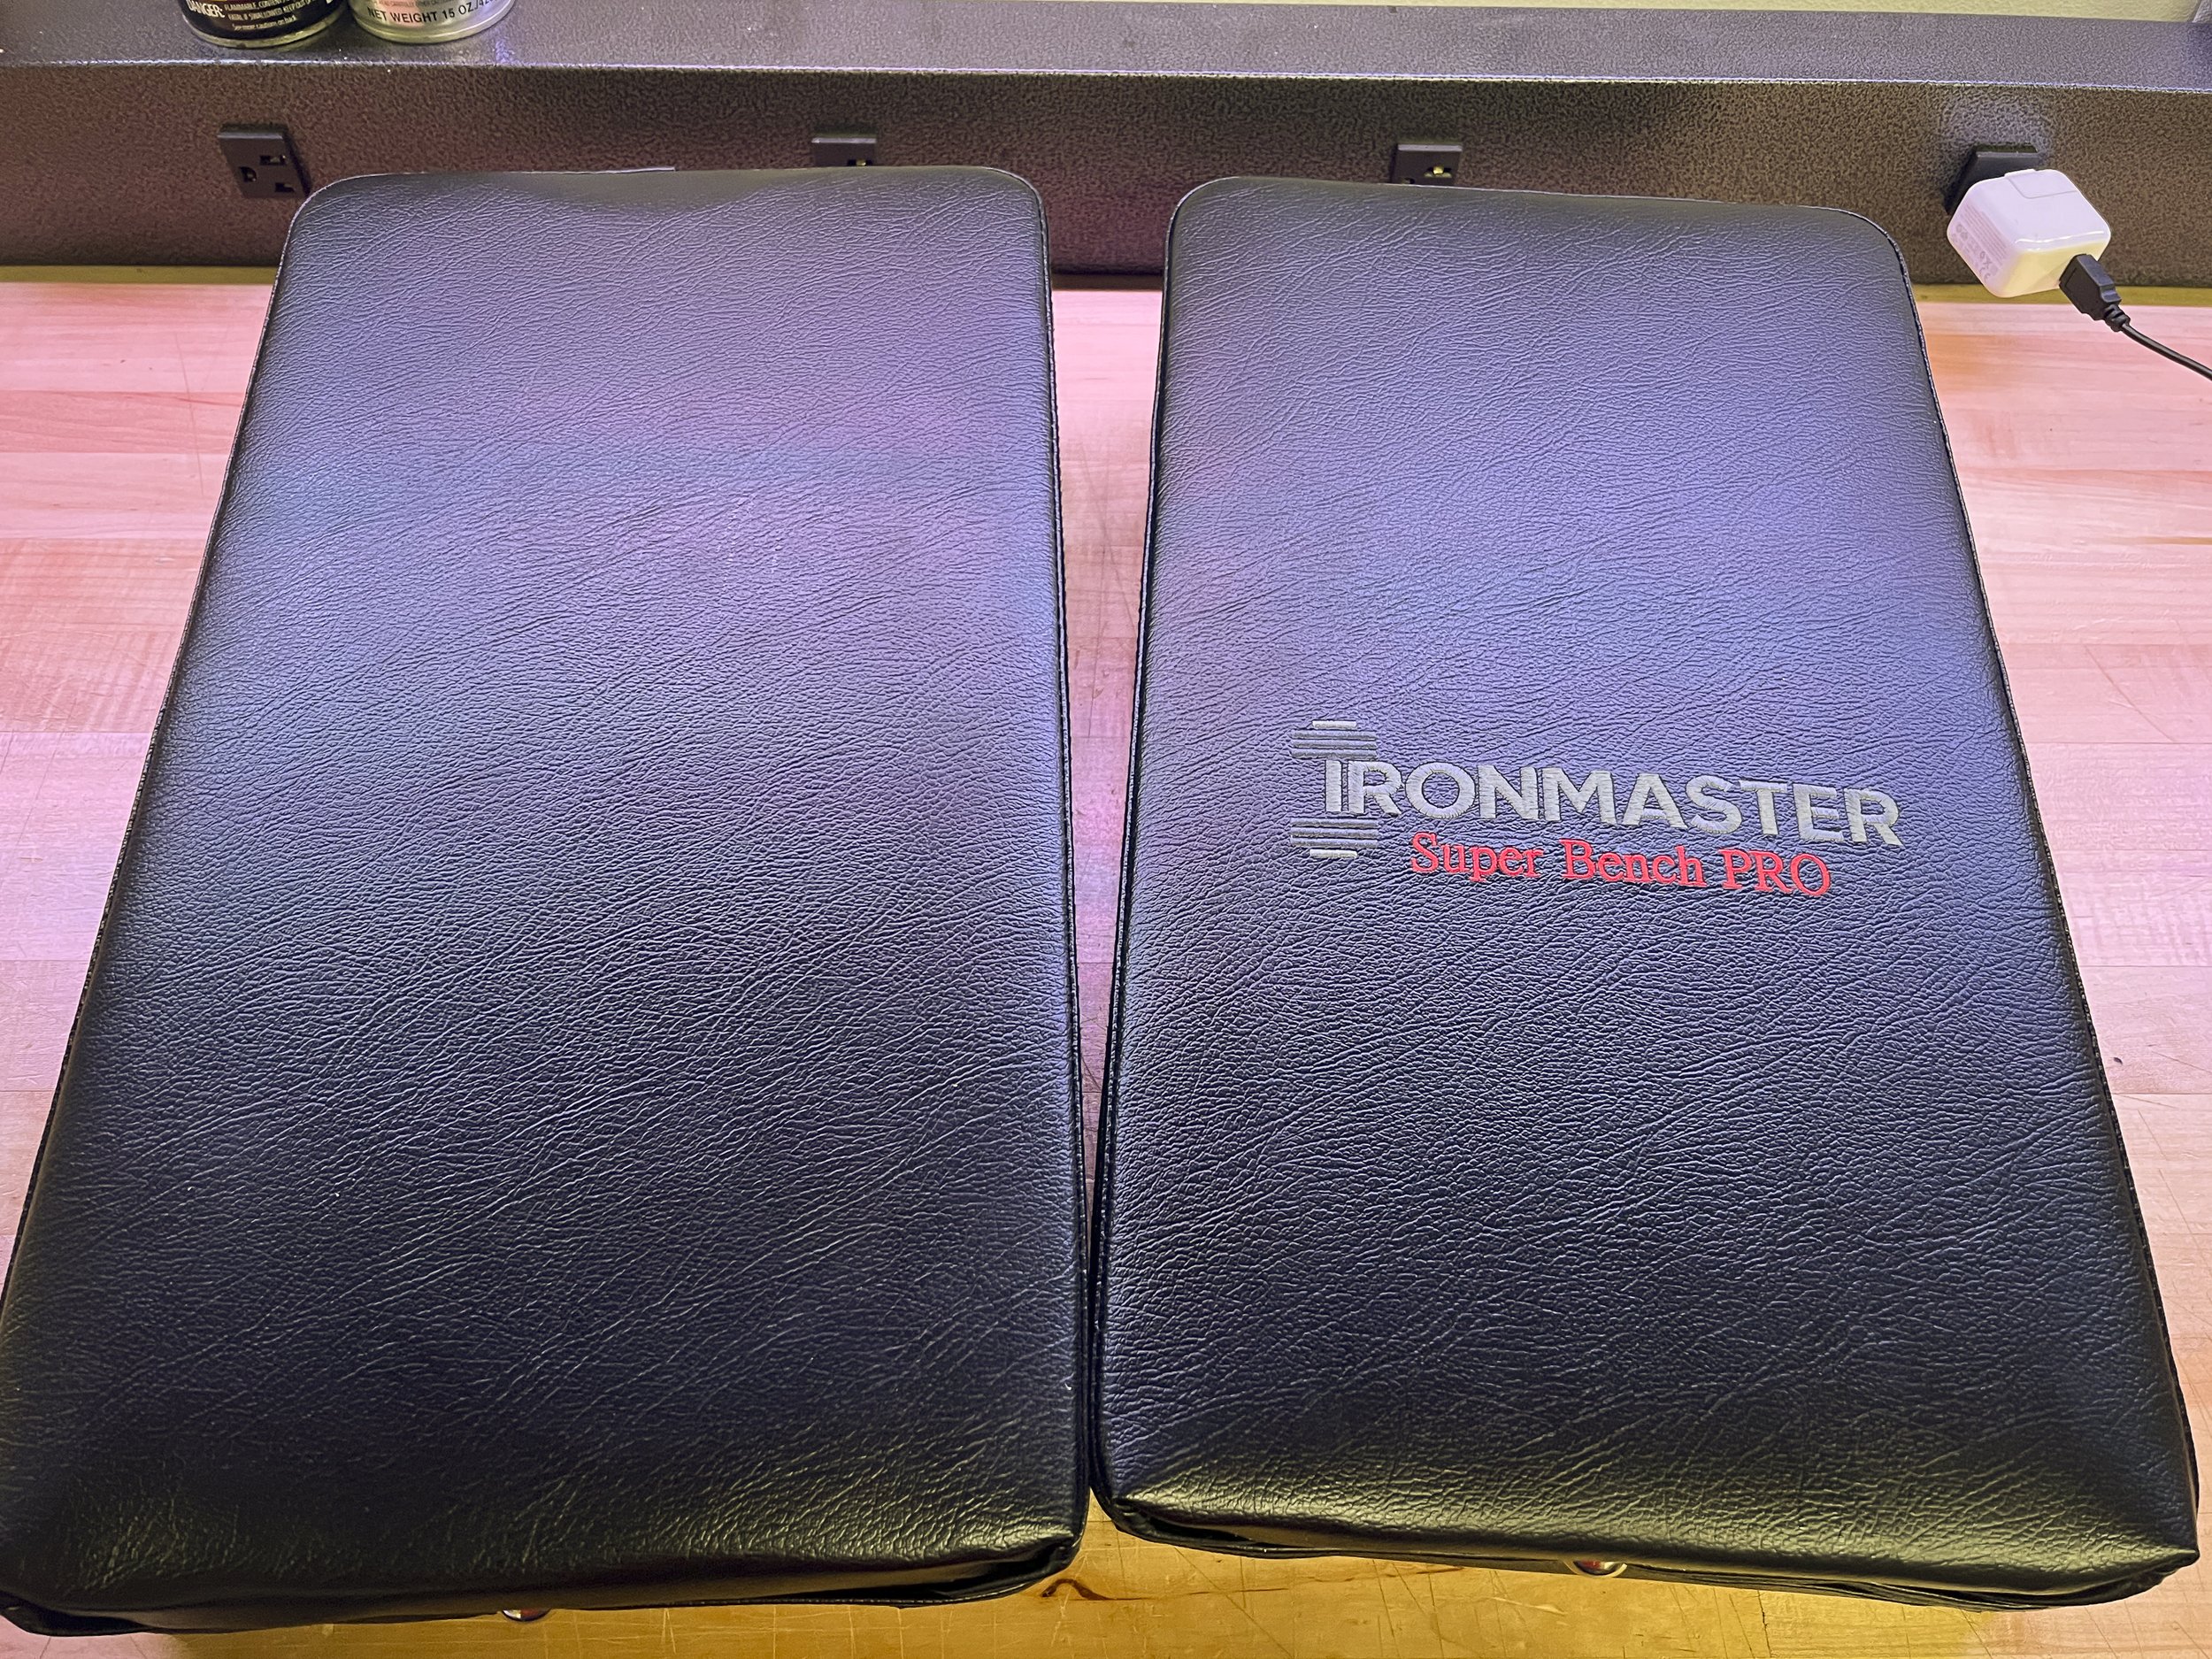
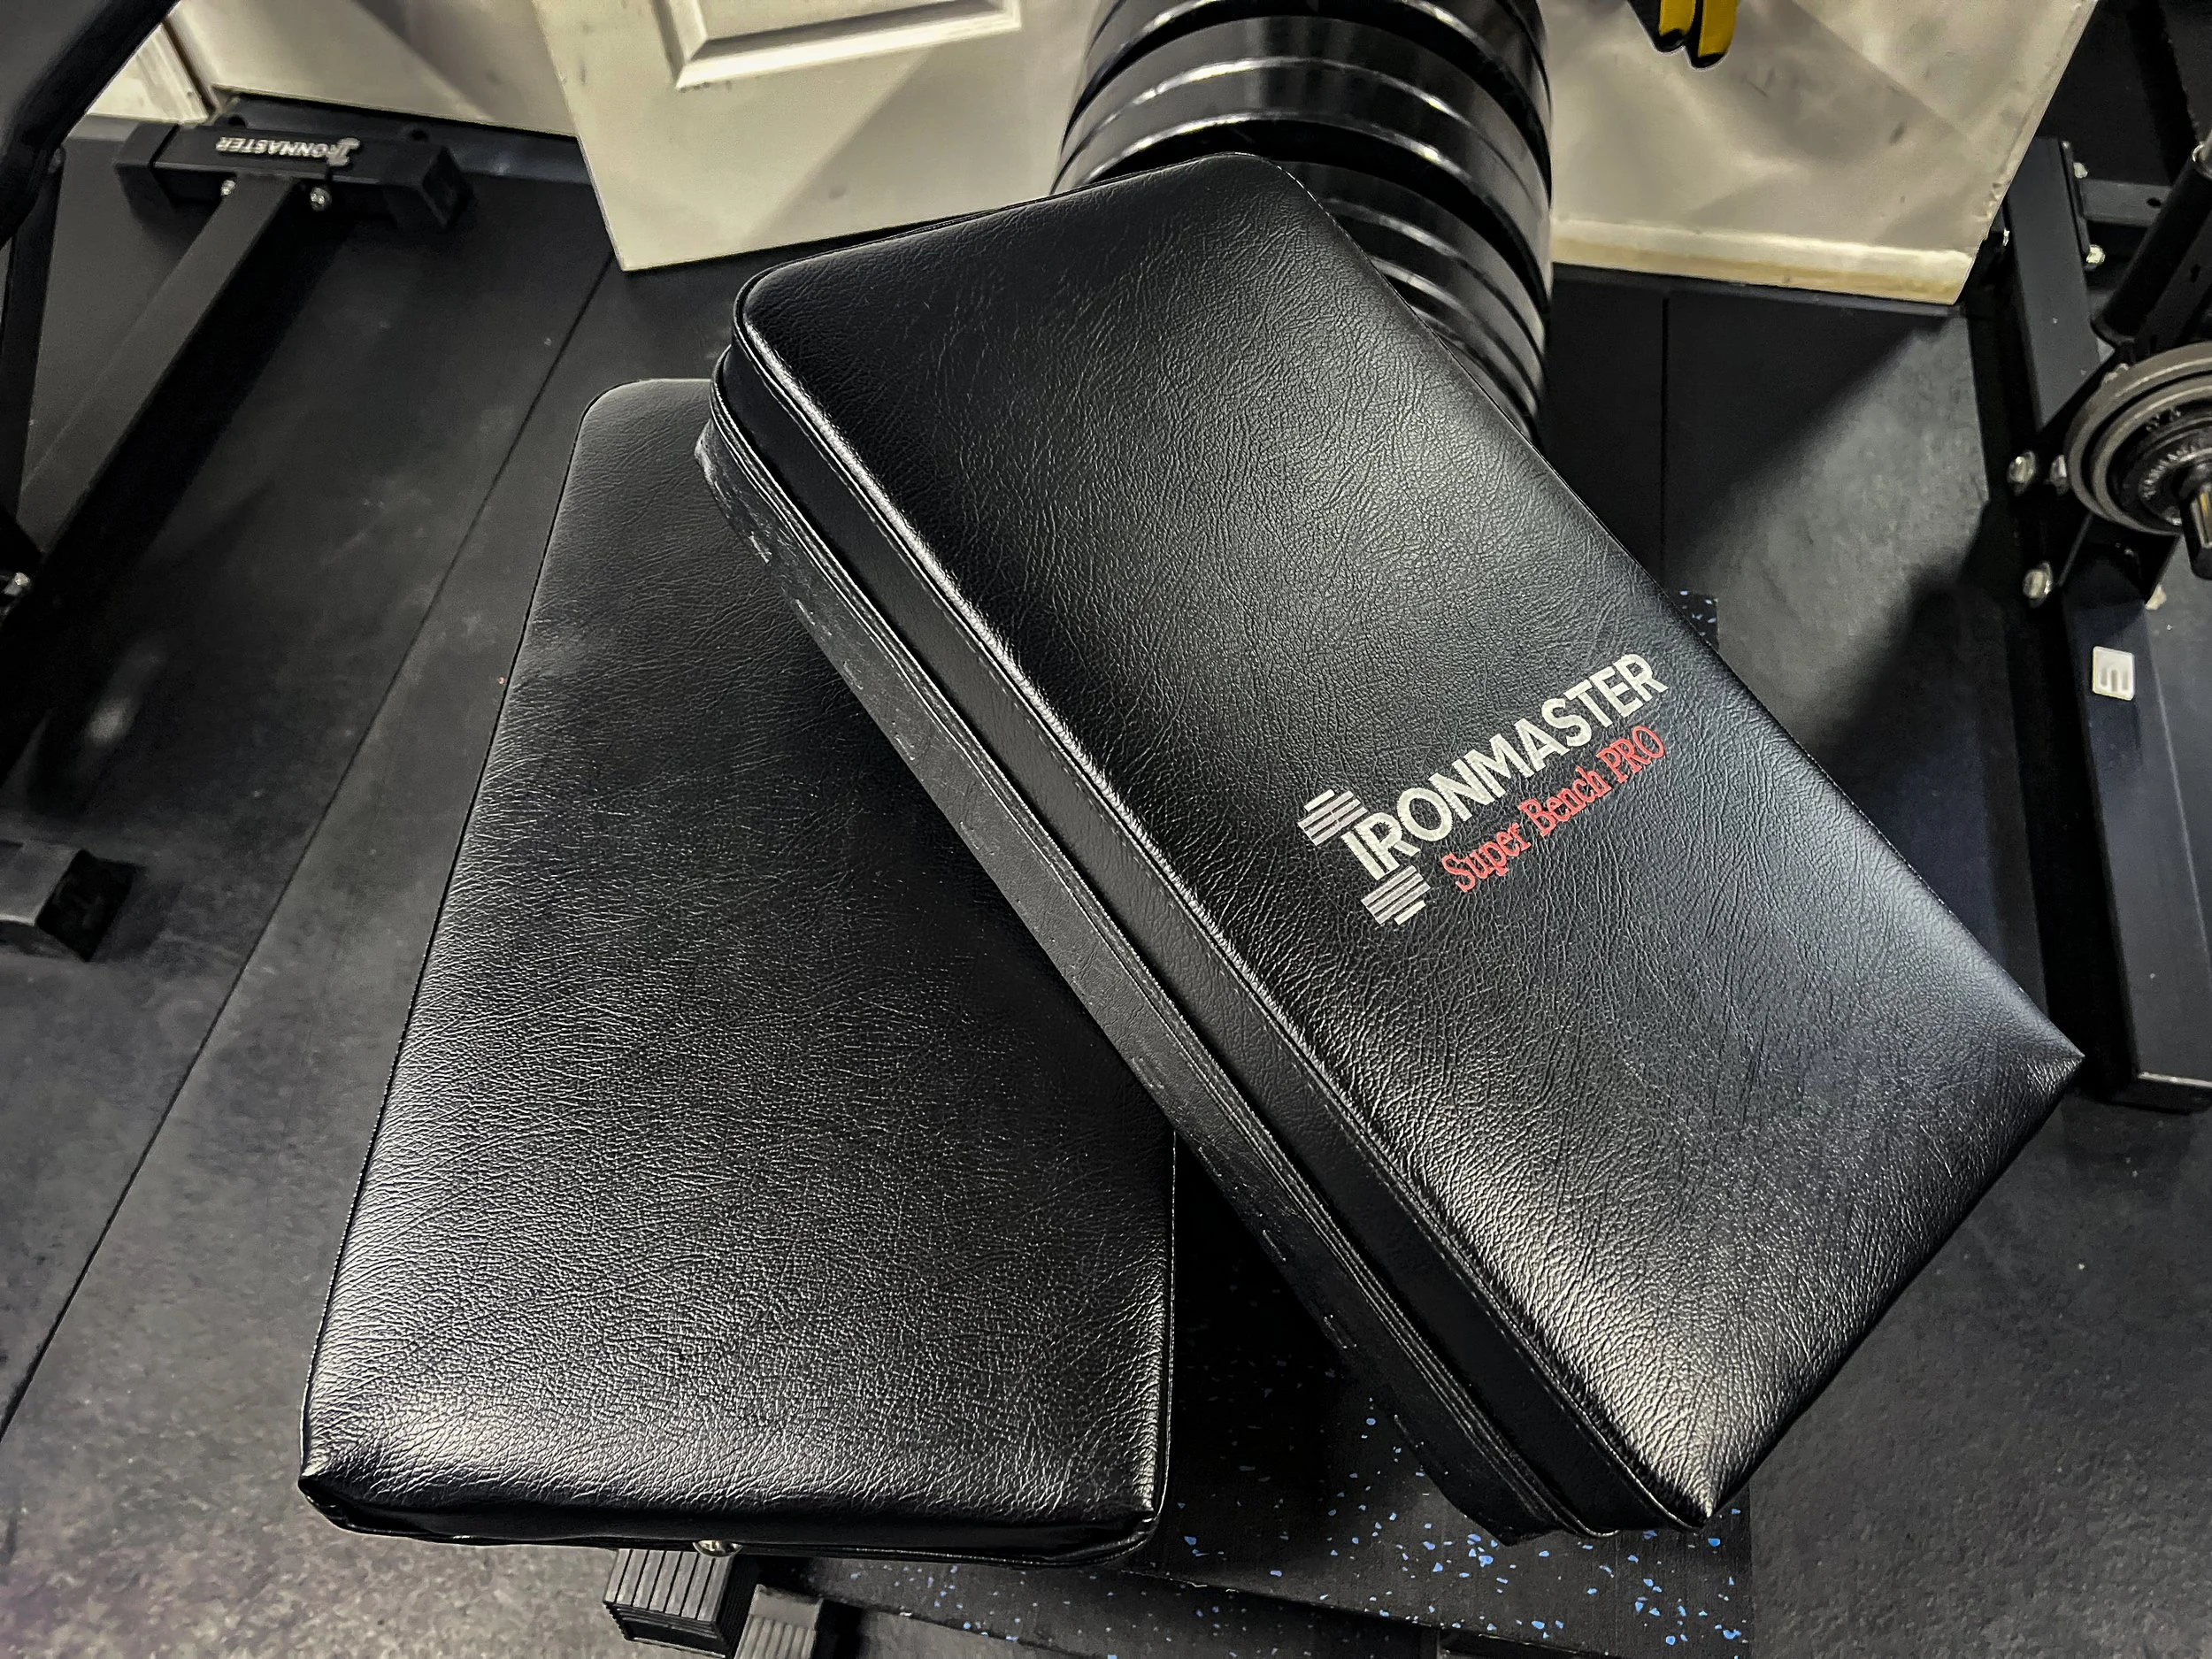
The biggest help was the old pad I had from one of our benches. Back in the day, Ironmaster Pro benches came with a straight pad and you had to purchase the ones that widen at the lumbar area. It’s now standard on the Pro V2 but not back then. We replaced them so I had the pad stored in the gym and that’s what allowed these blocks to come out looking so good.
The width of the blocks is simply the pad from the old Ironmaster bench and it’s plenty wide for my intended use. Height wise, I always use a Rogue 45-pound bumper plate as my riser and it measures roughly 3¼” high when it’s flipped on its side so I needed at least that much. I had a 2x8 left over from another project and, when combined with the bench pad, the total height added up to 3½” and I figured that was close enough. I used my past experience and a bumper plate to determine the length and 18” seemed to be about right. It’s big enough for the intended use and it left a bit of extra material to play with when cutting the old bench apart and making it into the new deadlift blocks.
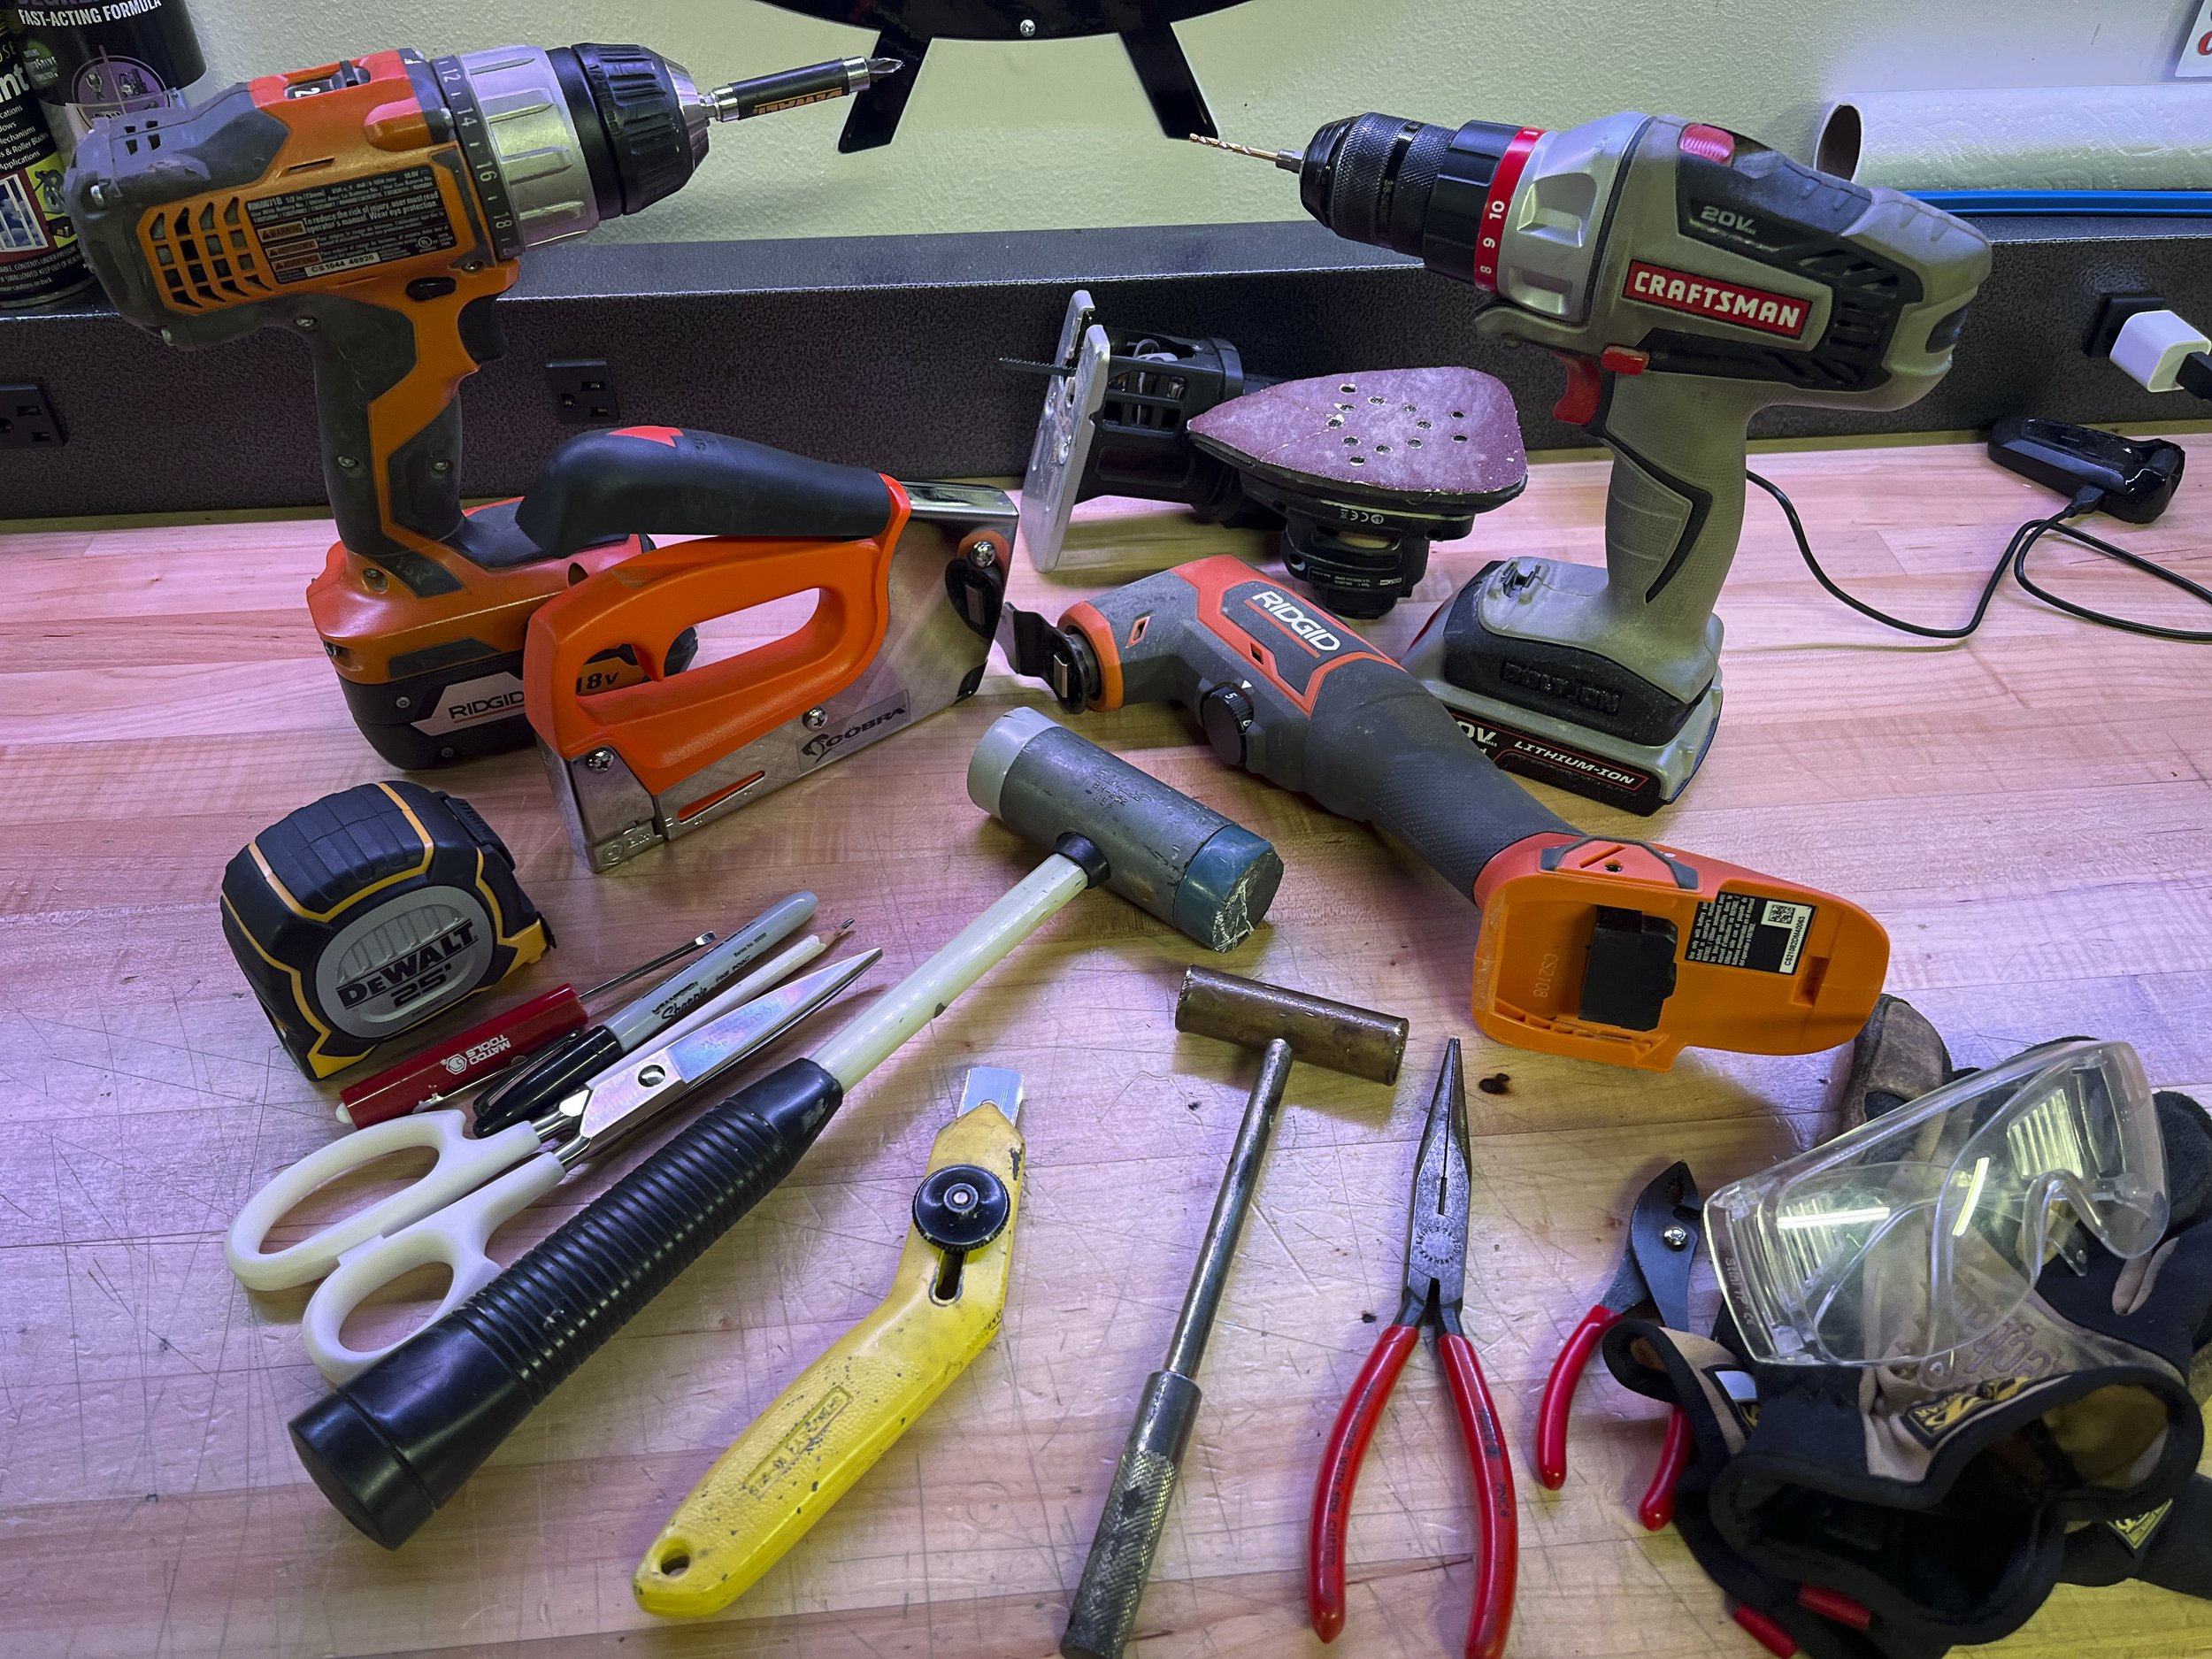
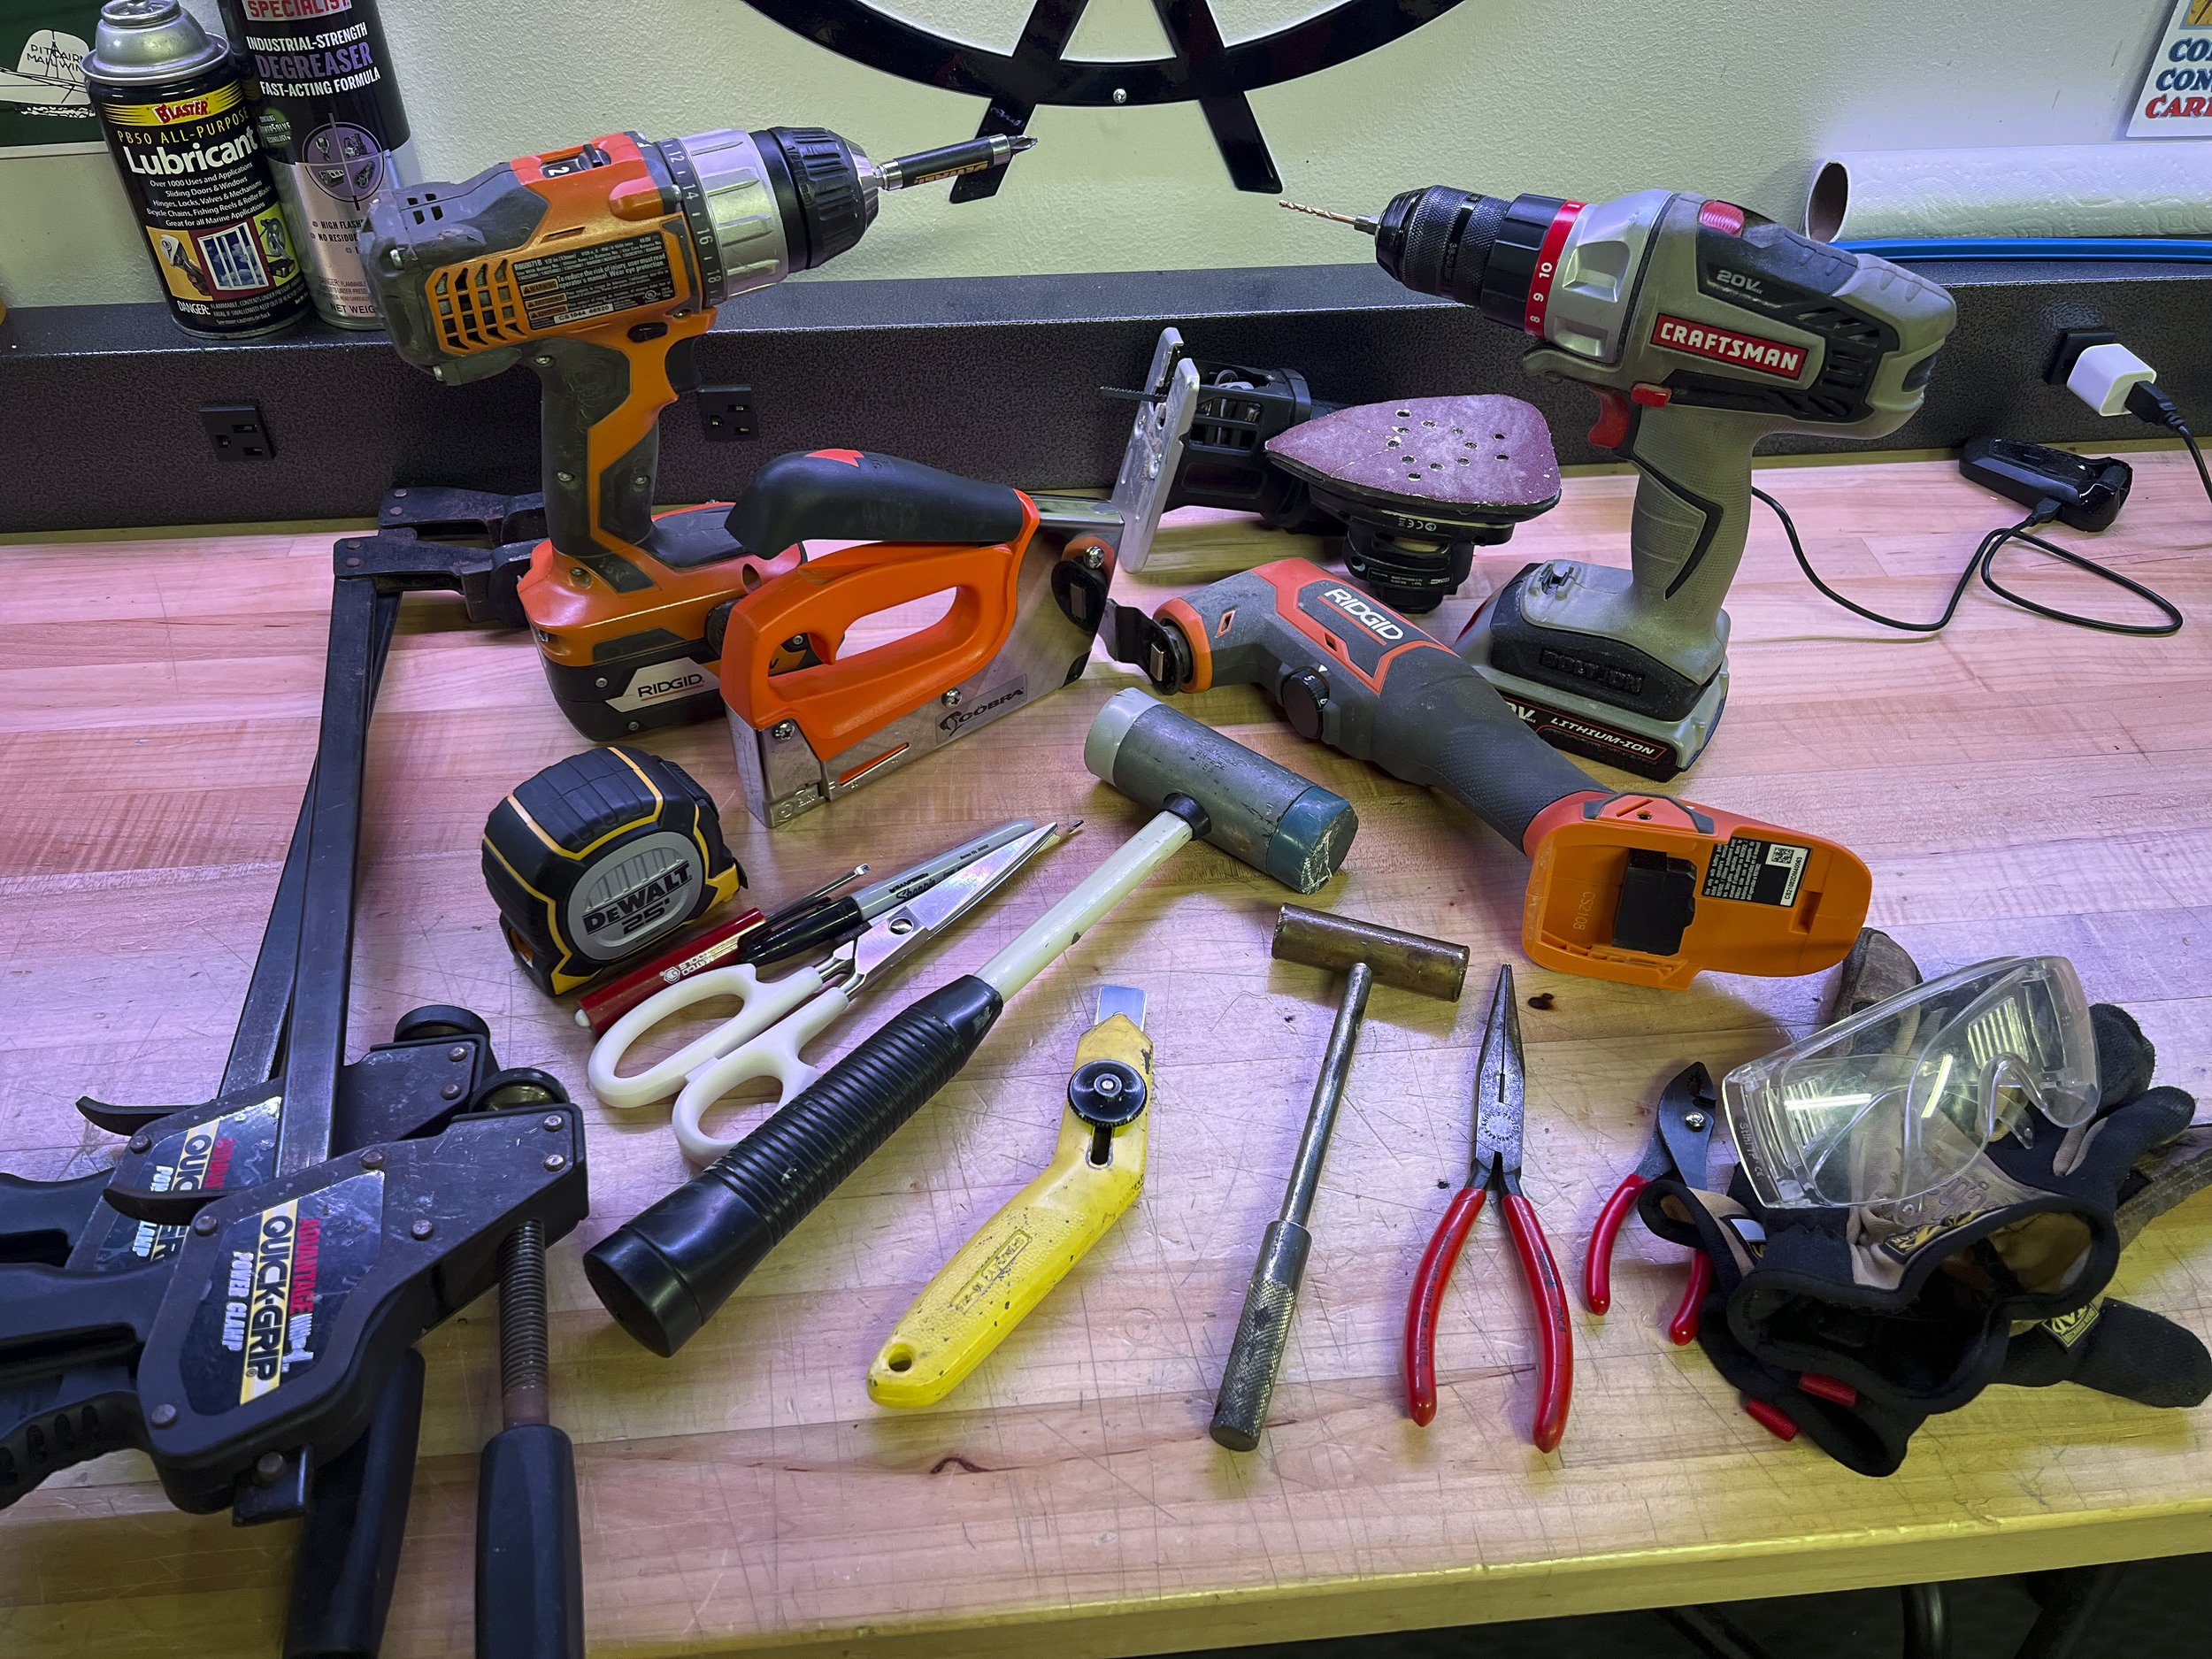
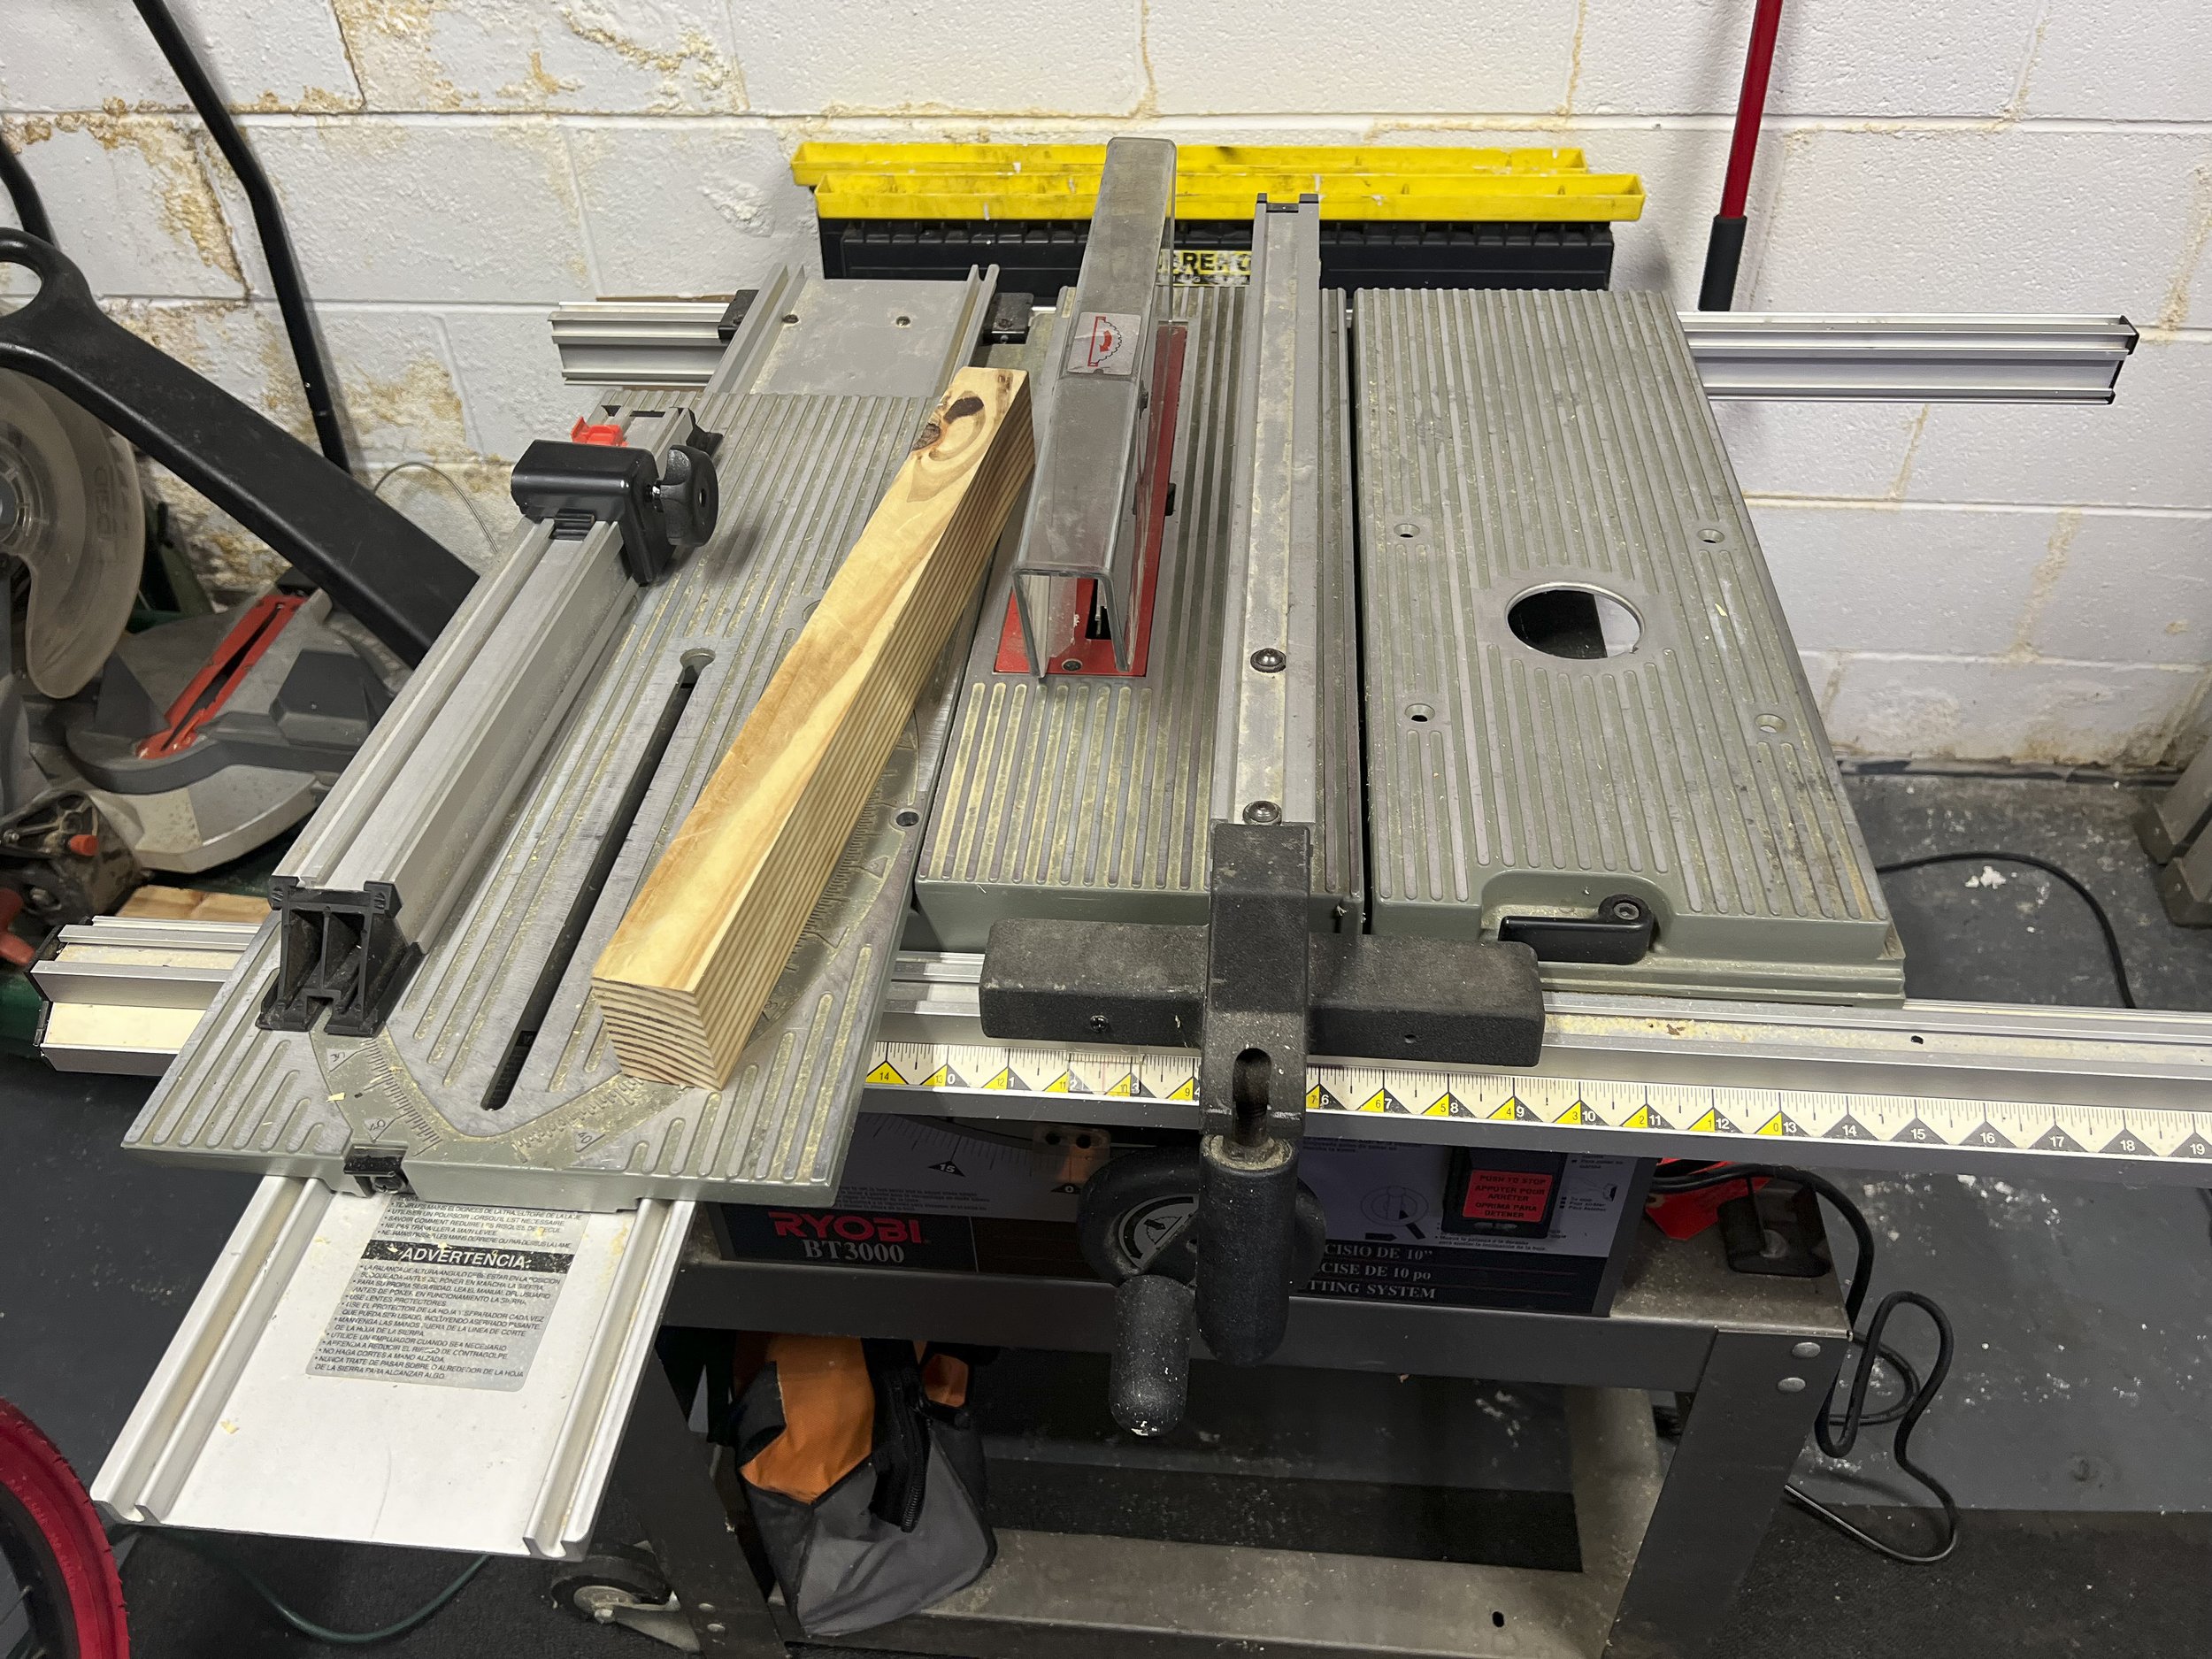
The tools were fairly simple and straightforward. My main weapons were a small screwdriver for prying staples, some needle nose pliers, the staple gun and a drill and screw gun. The other tools that came in handy were some clamps, the oscillating multi-tool, a jigsaw and a sander. I used the table saw because the 2x8 by itself wasn’t wide enough. It needed to be made from at least two pieces, joined side by side, to equal the width of the bench pad.
I decided to make the middle of the bench pad into the waste section. The idea was to cut it in half, making two separate pieces and use one for each block. I could also use the rounded corners on opposite ends of the bench so each block would have one end with factory corners and one with two that I’d rounded to match.
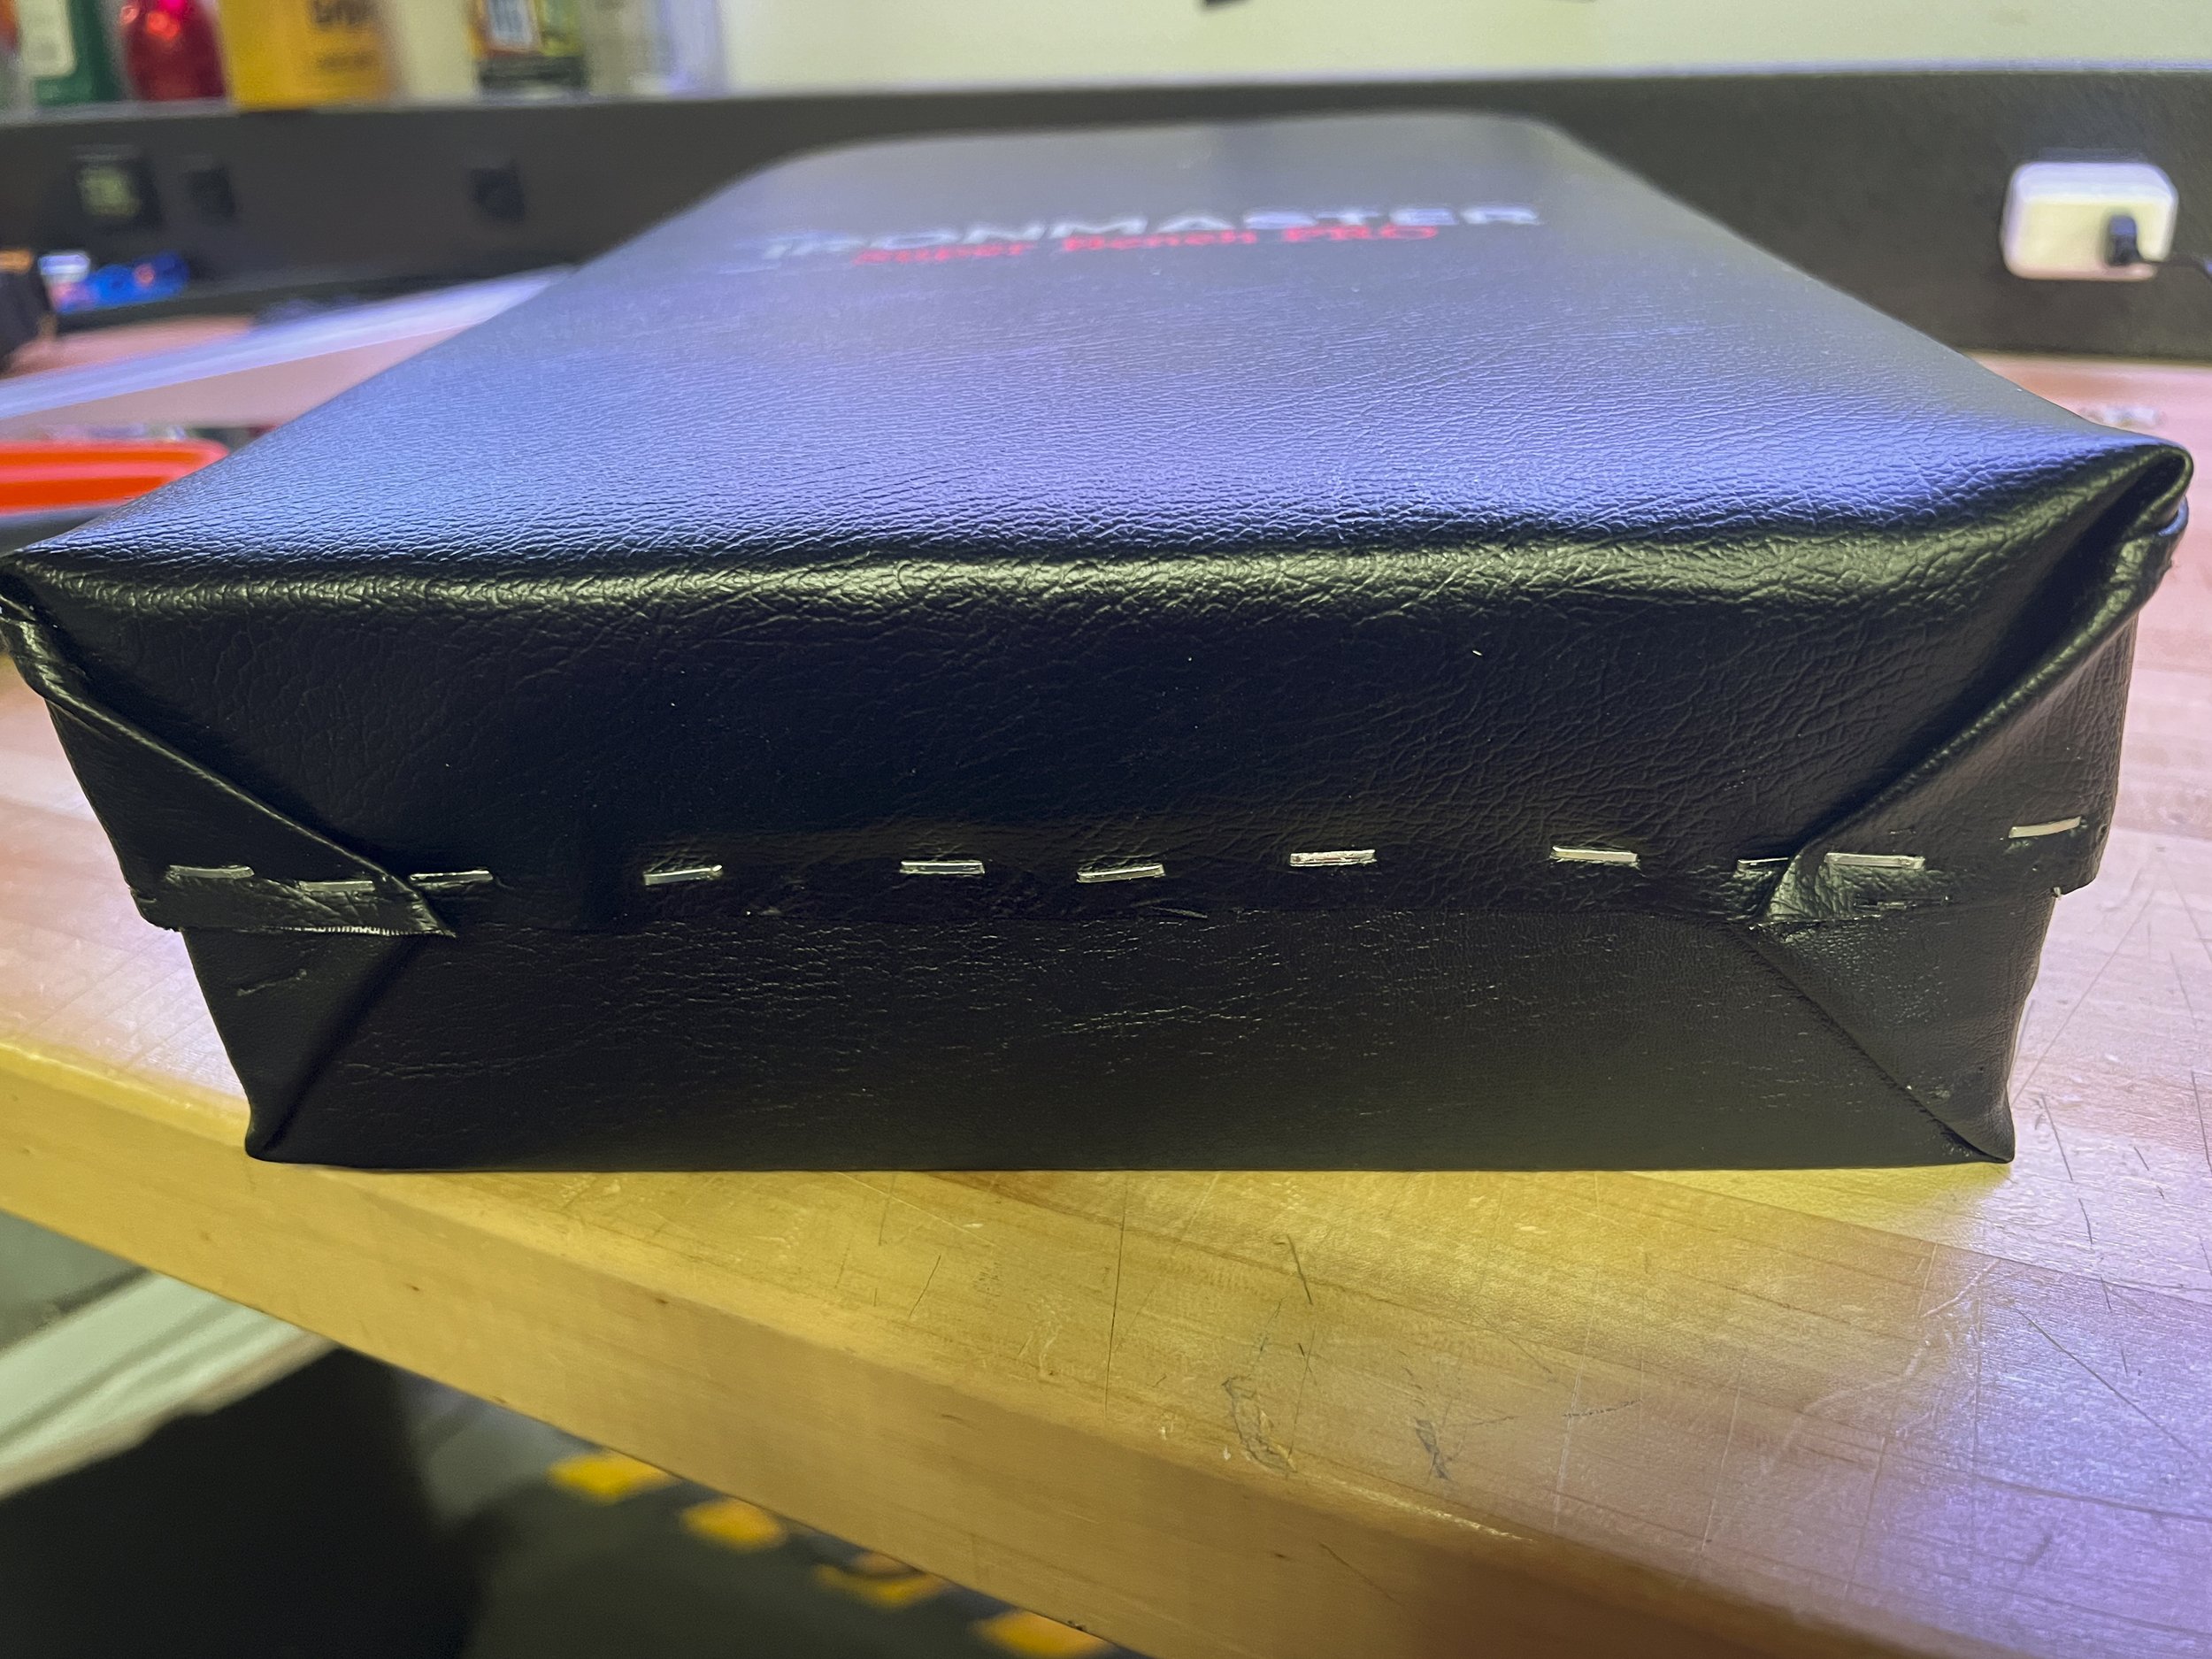
The first step was to deconstruct the old bench pad. It’s pretty simple and made up of just a few pieces. The vinyl covering consists of a top and bottom piece with the seam hidden by a welt. I first removed the welt; the staples are hidden where it folds over. Simply pull the folds apart and, using a small screwdriver, pry up on the staple. You can also slide the screwdriver underneath the welt itself but be careful you don’t rip the staple through the fabric of the welt. It’s needed for final assembly and I wanted to have as much solid real estate as possible when I attached it to the new deadlift blocks.
That left the bottom of the bench pad which was nothing more than a piece of plywood with a vinyl covering stapled to it. It made up the bottom of the bench and had some small threaded inserts used to bolt the pad to the bench structure. Once again, I went around the whole thing and gently remove each of the staples. There was nothing left but the now removed piece of vinyl and the plywood that it covered.
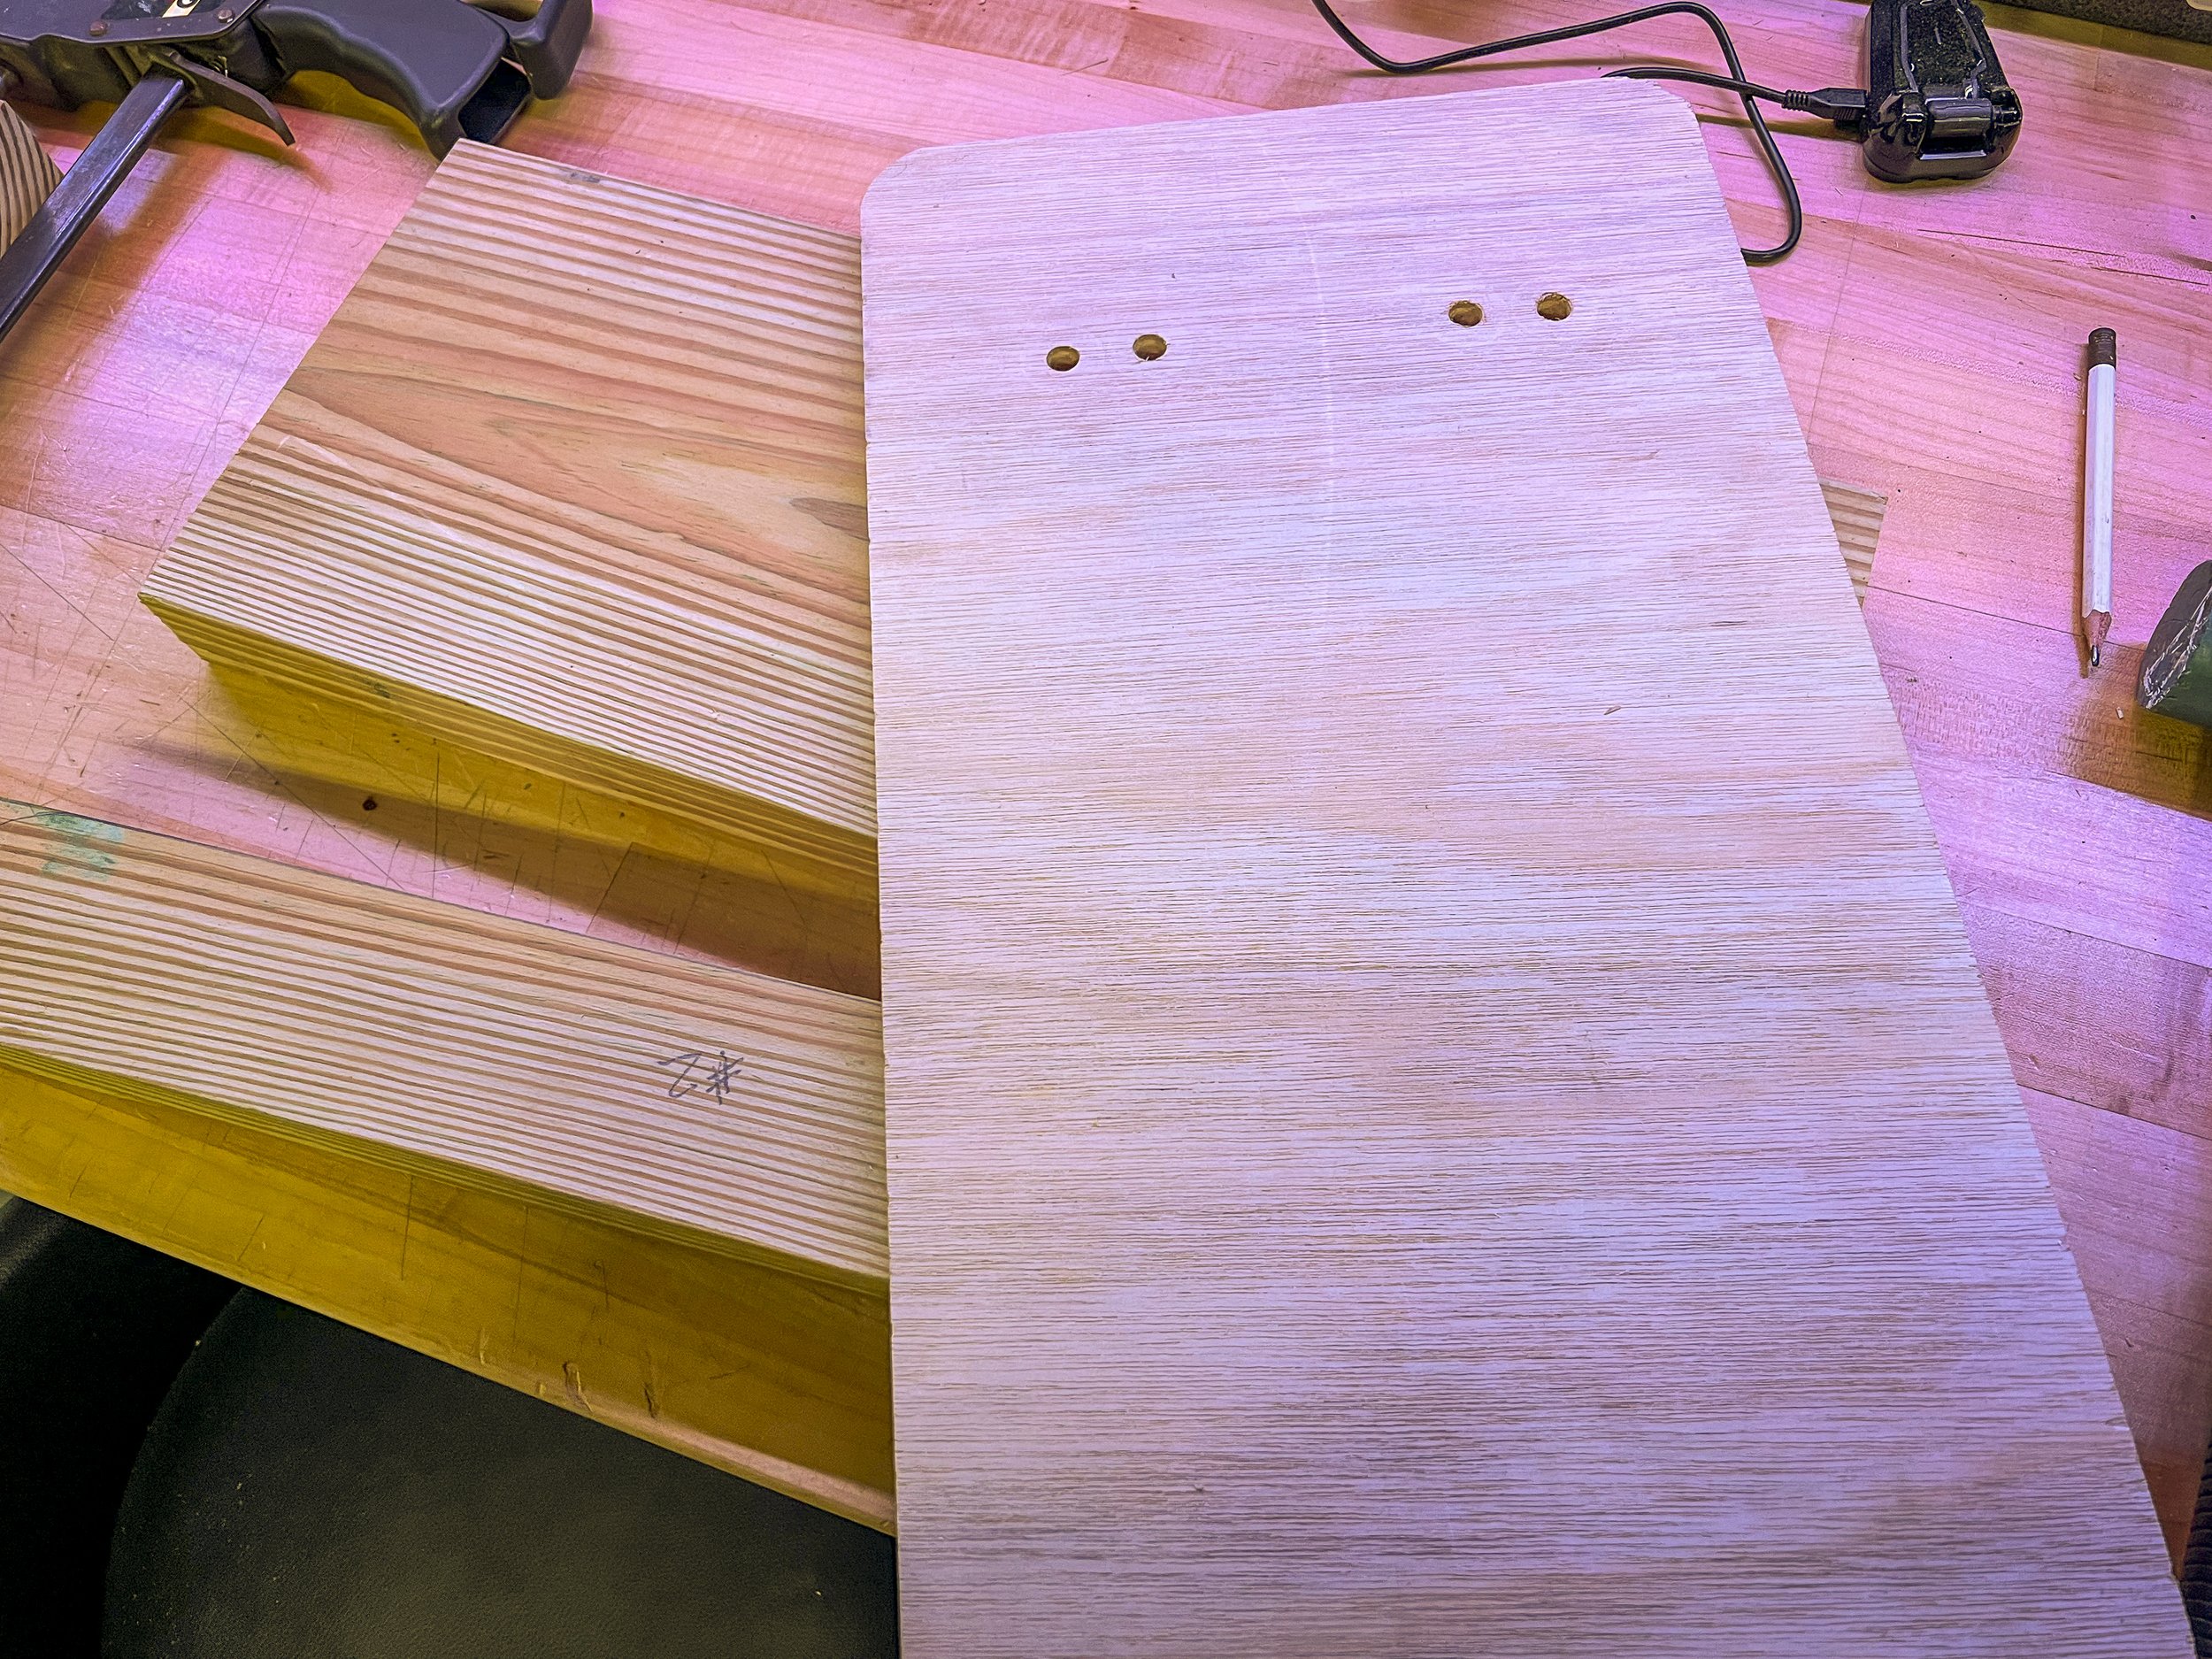
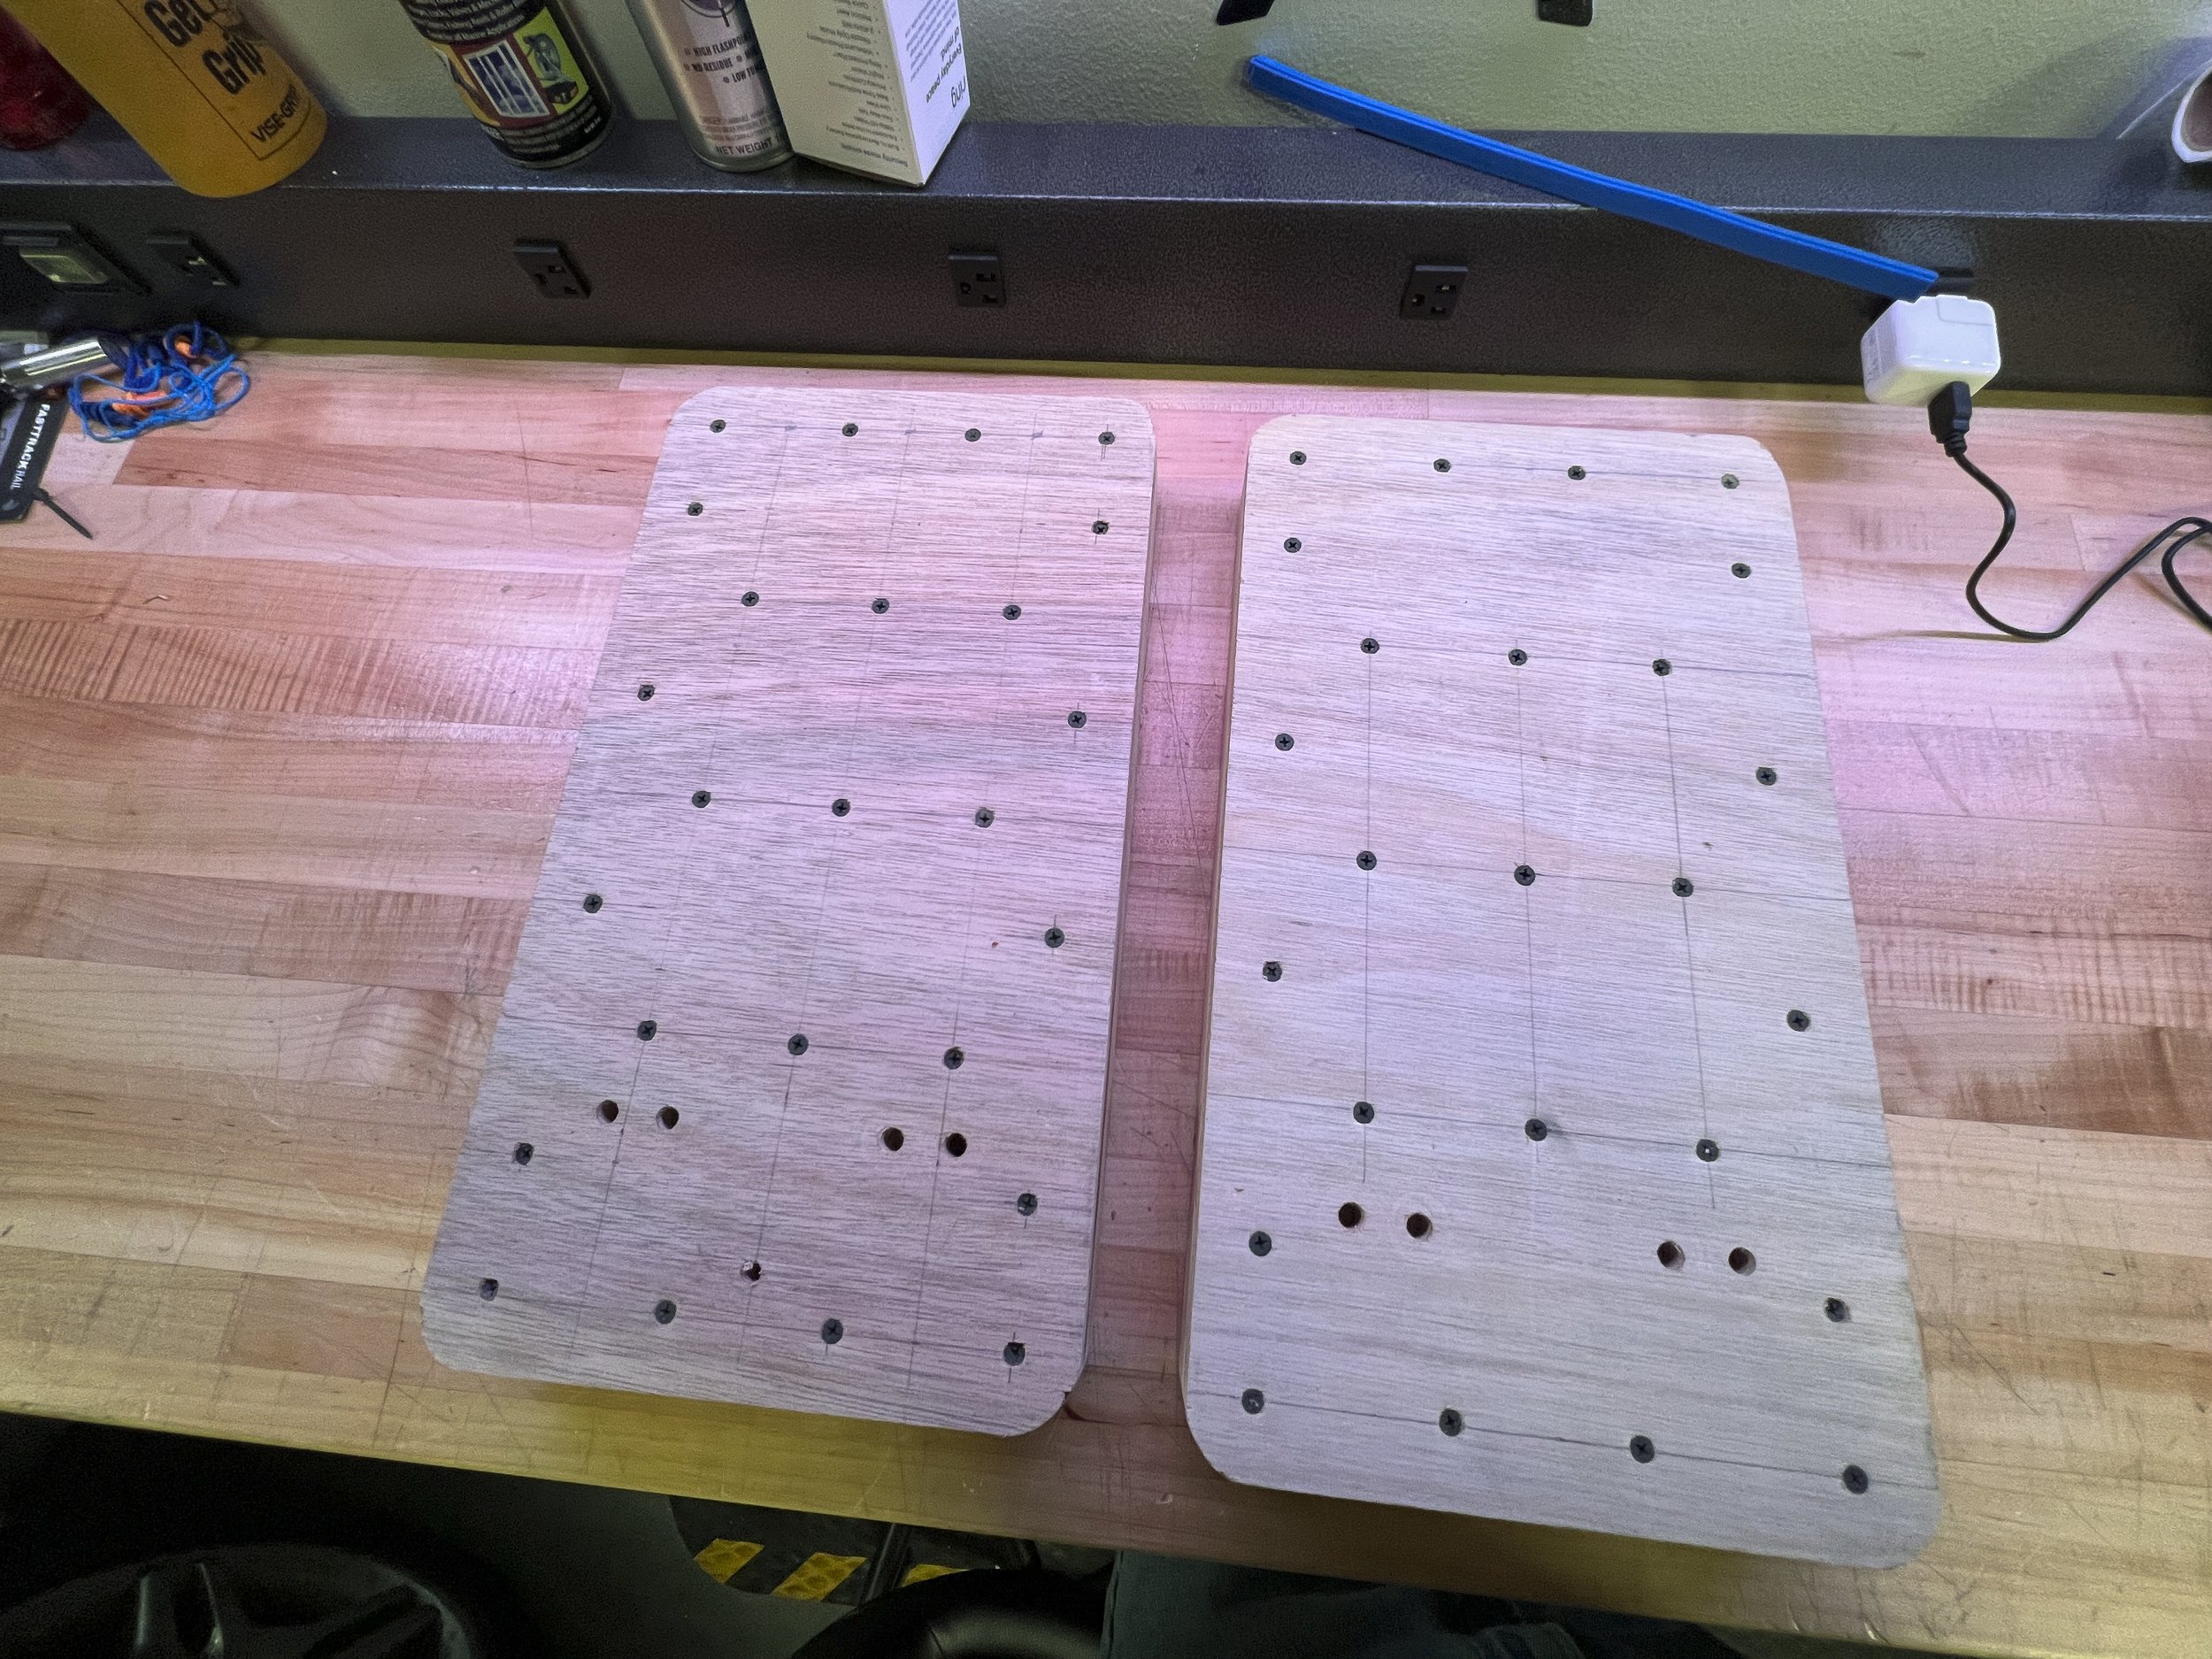
The plywood became the base of the deadlift blocks. I re-covered it with the piece that was previously removed but not until everything was cut to length, the pieces of 2x8 were added and the rounded corners from one end were matched and cut on the opposite one. I measured 18” from each end and cut them down, used one to mark each radius on the other piece of plywood and then cut around the marked lines. That left two very nice 18” pieces of plywood with four rounded corners each.
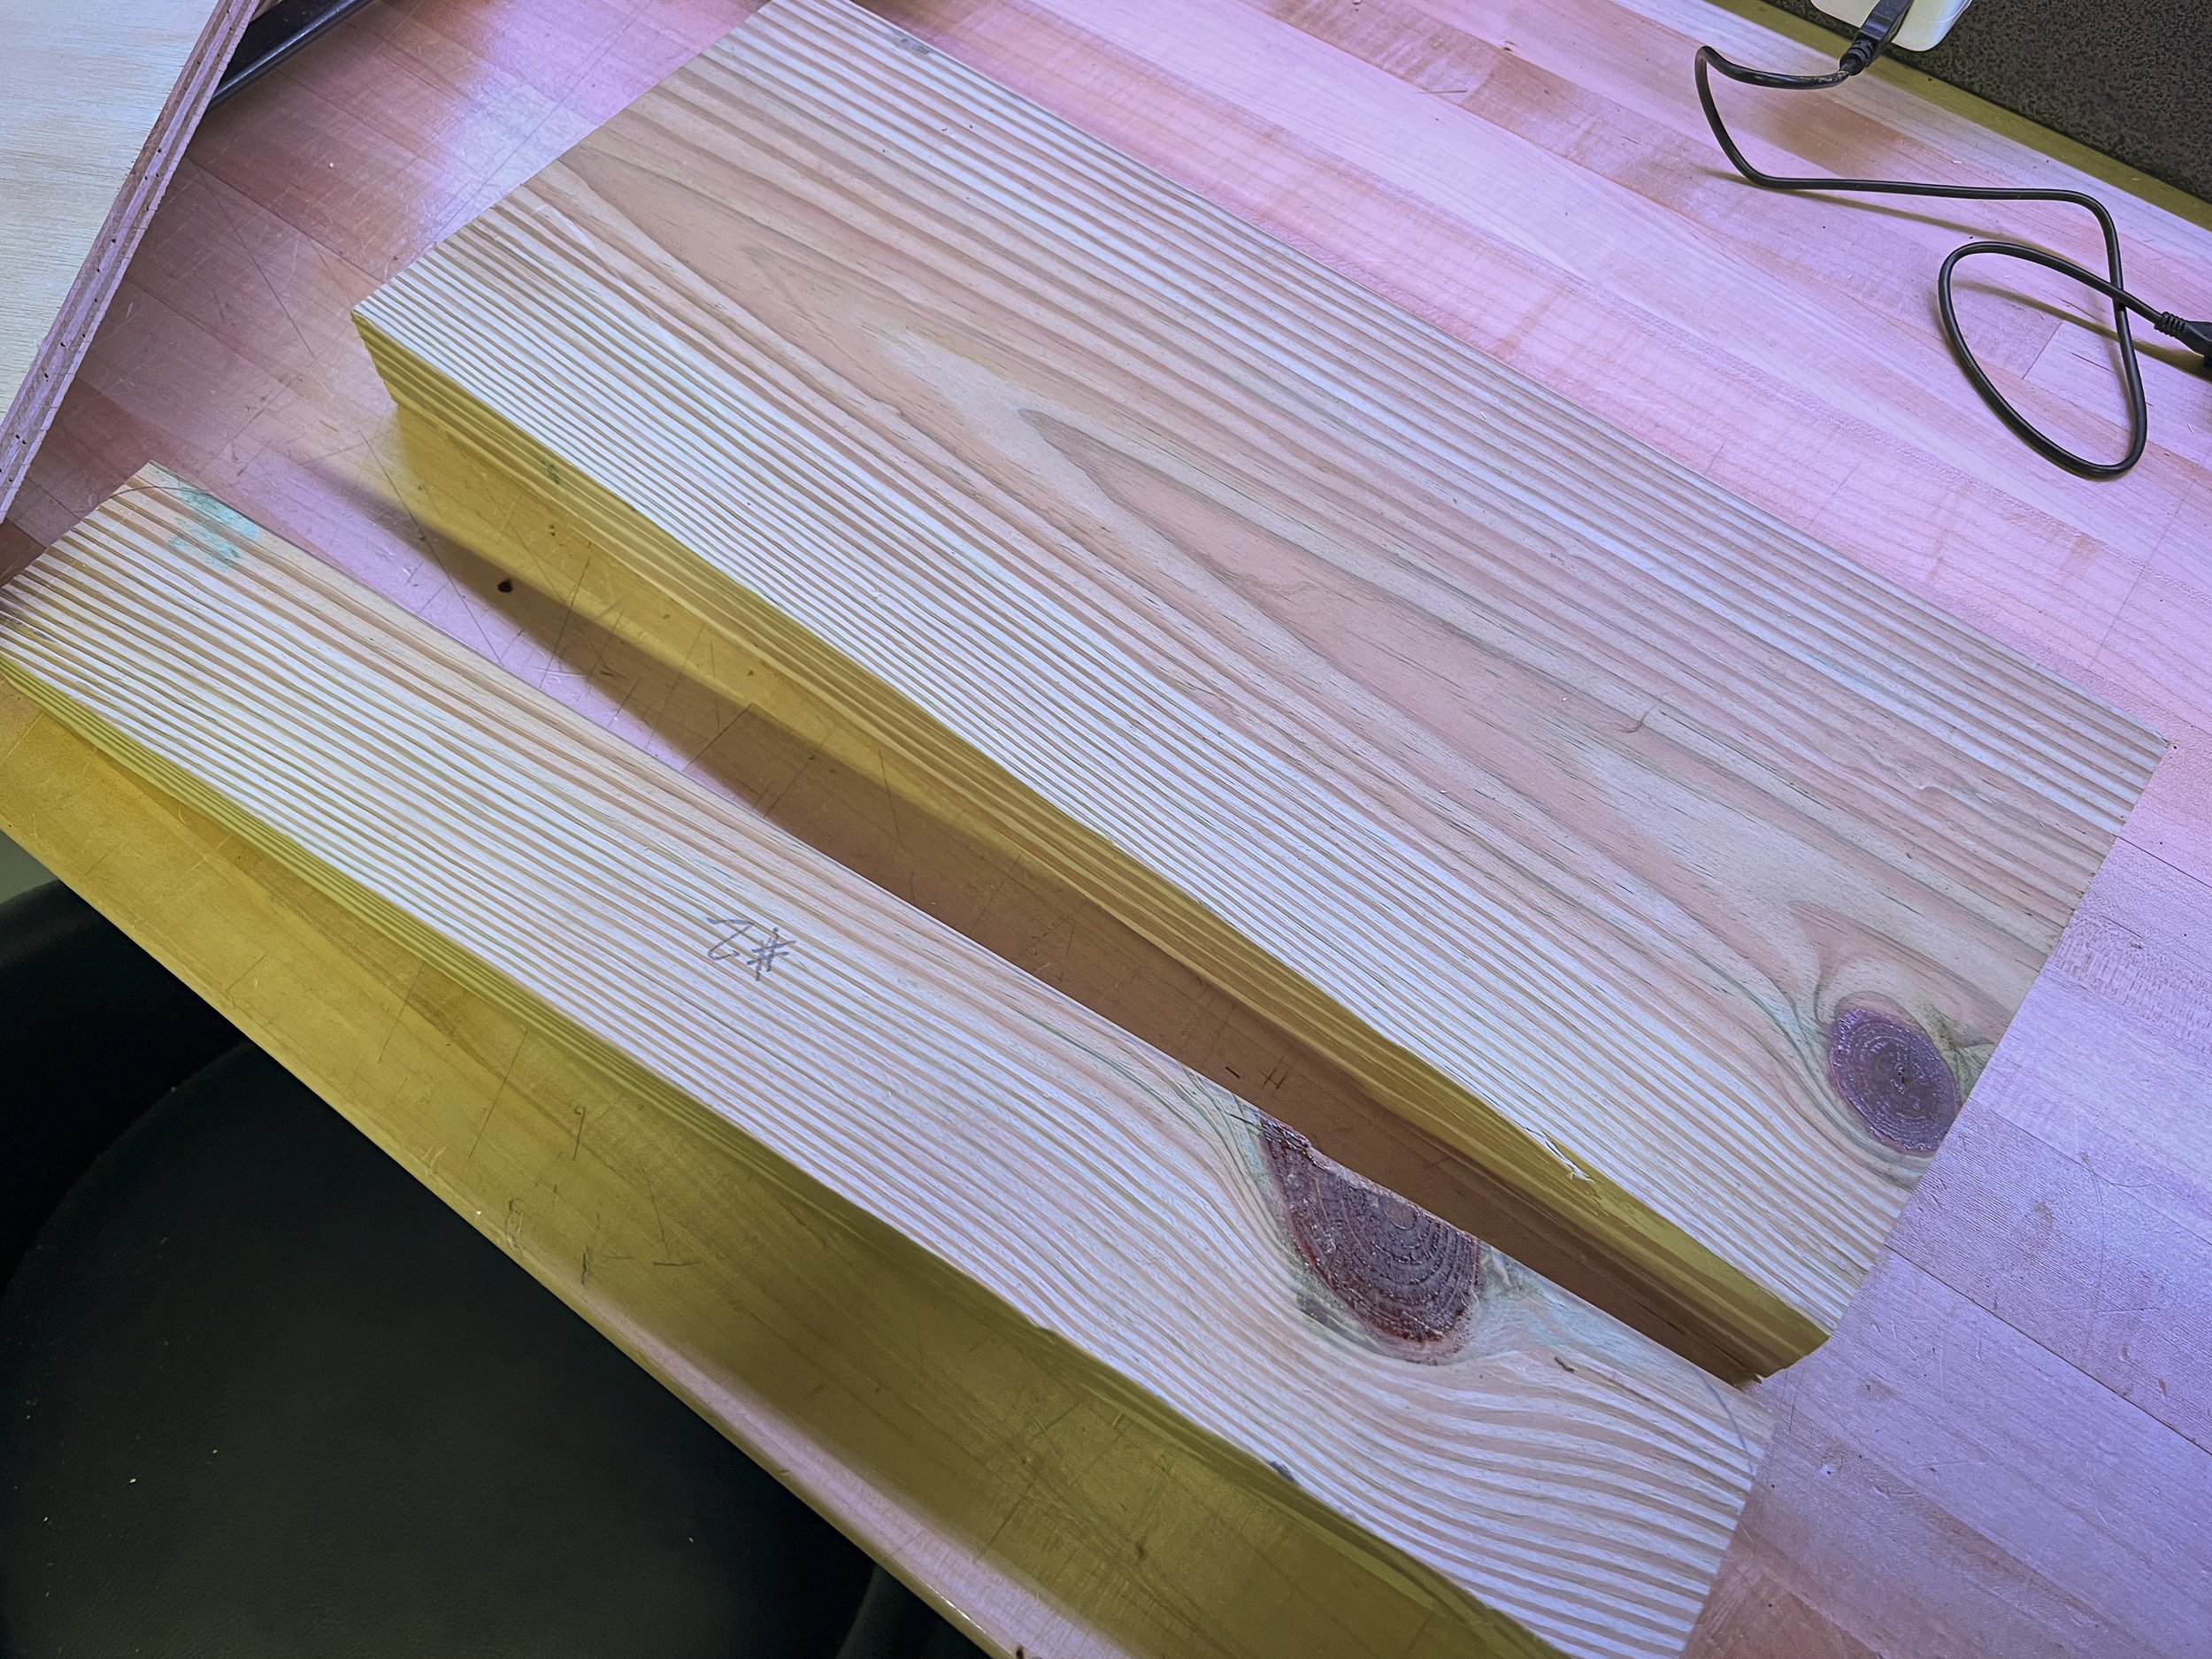
The next step was to cut the 2x8 into 18” pieces. Each deadlift block required a full 2x8-18” and an additional 18” piece ripped to the correct width so that both pieces, when put together, became exactly the same width as the plywood from the bench. NOTE: it would have been a lot easier to cut out two pieces of ¾” plywood and stack them to add up to the 1½” of a 2-by but this is what I had and I have the table saw so it wasn’t a big deal. I waited until after I had mated the two pieces of 2x8 and the original bench pad plywood before I cut the radii on the 2x8s but I could have done it either way.
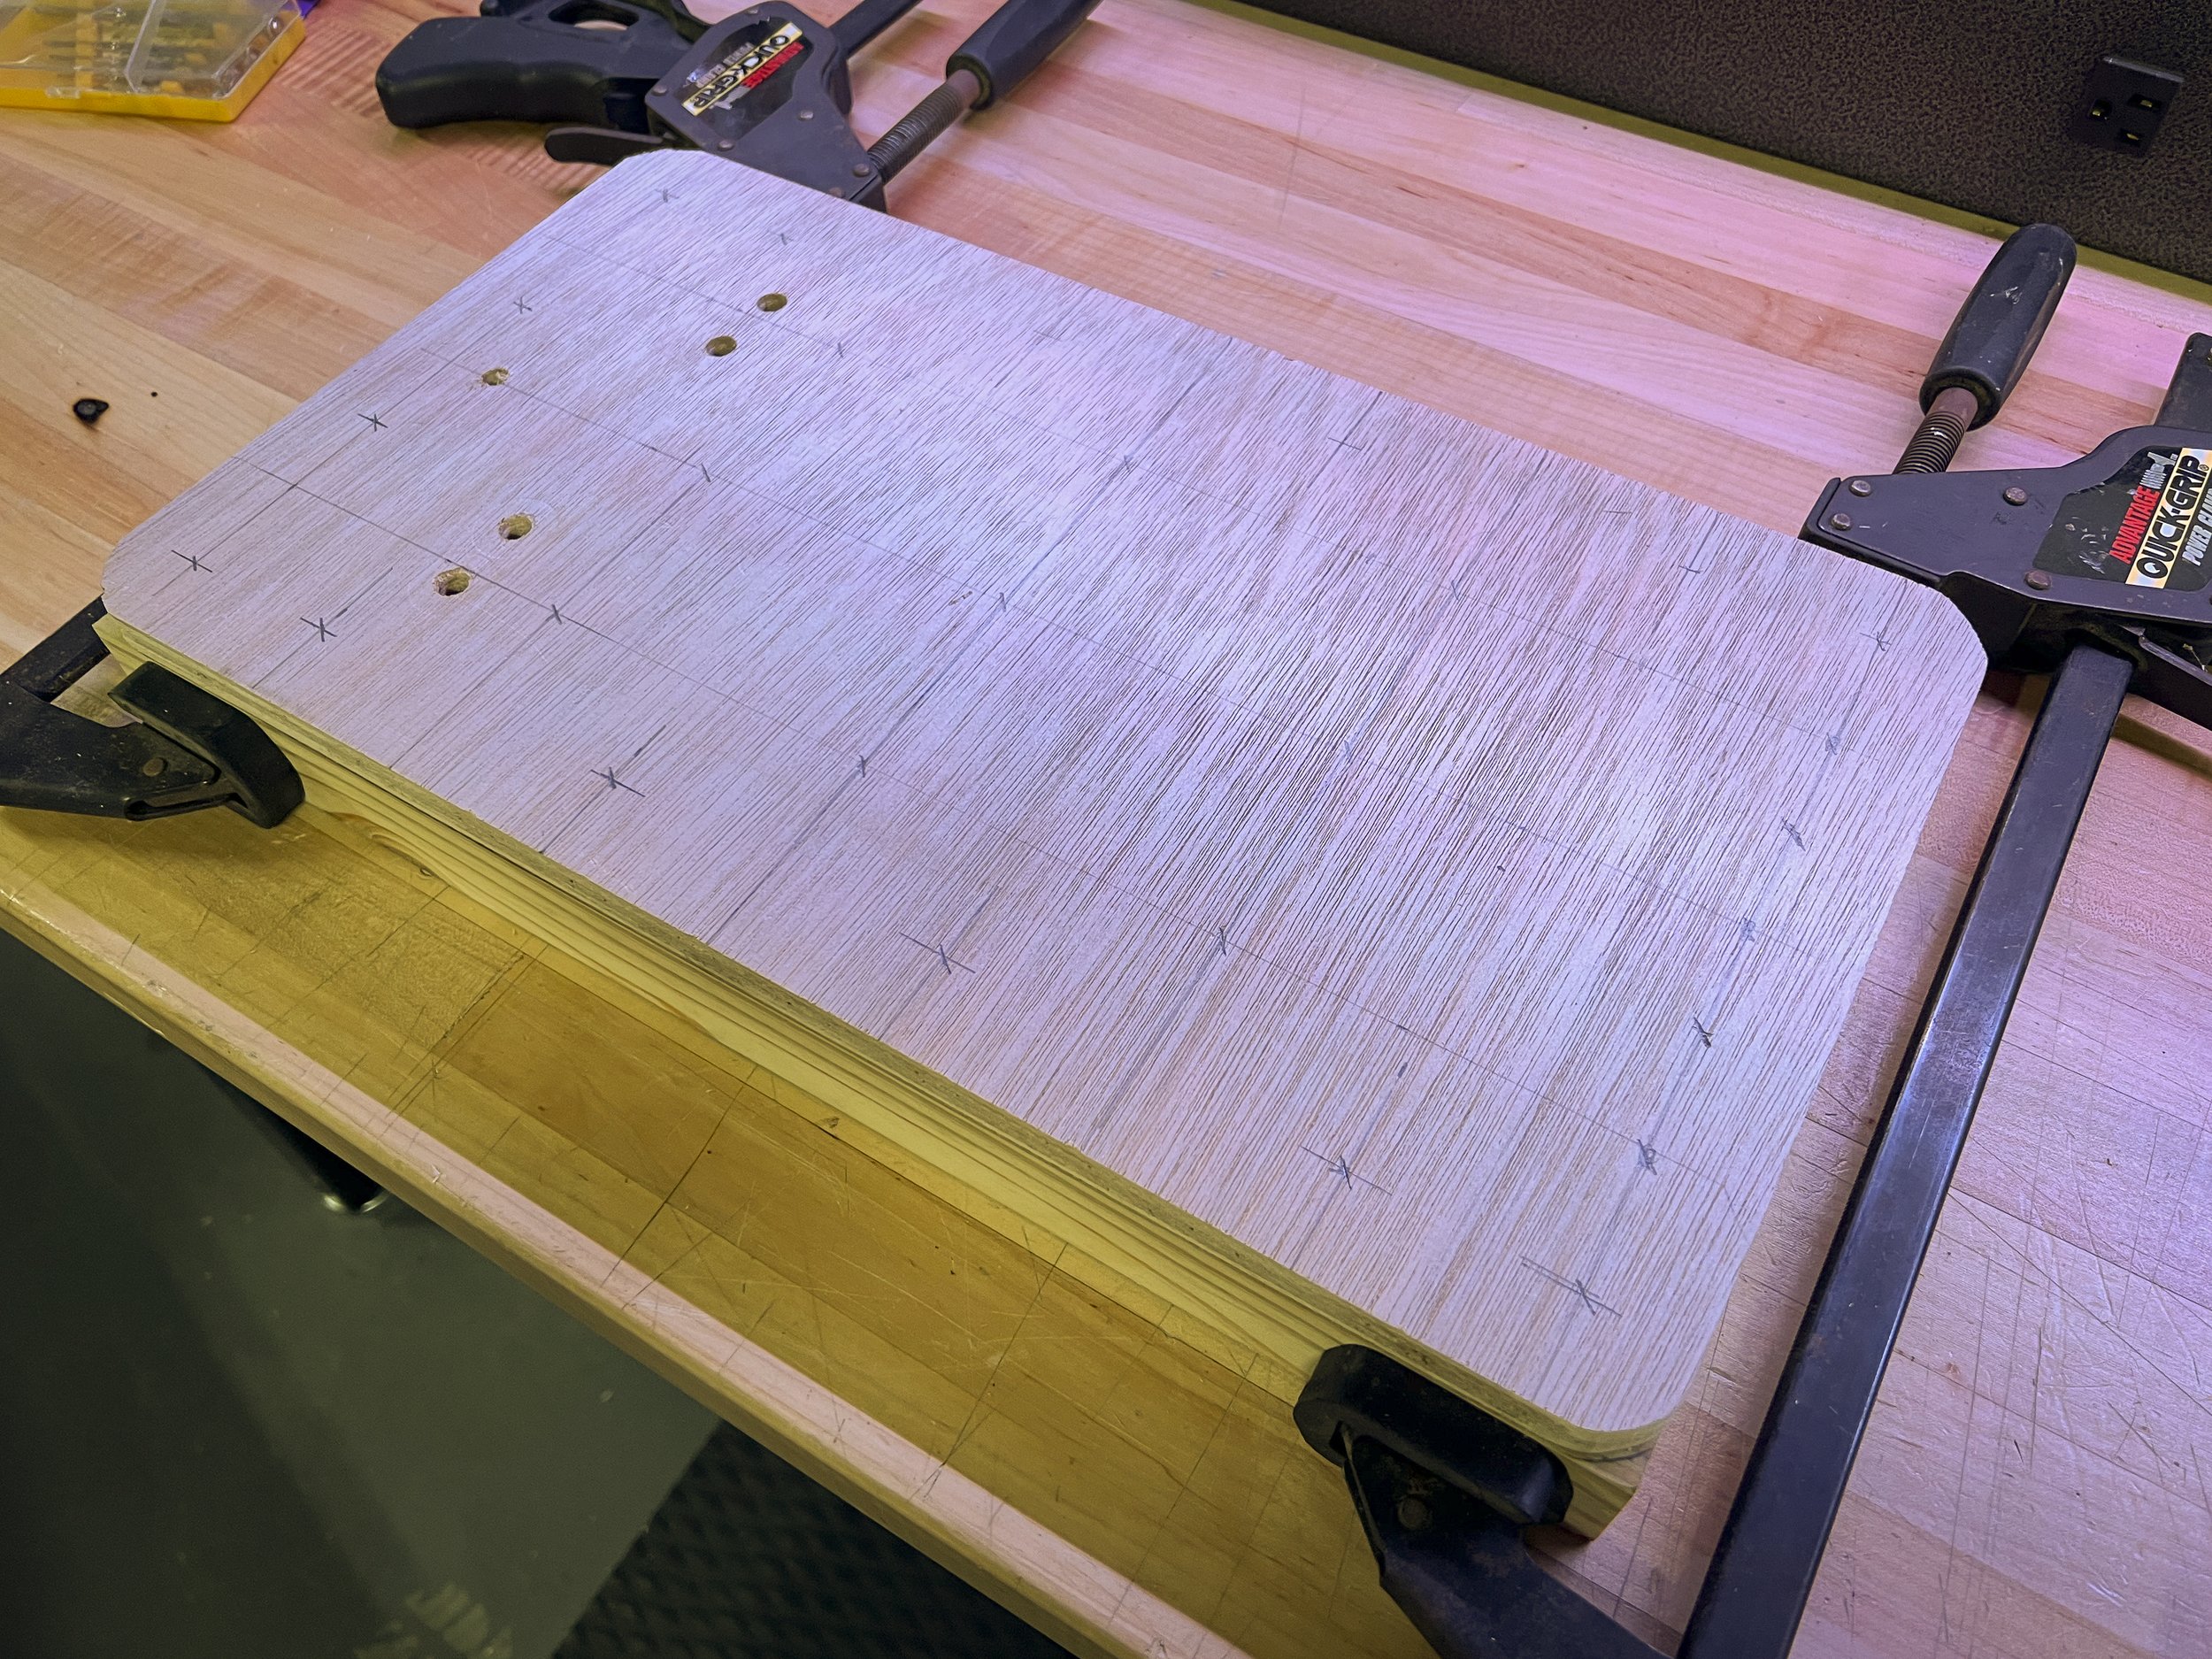
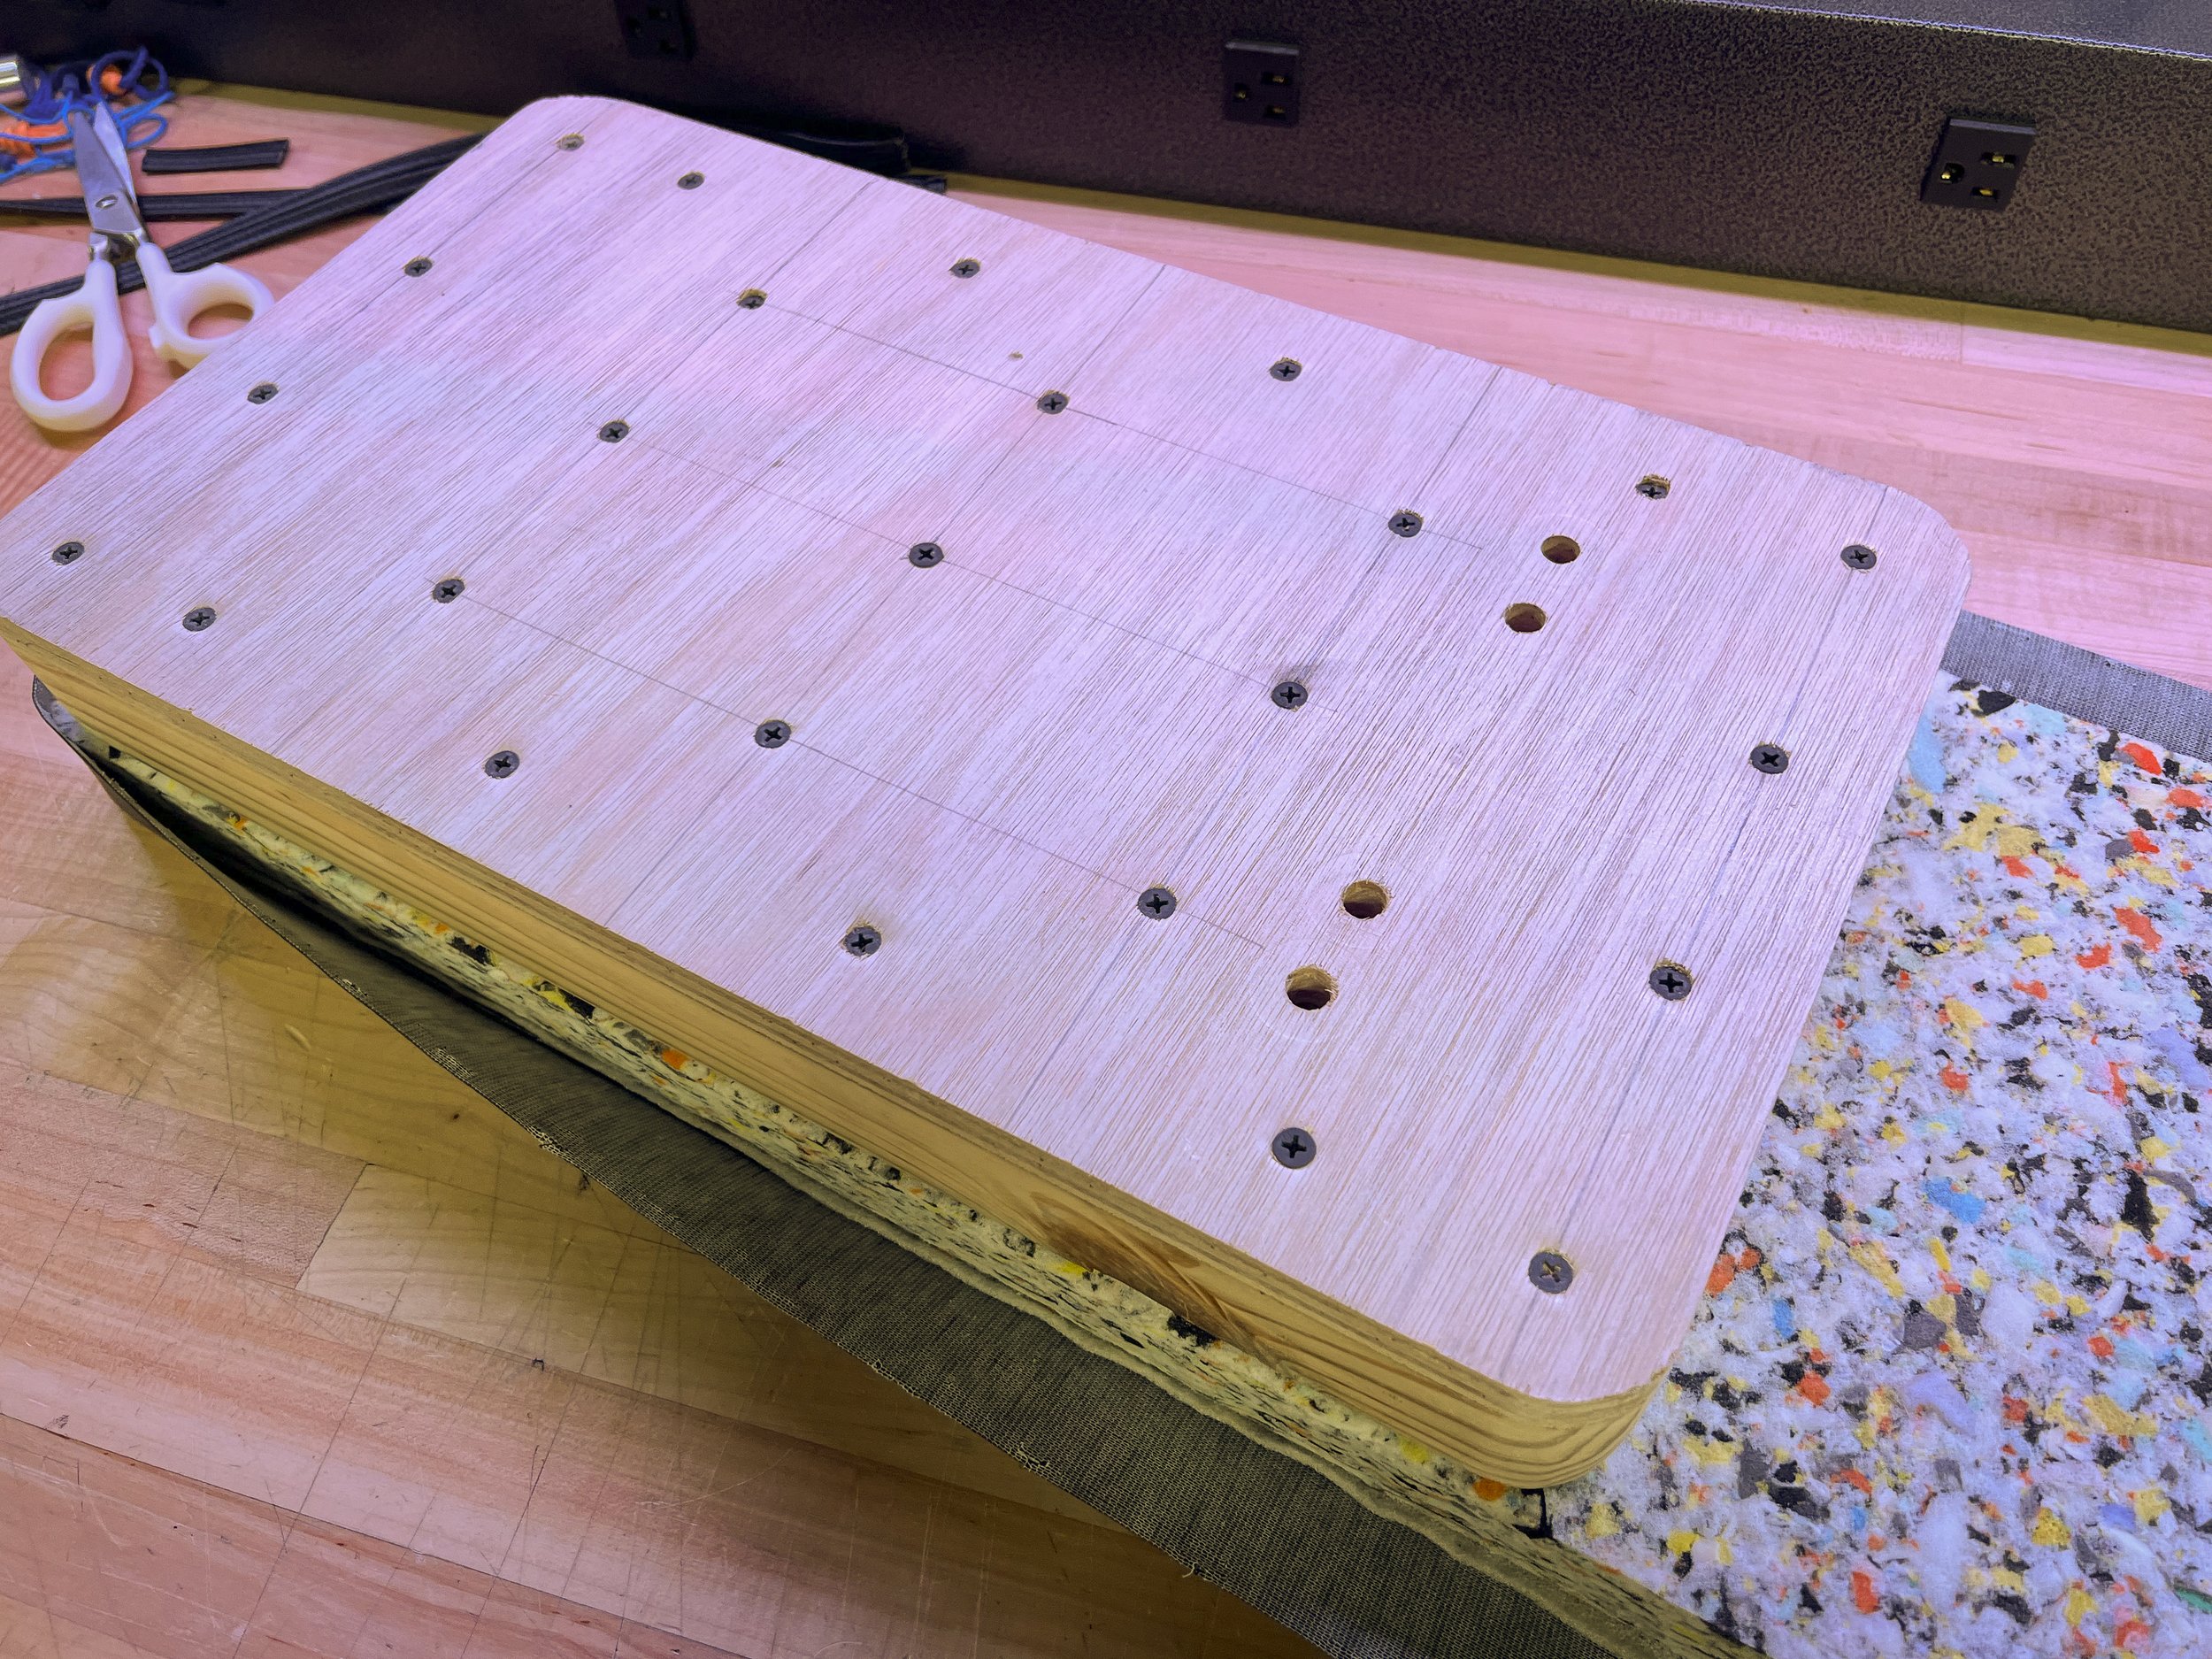
The next part was to draw the screw pattern on the plywood from the original bench in order to attach it to the two pieces of 2x8. The blocks need to be able to handle quite a bit of weight hitting them so I opted for plenty of screws and made sure to start no more than 1” from the edge and go all the way around. I also wanted a tight center because that’s where the weight is going to land. Keeping the structure of the blocks tightly bound together, combined with the padding, should give excellent deadening when the bar comes crashing down on them.
Once the screw pattern was on the plywood, I placed the two pieces of 2x8 on the bottom, put the piece of bench pad plywood on top and then clamped the whole thing together. I drilled small pilot holes at each mark and screwed the plywood and pieces of 2x8 together with some 2” drywall screws to form a single, solid base.
Next, I followed the radii that already existed on the plywood in order to cut the same rounded corners into the 2x8s, used the multi-tool to shave each one, then the sander to smooth them. They didn’t have to be perfect because they were going to be covered so beat to fit and paint to match worked just fine. At that point, I had the main structural element of the deadlift blocks complete, leaving the rest of the job as nothing more than assembling each of them.
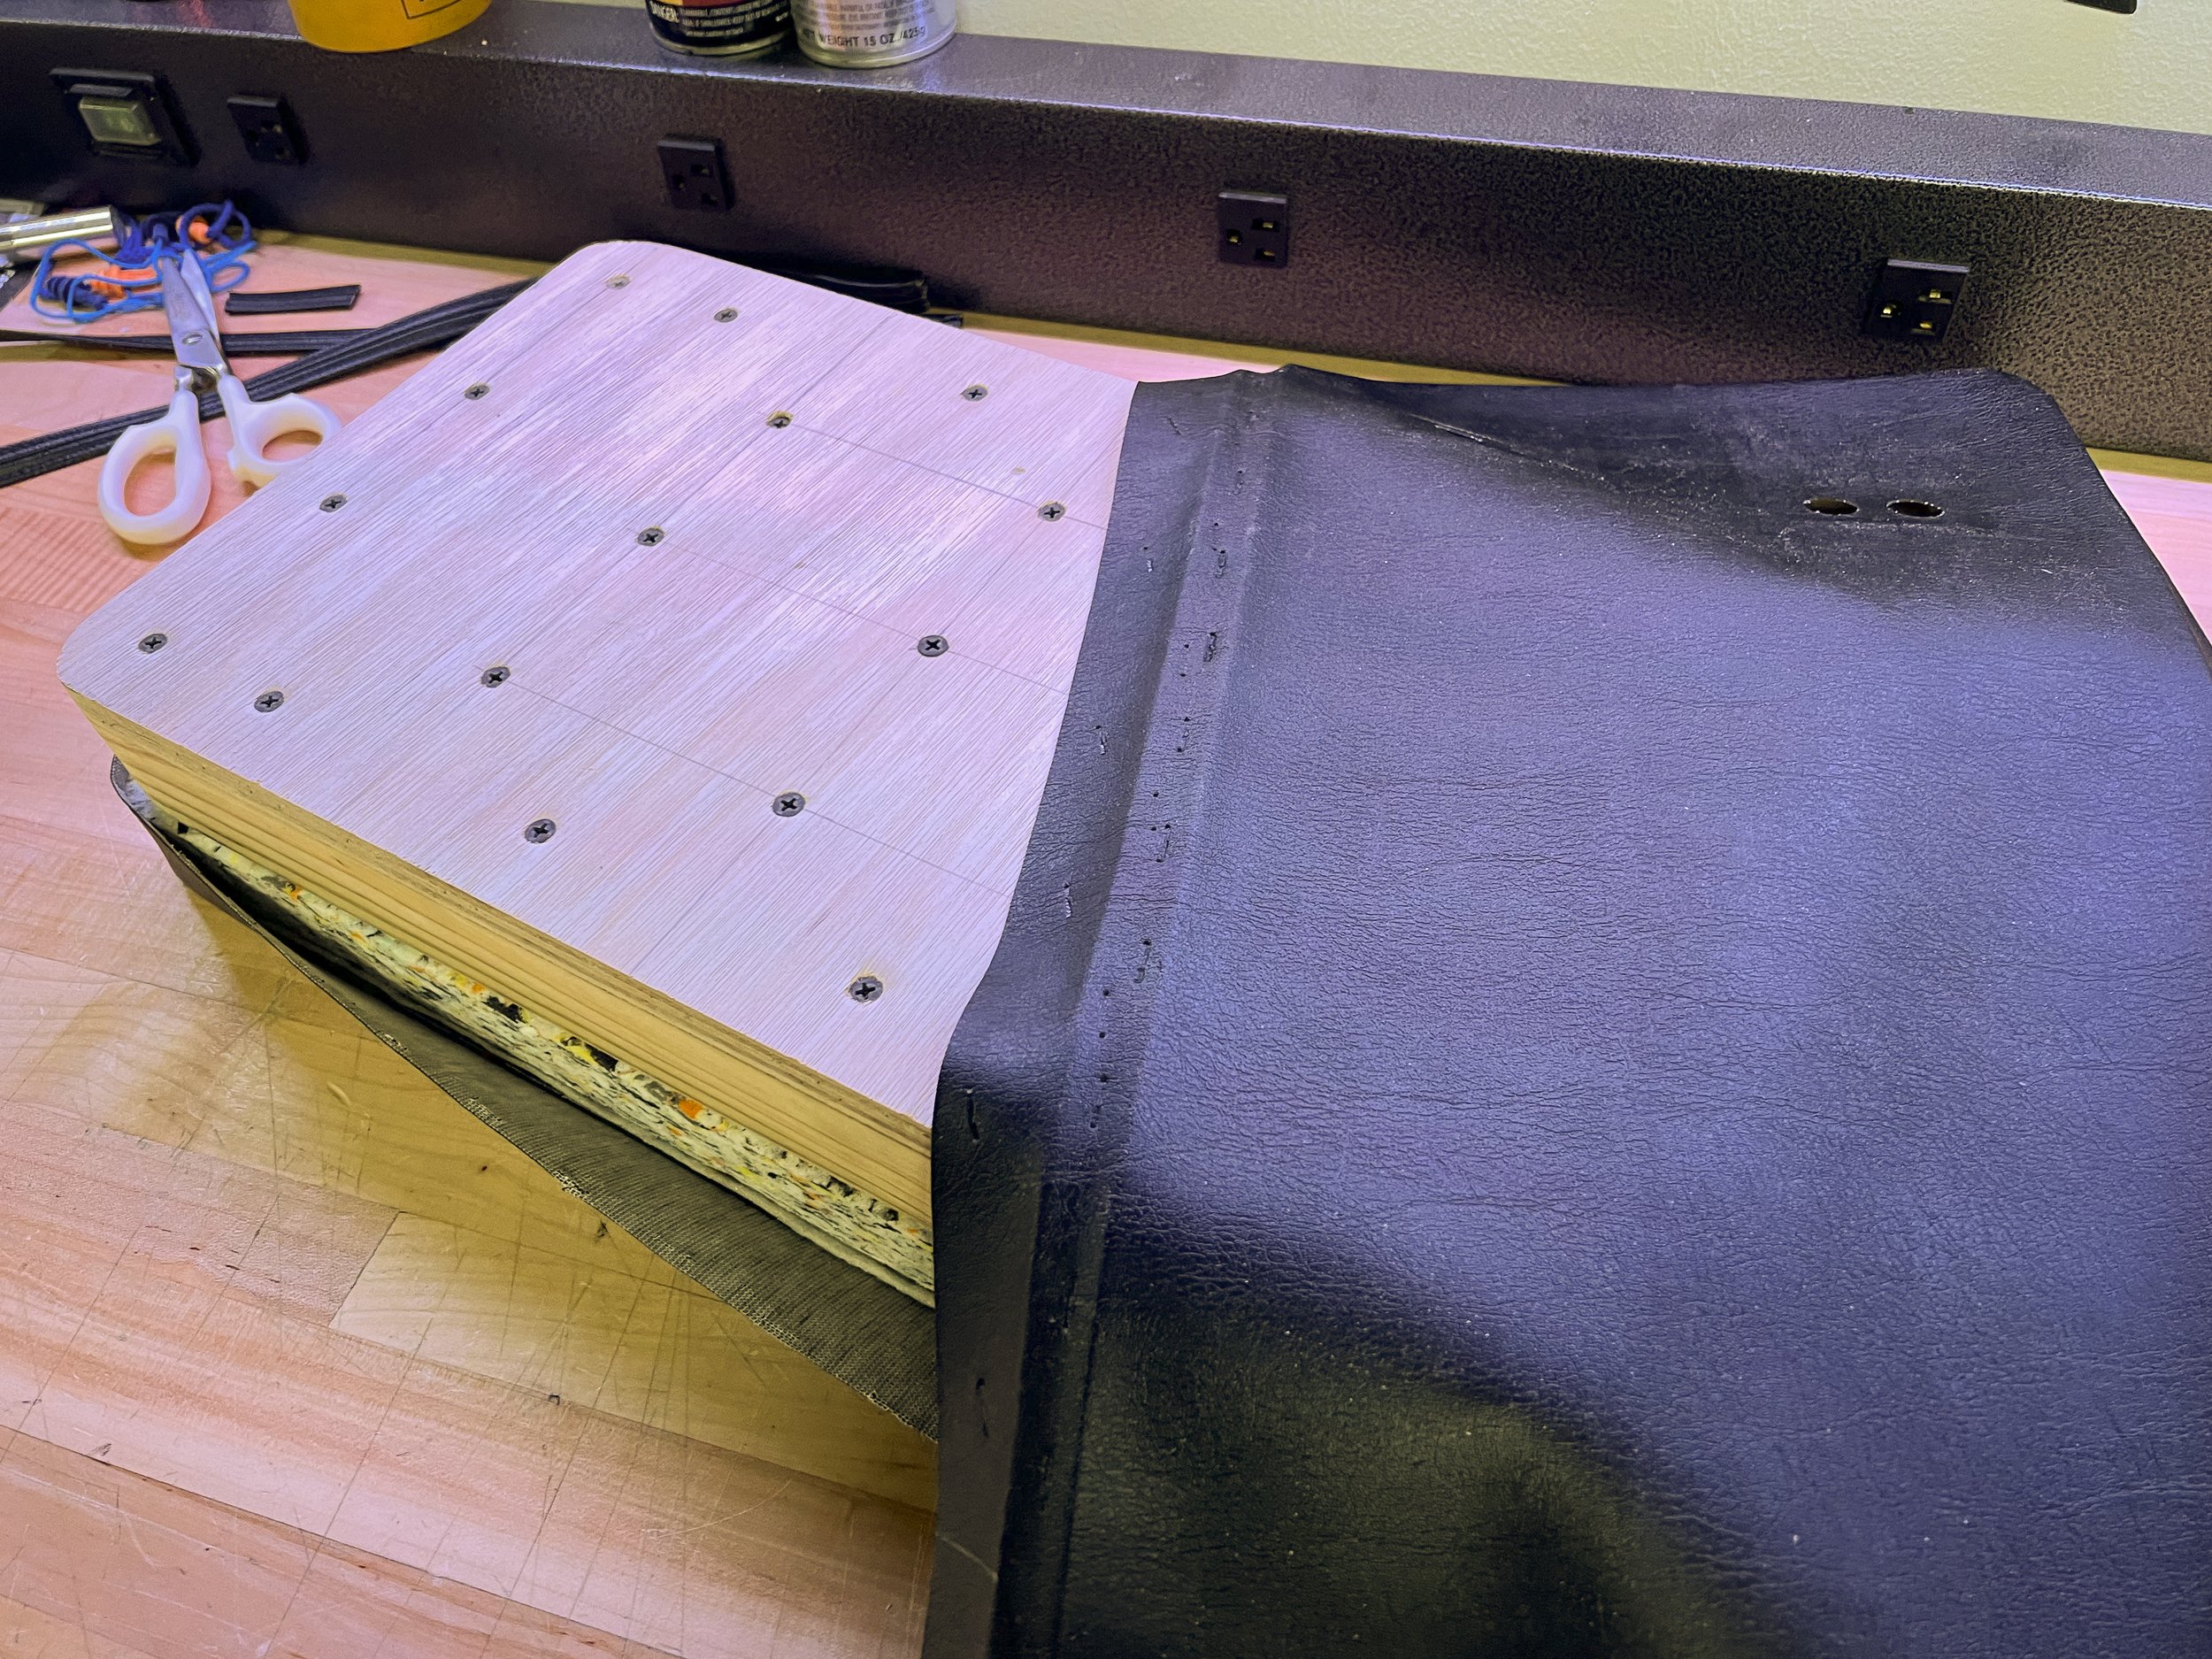
I took the piece of vinyl from the bottom of the original bench pad; it has the holes in it where the pad was screwed to the bench. I cut it in half and was left with two equal pieces to use in assembling each block. Just like the piece of plywood, the vinyl from both the top and bottom was used, starting at each end, with the waste portion in the middle. By doing so, each block had fabric already cut and fitted to go around the rounded corners on one side so I only had to do radius tucks on a single side of each deadlift block.
The first job was to put the wooden base of the blocks snug against the factory rounded corners in the bottom piece of vinyl. All the staples needed to be close to the bottom edge because the welt needed to cover the staples from both the top and bottom pieces of vinyl once they’d been mated together. My first staple was in the middle on the narrow end while I kept the vinyl stretched as tight as possible. Once the narrow end was attached securely, I worked from side to side all the way to the far end of the block, making sure the vinyl was pulled tight and even.
That left the narrow end of the block with the cut end of the vinyl. I pulled it tight and fastened the center part of the vinyl to the wooden base. All that was left were the tucks going around the corners. I stapled the vinyl right up to the point where the radius started and then used a fold like you might do on the ends of the wrapping paper on a Christmas or birthday gift. I trimmed any excess vinyl and then used a brass hammer to go around the base and make sure all the staples were firmly seated in the wood.
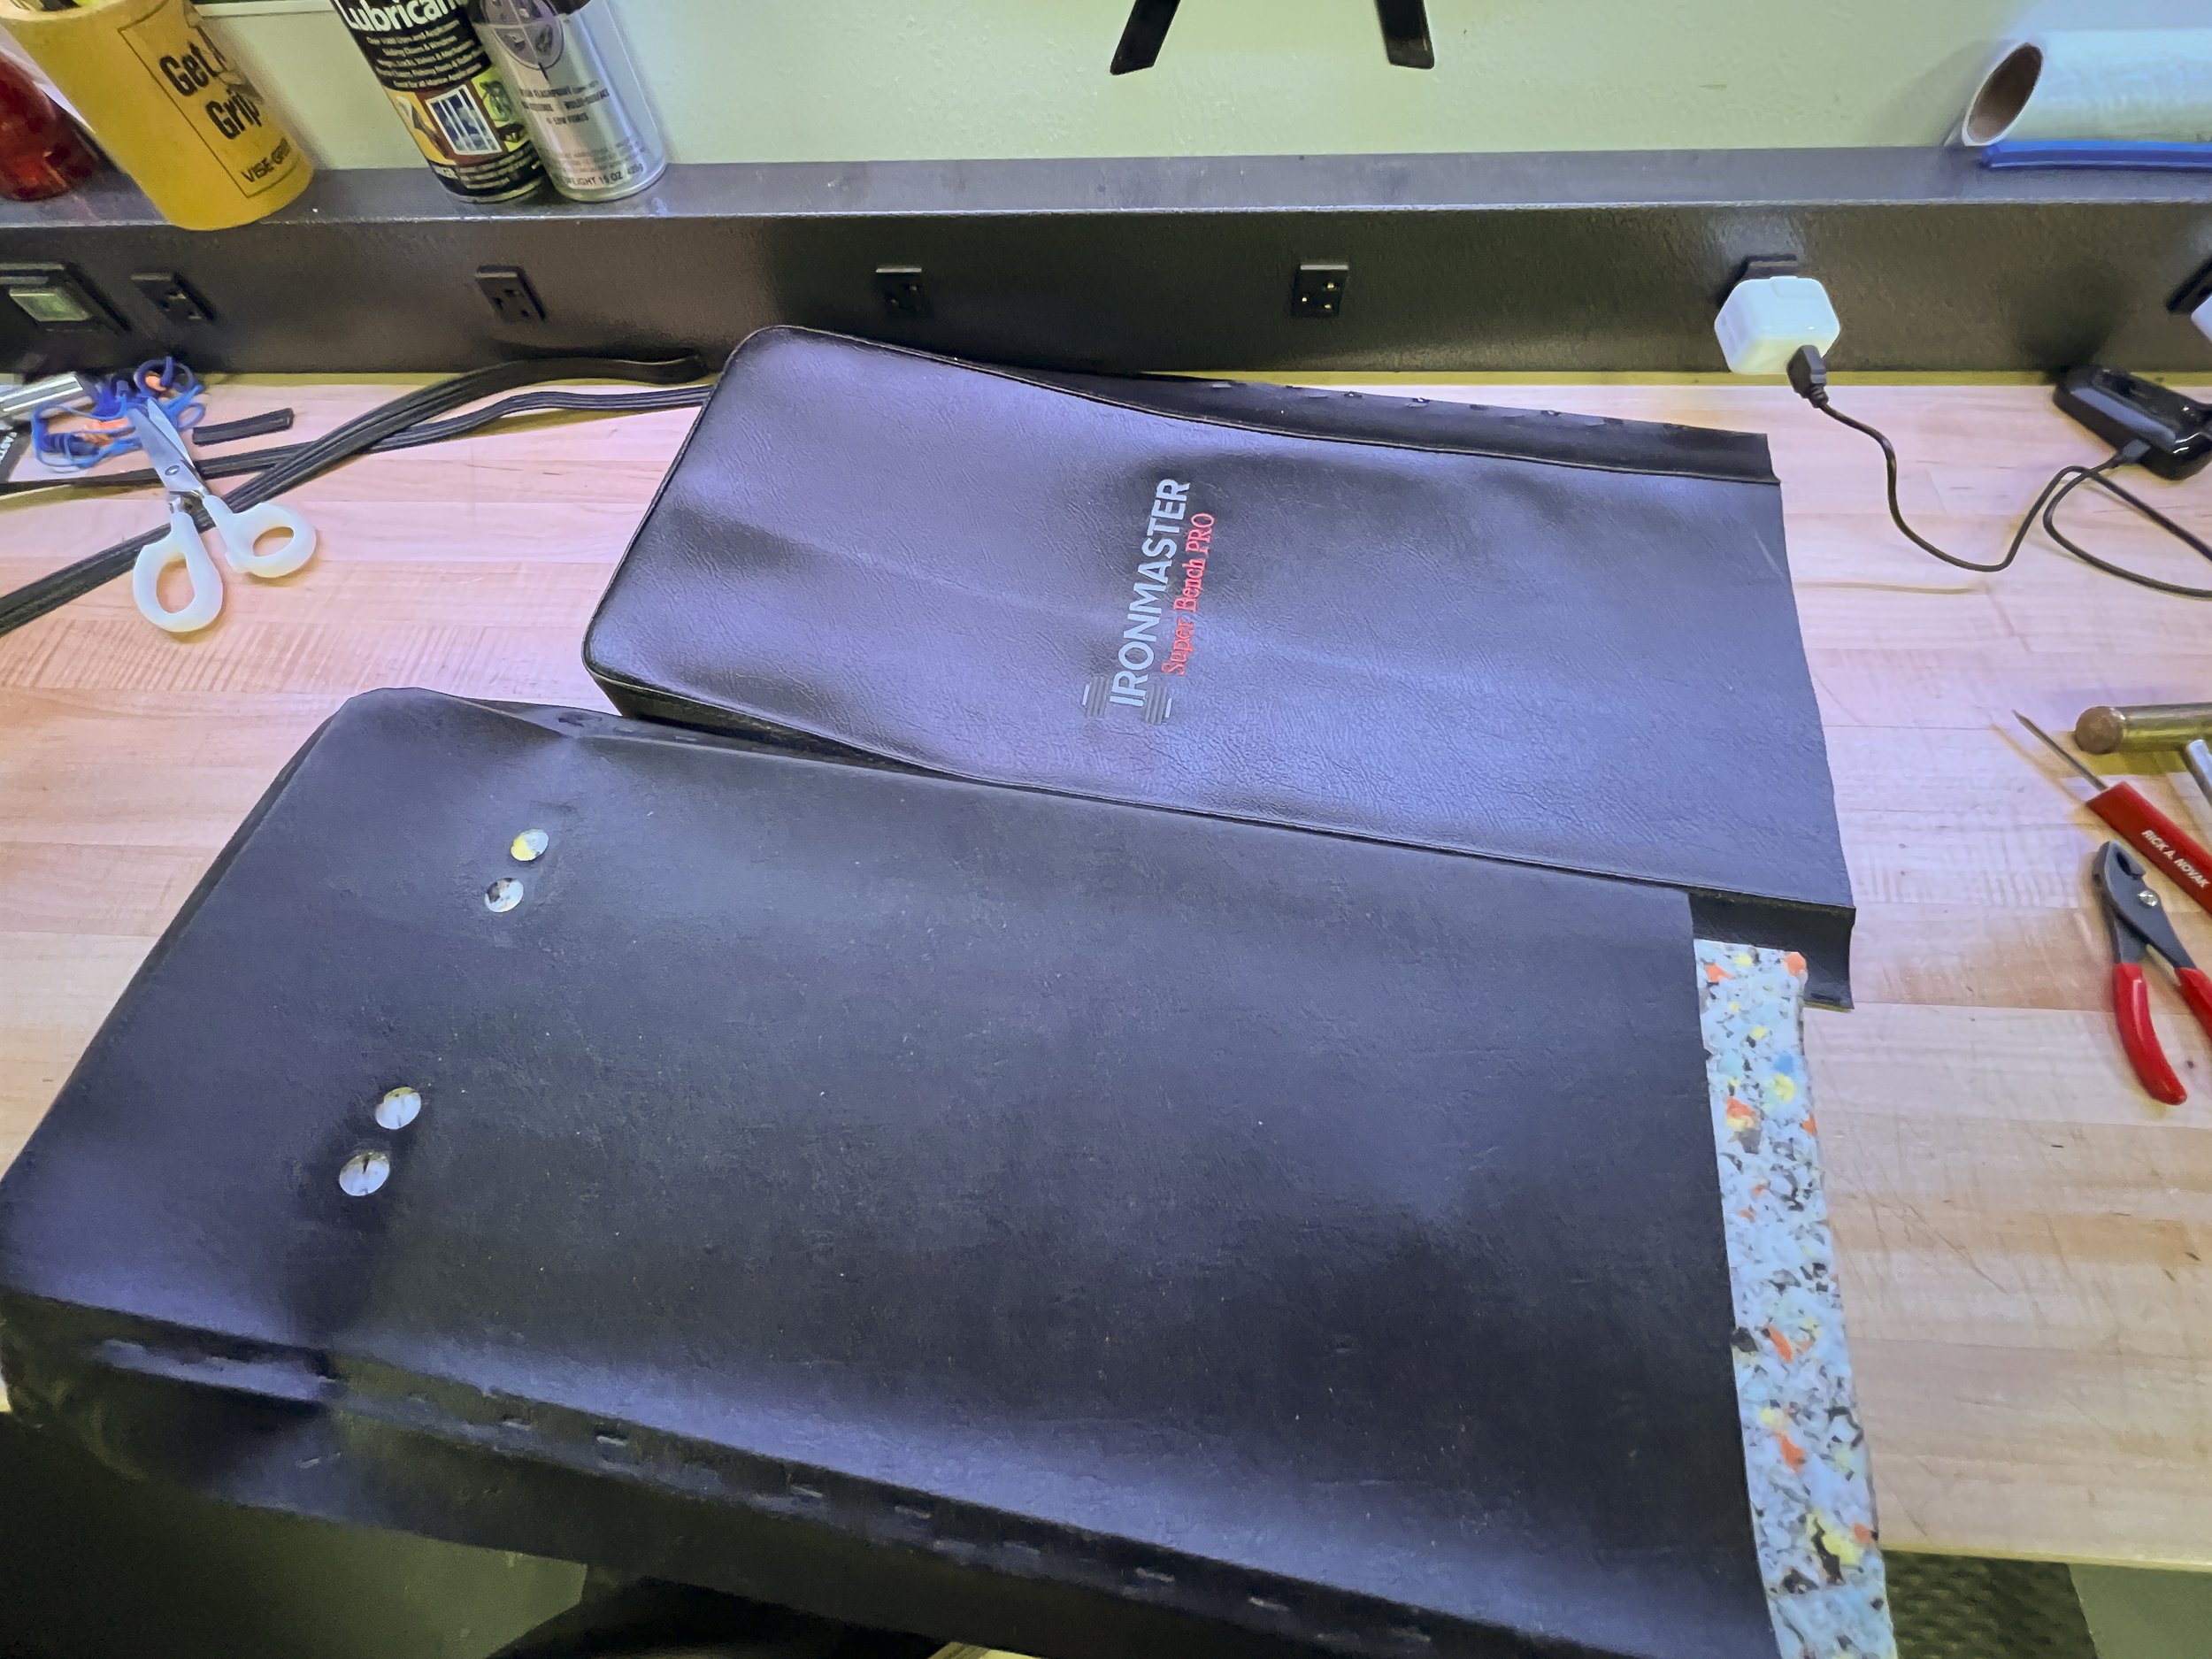
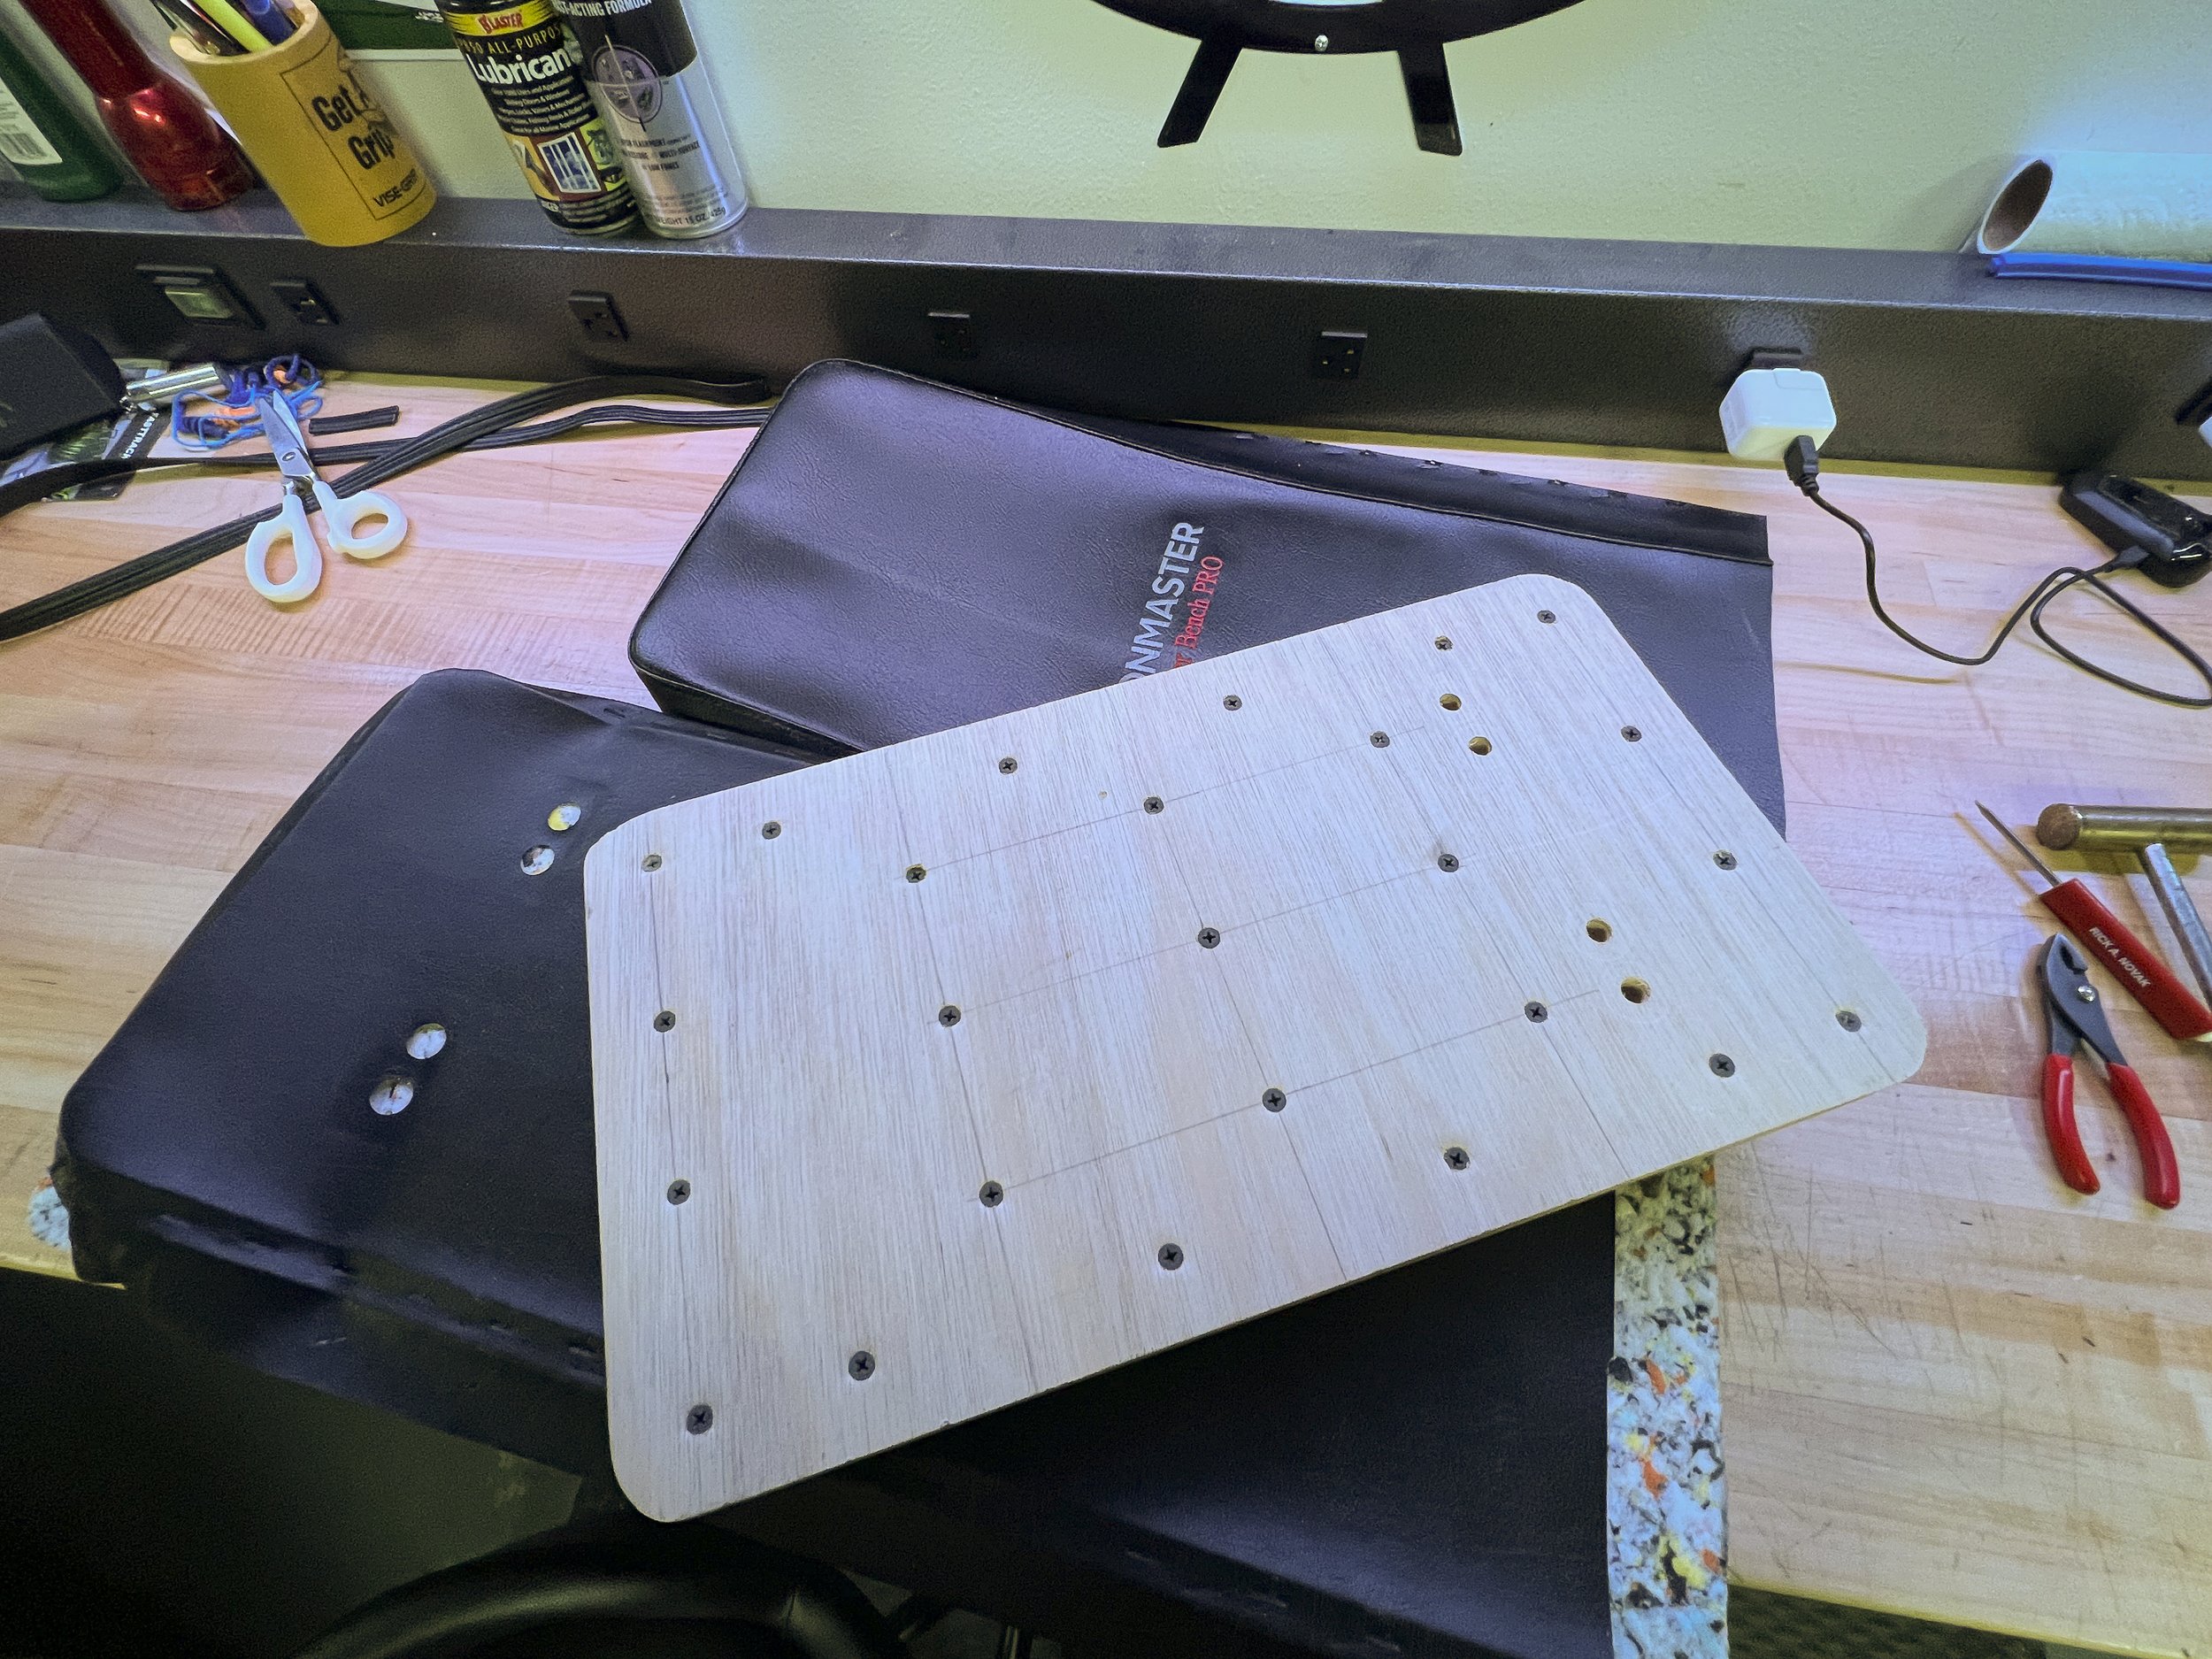
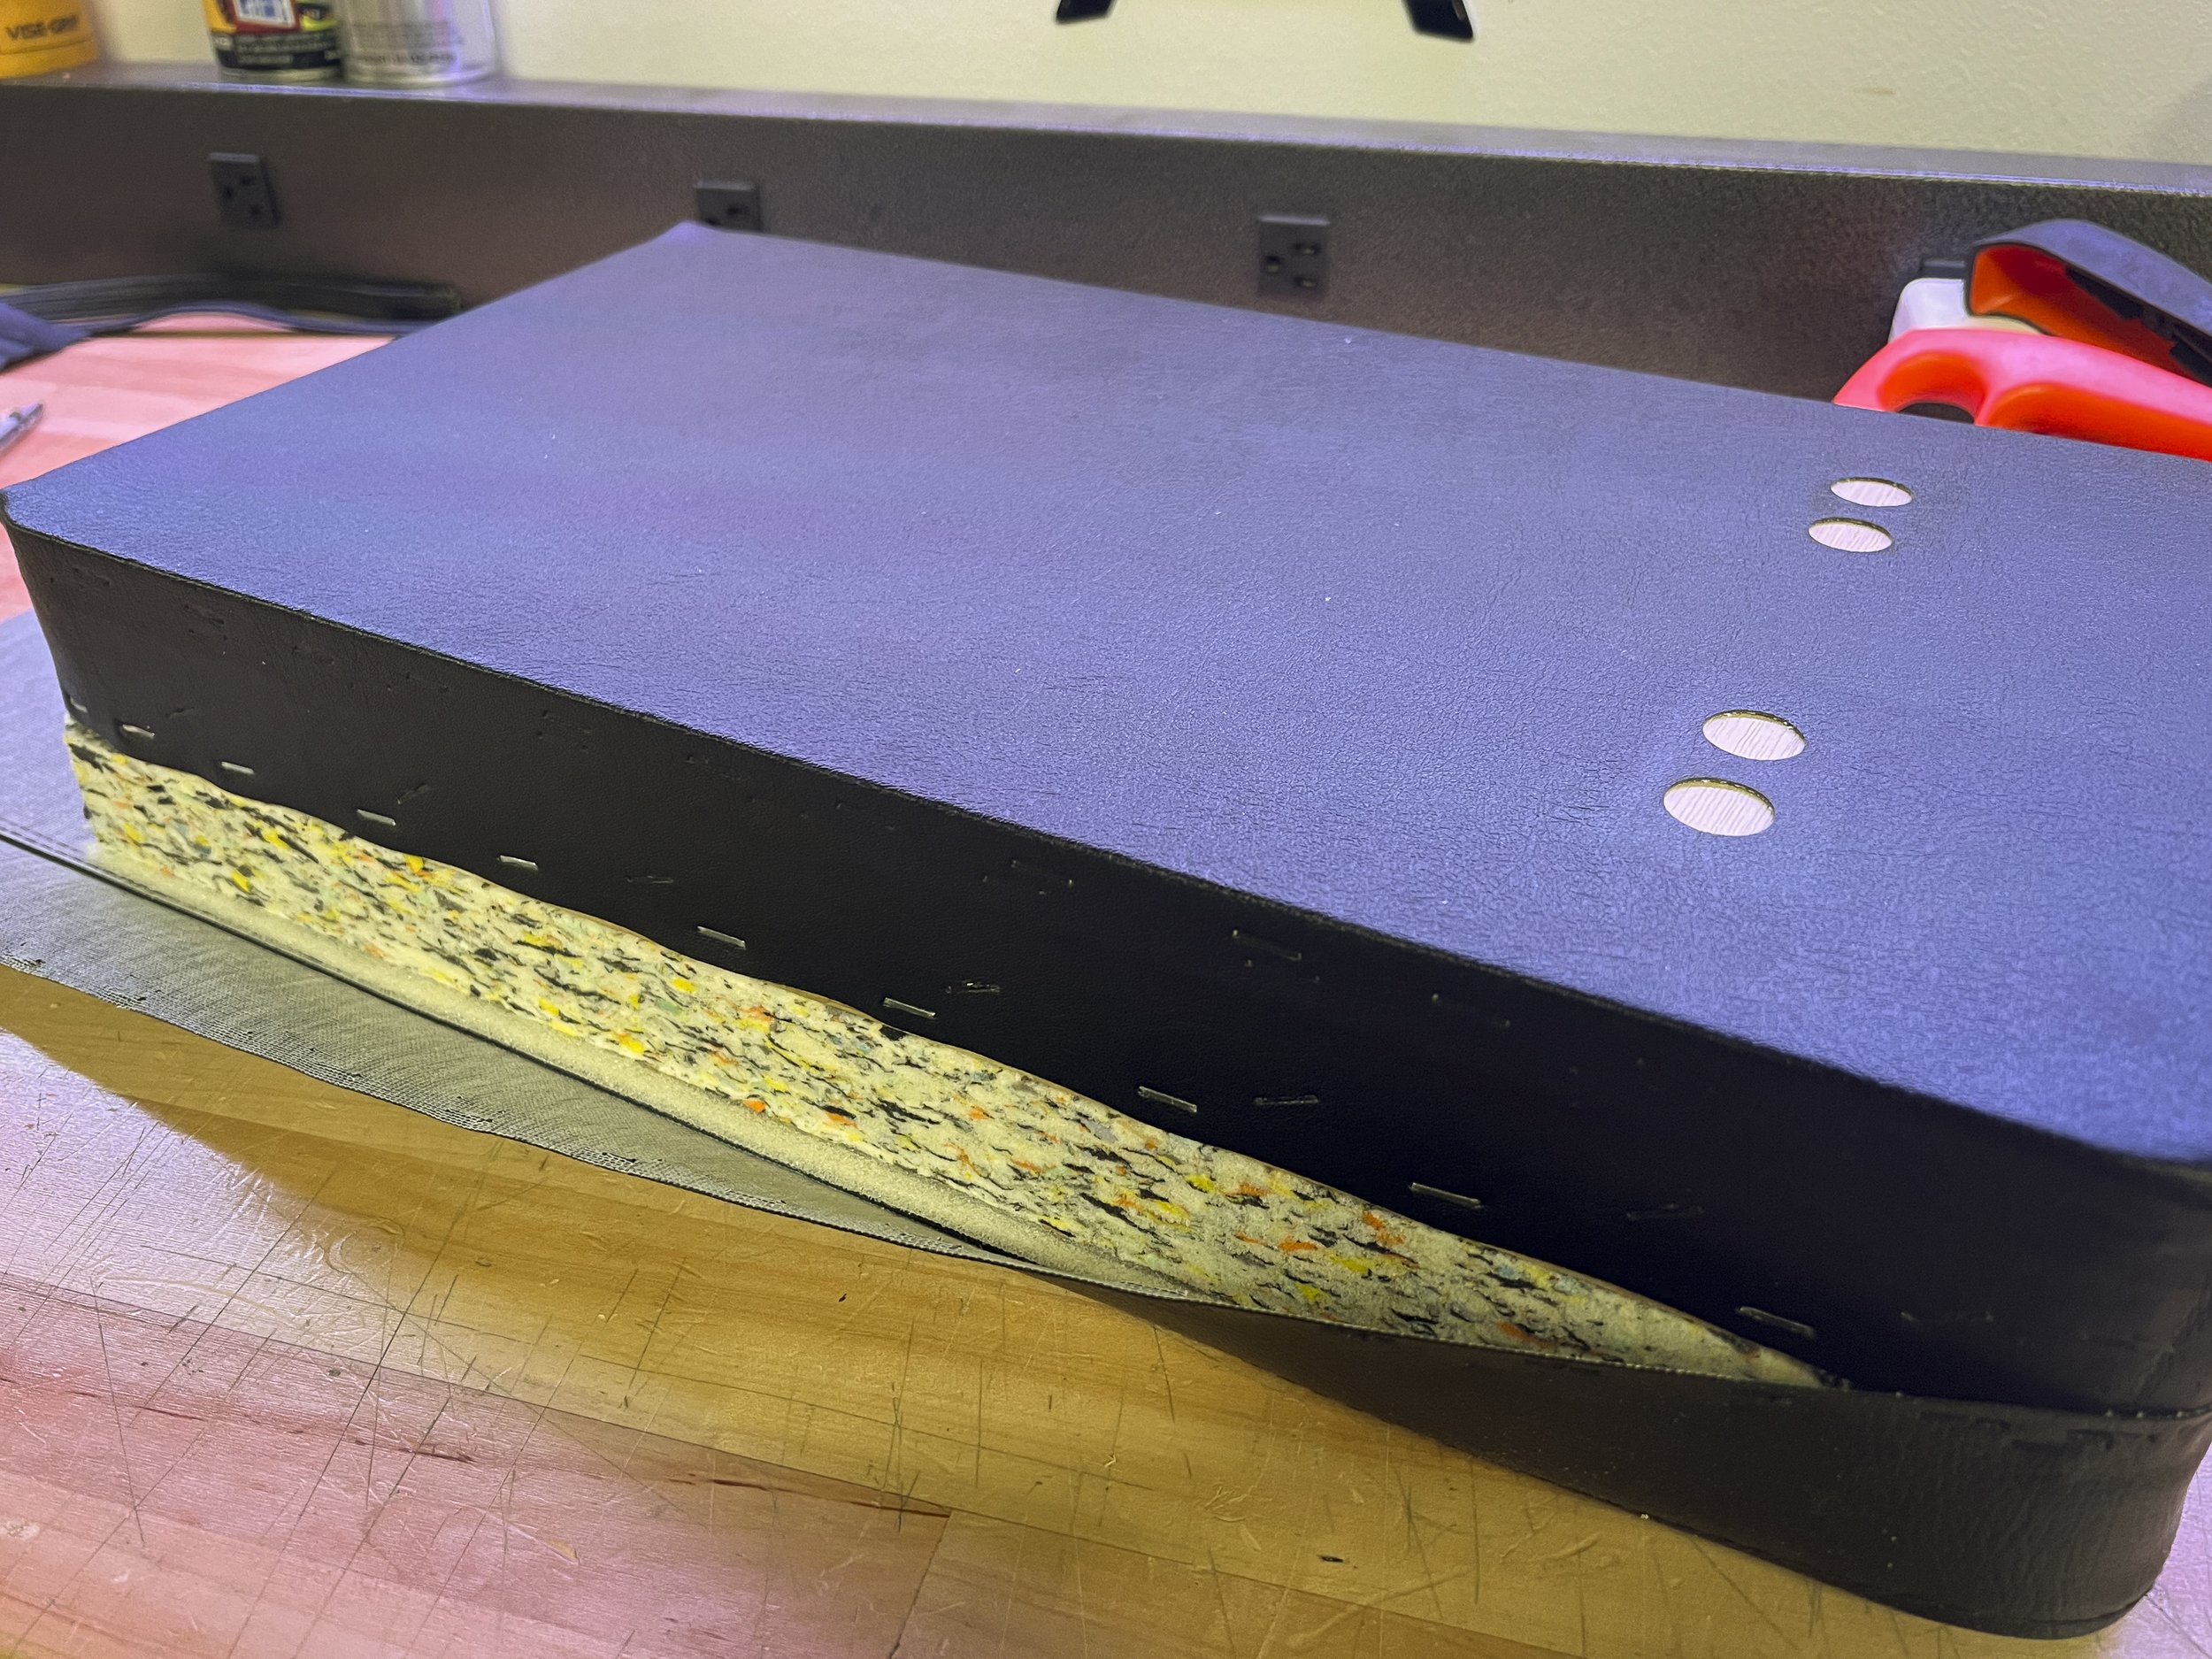
Next was to put the top part of the old bench – consisting of the vinyl covering and the thick pad – on the opposite side of the part that was just completed. That became the top of the deadlift block and was the surface on the original bench where we sat or laid during use. Just like the bottom, the vinyl and pad from the top of the bench was cut in half. I cut each radius into the thick pad and it was ready to go. The vinyl would be tucked at those corners when I finished the piece. Once completed, each deadlift block would have a side with the factory radius from the bench at each corner and the opposite end with tucks where each piece was cut in half and then folded around the radius at its corners.
I matched the pad and vinyl with the factory rounded corners with those on the bottom piece and the process was essentially the same. The key was to ensure that the top piece was pulled snug and even and the staples were along roughly the same line as the ones used on the bottom. This made sure the top was fastened securely into the wooden base and that the row of staples from both the bottom and top pieces of vinyl would be covered when the welt was reinstalled.
Once the top was fastened on the first three sides, I went around the radius and did the same gift wrap-style tuck I did on the bottom, trimmed any excess fabric and snugged up all the staples with the brass hammer.
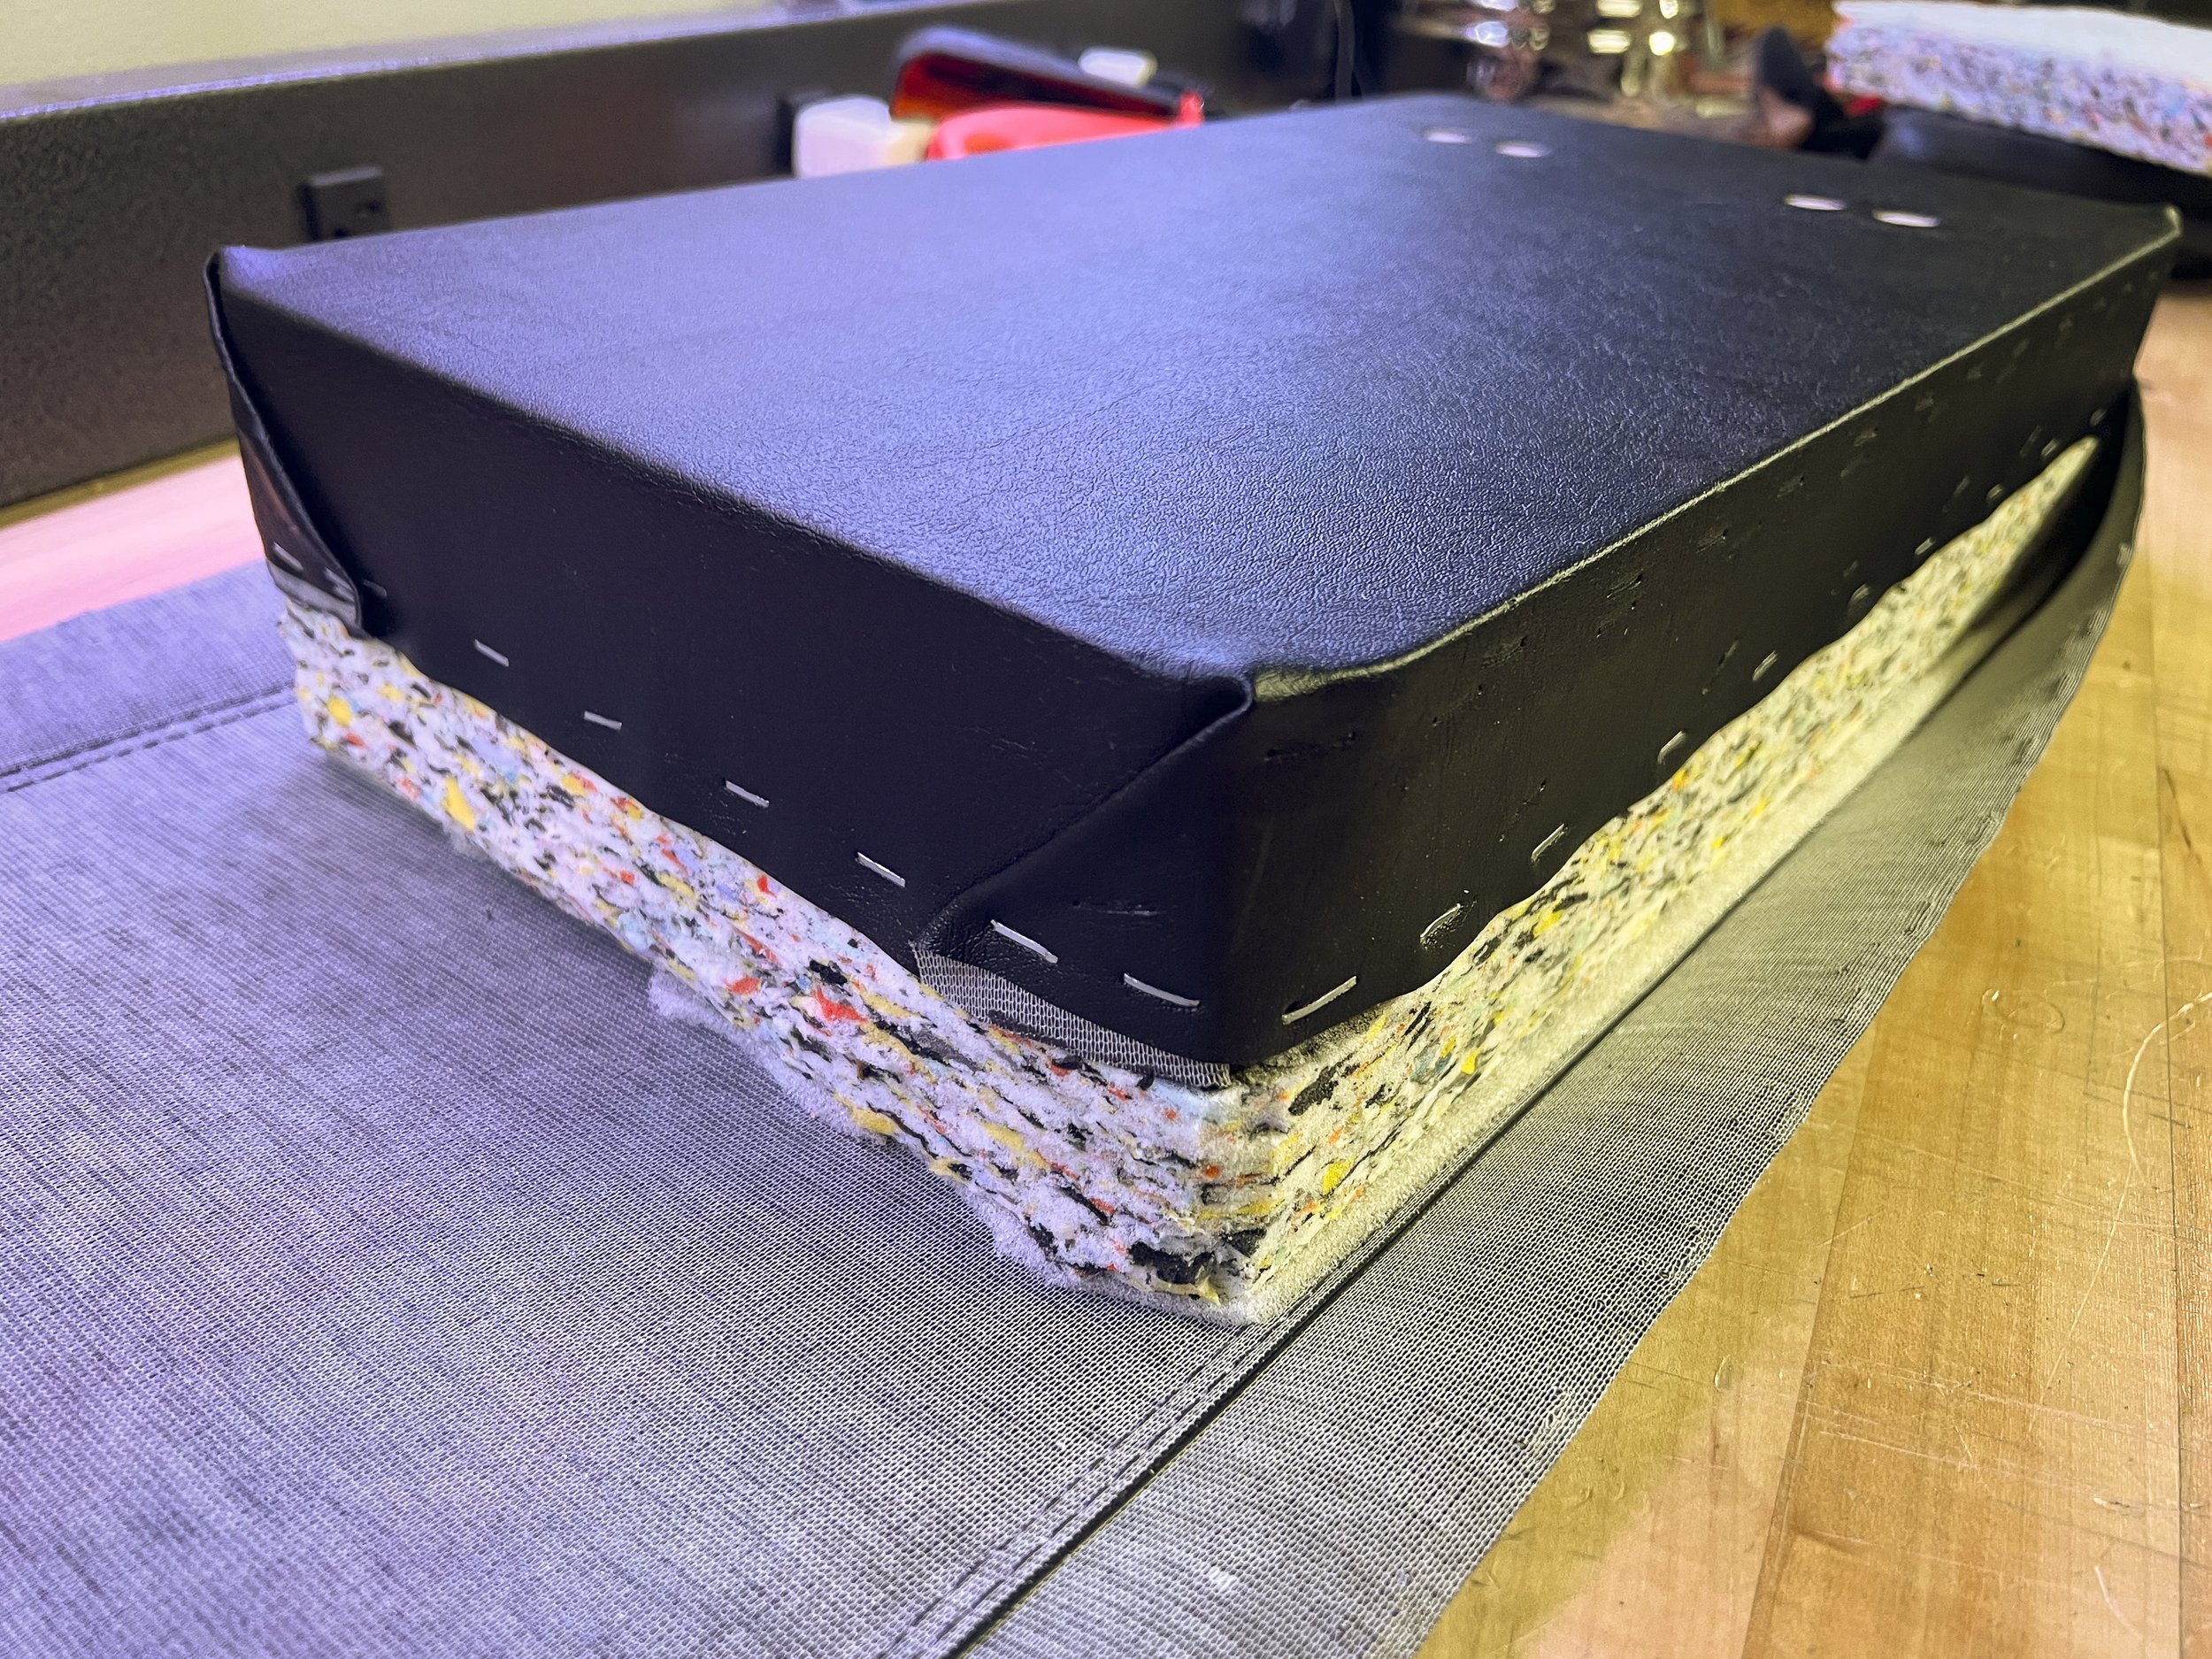
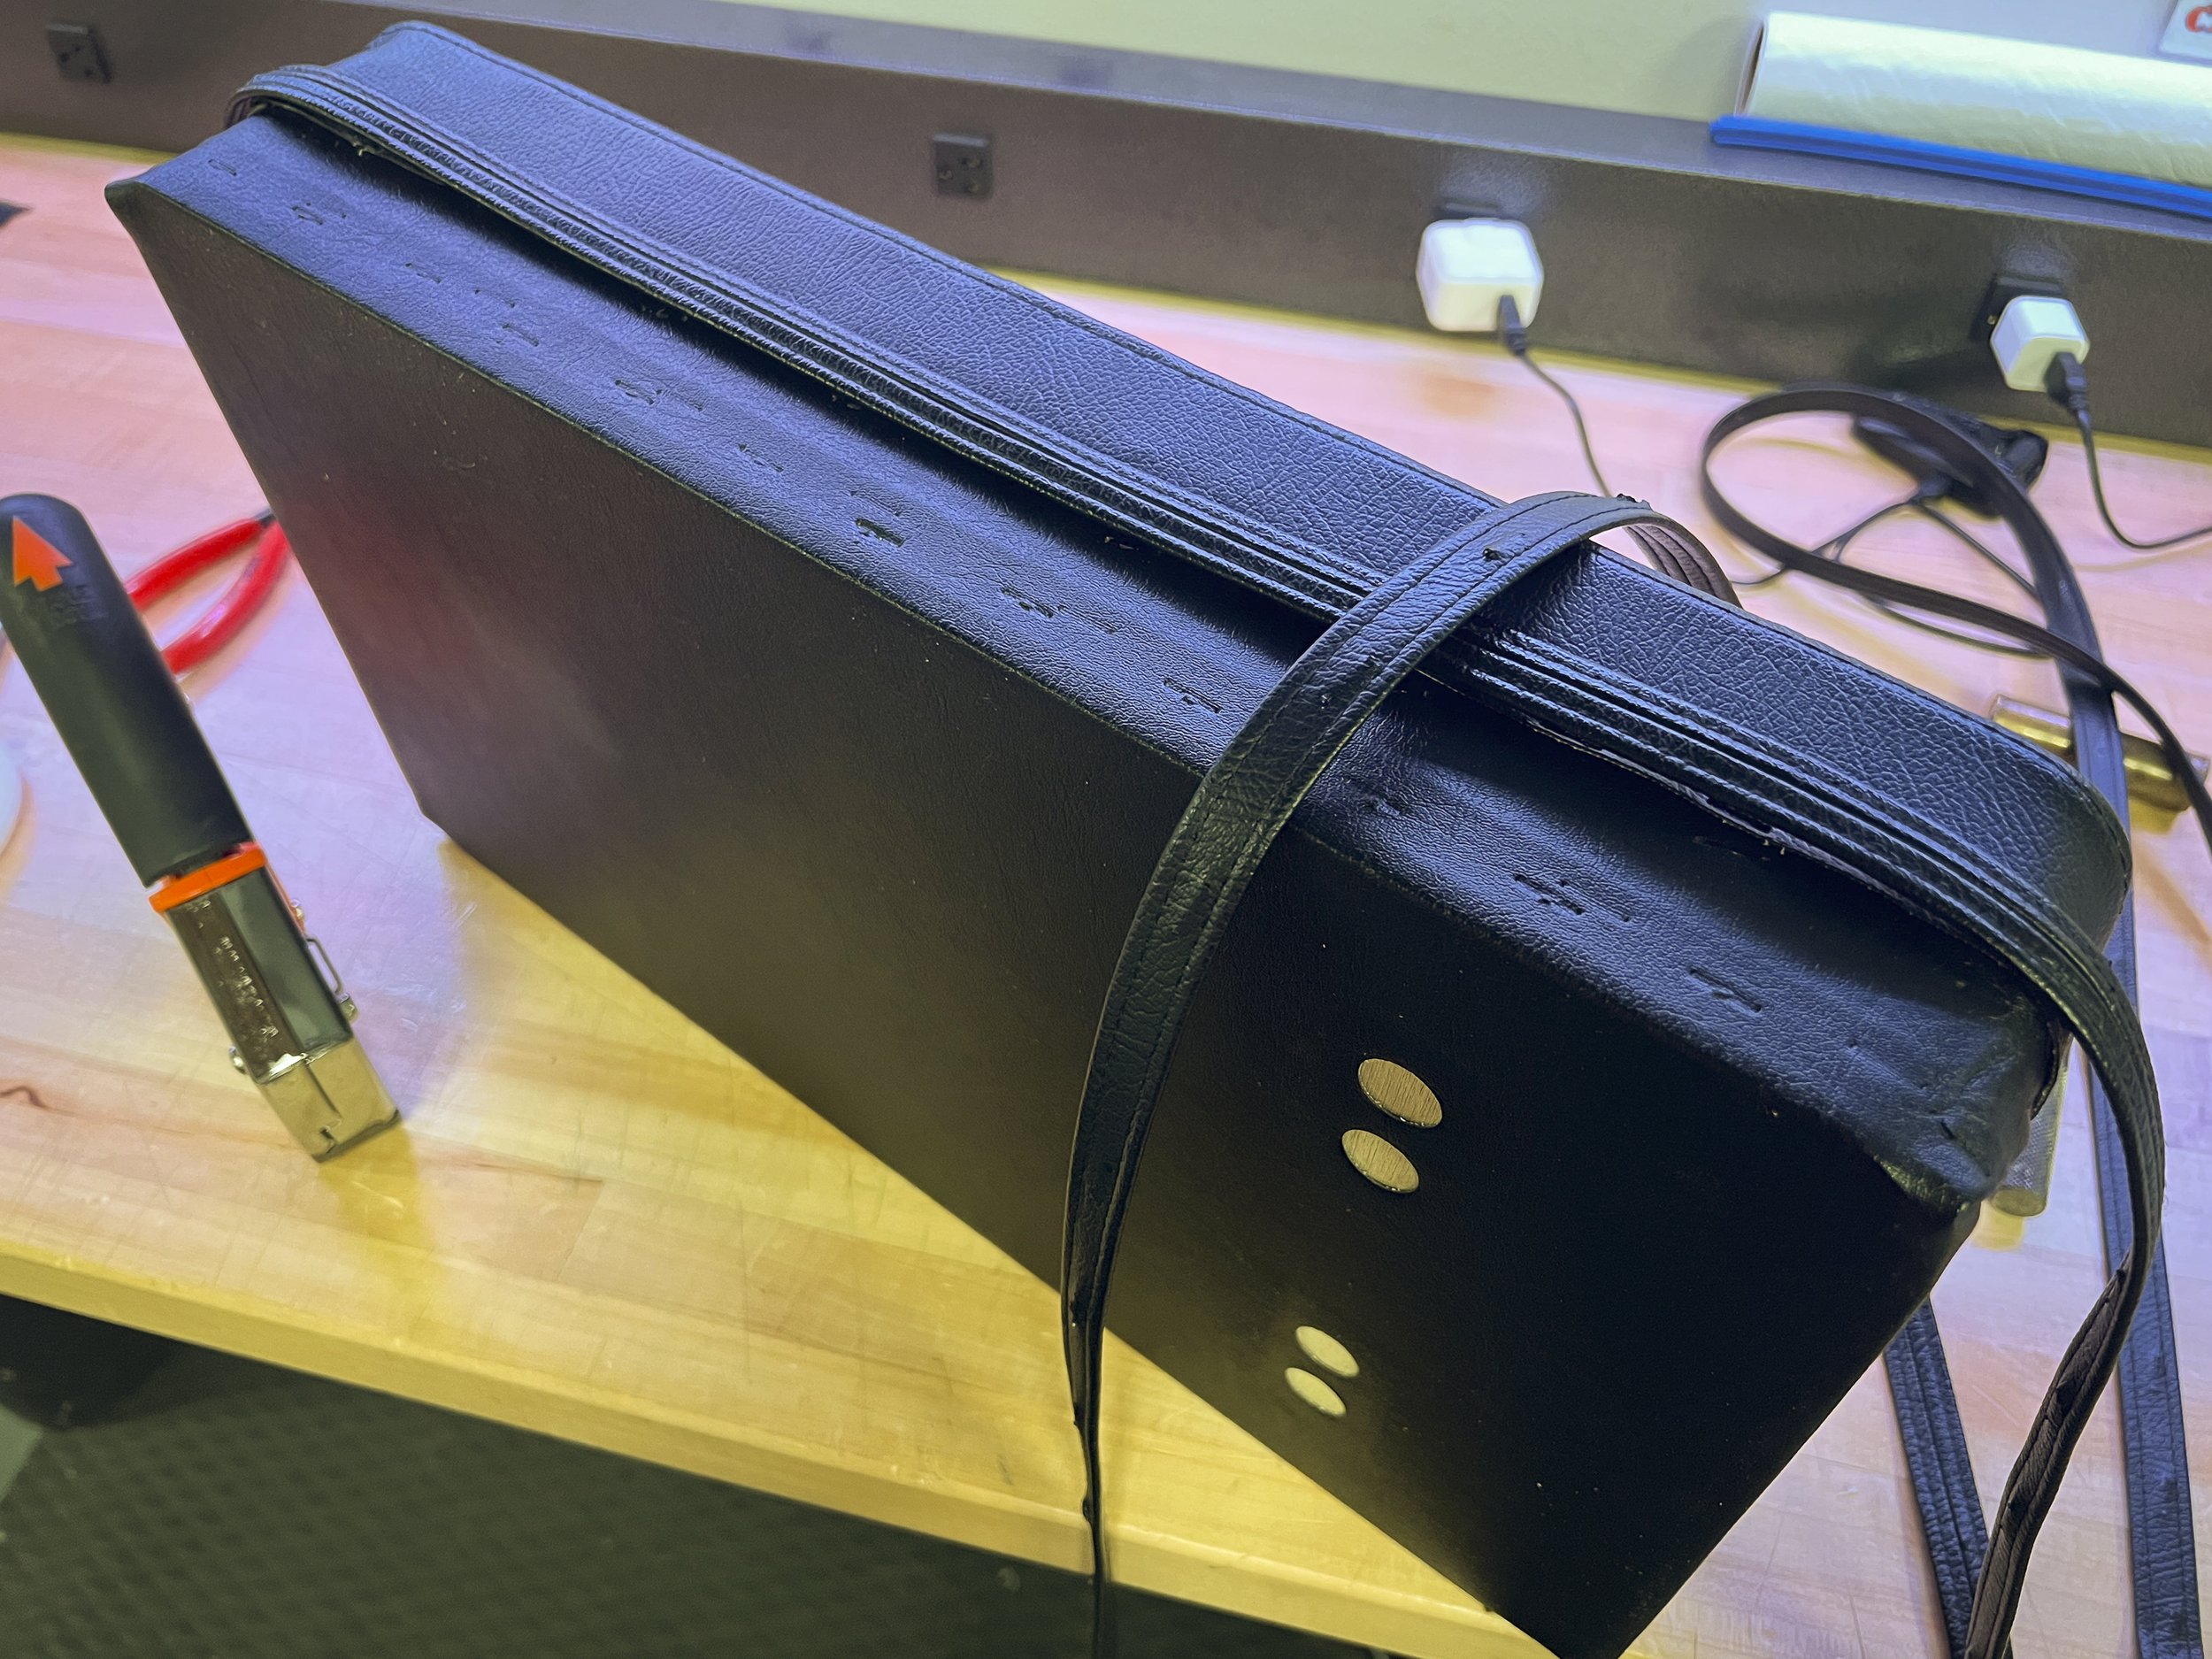
The last thing to do was to put the welt back on and cover the staples. I chose to start in the middle of the end with the tucked corners and worked around the blocks carefully, making sure the welt was taut and level while also covering the row of staples attaching the top and bottom pieces of vinyl. As I did with the staples in the top and bottom halves, once they were in, I went around with the brass hammer and made sure they were all the way into the wood. That also helped flatten out the welt for a nice clean finish.
Of course, when I started installing the welt on the second piece, much to my shock; I didn’t have enough to go around. I couldn’t for the life of me figure out why since I had used the material from only one bench and, obviously, the welt went all the way around it. It finally dawned on me that I had double the number of narrow ends since I’d cut it in half and that ended up being enough to make it come up a bit short.
Fortunately, we had another bench that had been involved in a mishap. The vinyl was torn, requiring a replacement of the pad, so I just happened to have another one, complete with the welt, to use. It’s also an Ironmaster bench so they were the same. I removed it, put it on the new block and the project was finished. I’m glad I had the extra bench pad and welt because the two blocks came out really nice and I would have hated to have the very last piece I needed fail to match. I also ended up with two rounded silver tacks that are used to cover the seam where the ends of the welt come together so both blocks match, giving them a pro-circuit look.
Sometimes things just work out. (I’m not usually so lucky!)
If you don’t want to go out and buy them, there are numerous ways to make a set of blocks. You can use a couple of plyo boxes, flip bumper plates on their sides like we usually do or make some very simple ones with 2x4’s. All you have to do is turn each layer crosswise to the other and screw them together until you reach the height you need. I’ve seen horse stall mats from Tractor Supply cut into pieces, stacked and cemented. You can also find plenty of plans online. There are some really nice ones that nest together allowing you to obtain different heights. All of them are cool, no matter what you use, because it lets you get the benefit of the exercise and that’s all that matters.
I’m really happy with the way these came out, especially the fact that it cost me not a single dime. I had all of this lying around. My total time on the project was around six hours over the weekend. I spent about four hours on Saturday and that included figuring out what I was going to do. The idea of using the old bench pad came to me as I scrounged around for something to use and it kind of went from there. I spent roughly two hours on Sunday finishing up. All I had to do on the last day was assemble the second block and that only took an hour and a half or so since I’d already gotten the technique down when I did the first one the day before. The last half hour was checking it out on the gym floor and taking some final photos.
I hope this helped in some way. Maybe it’ll inspire you to stretch out and try something of your own design or figure out a way to make something work for you. Again, the most important part is being able to do a big exercise like the Deadlift because it’s a full-body experience and one of the most beneficial moves we do. Finding a way to do it will pay huge benefits down the road.
If you have any questions, comments about what we did or need some help, just let us know because we’re always happy to chat.